Product design and development process at Sunscrapers
An in-depth case study of Weekly App, a PSA SaaS
Introduction
In 2020, we set out on a mission to build a product of our own - a Professional Services Automation SaaS that would also help us run our shop.
We’ve documented the whole product design and development process to give you unparalleled, in-depth insights into the way we work.
Let us start by looking at the overview of the product design and development process at Sunscrapers.
Understand
Design
Build
Launch
Grow
Understand: Scoping Workshop
During this step, we conduct a comprehensive workshop to align the team on the product vision, business goals, features, stakeholders, and competition. We define the project's success criteria, assess available resources, and create deliverables such as feature backlog, mock-ups, tech stack, cost estimate, and project roadmap with a timeline. This workshop lays the foundation for a clear and well-defined software development process.
01
Understand
During this step, we conduct a comprehensive workshop to align the team on the product vision, business goals, features, stakeholders, and competition. We define the project's success criteria, assess available resources, and create deliverables such as feature backlog, mock-ups, tech stack, cost estimate, and project roadmap with a timeline. This workshop lays the foundation for a clear and well-defined software development process.
02
Design
During this step, we define clear roles, use cases, and user journeys as well as establish a cohesive design theme and branding. Deliverables will include a sitemap, flowcharts, and low- and hi-fidelity designs. Our goal is to create a product that is user-friendly, visually engaging, and aligns with the overall business objectives.
03
Build
In this phase, we iteratively and incrementally develop the software product based on the design and requirements. By breaking the development into smaller, manageable increments, the aim is to deliver functional and deployable features in a timely manner. This approach is based on agile project management methodology and allows for faster feedback, continuous improvement, and early value delivery to stakeholders and end-users.
04
Launch
During this step, we introduce the developed software product to the target market or end-users, while ensuring a smooth and effective rollout. The goal is to generate initial user traction, acquire early customers, and receive feedback for further improvements.
05
Grow
Our goal in this phase is to ensure the ongoing success and continuous improvement of the software product. We focus on maintaining the product's stability, performance, and security, addressing any issues or bugs that may arise. We also keep the software up-to-date with evolving technology trends and user requirements.
Phase I: Understand
Product design and development process starts once the business idea has been formulated. That means establishing and getting aligned on the following topics:
- product vision
- business goals
- business model
- features
- stakeholders and existing team
- competition
- success criteria
- preferences and limitations
- available resources.
If you haven’t established the key components of the business plan yet, you’re not ready to commence with the design and development phase and will be better off with completing a Product Discovery Workshop first.
Phase I
Product Vision
Here’s the vision we came up with for our product:
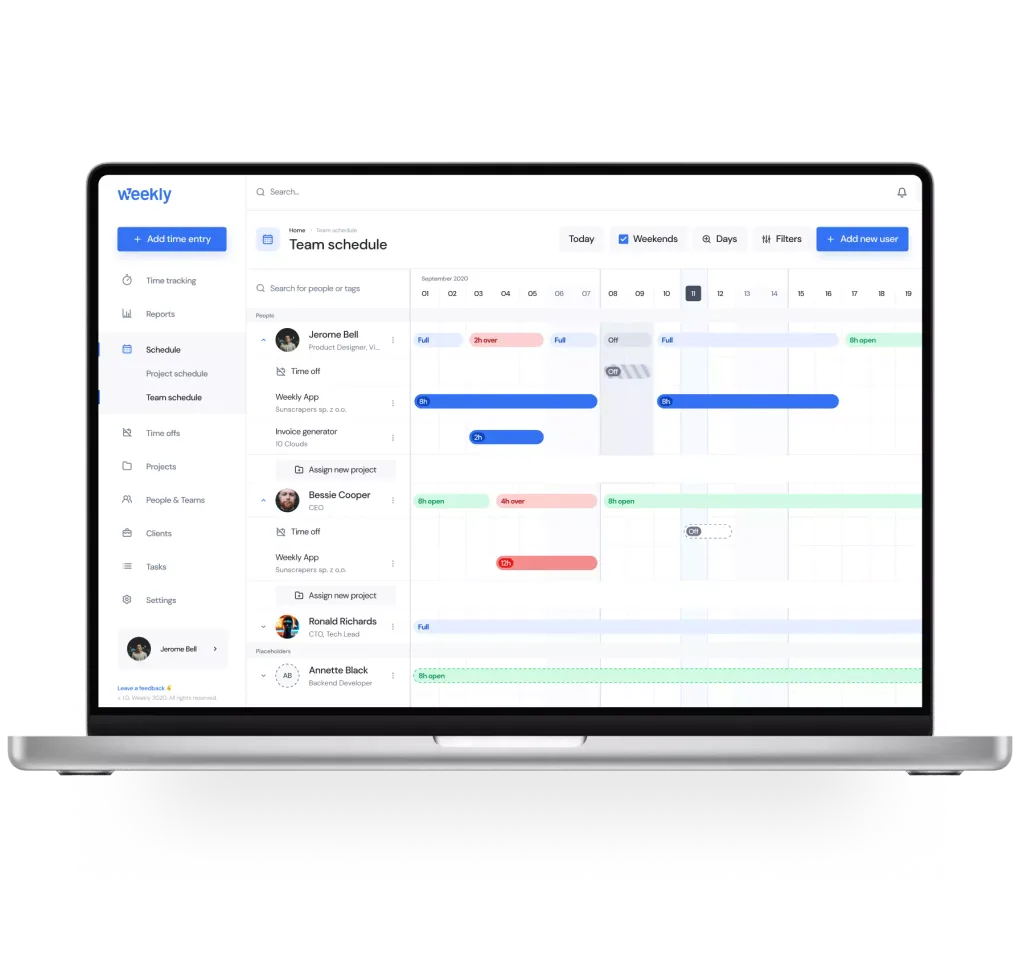
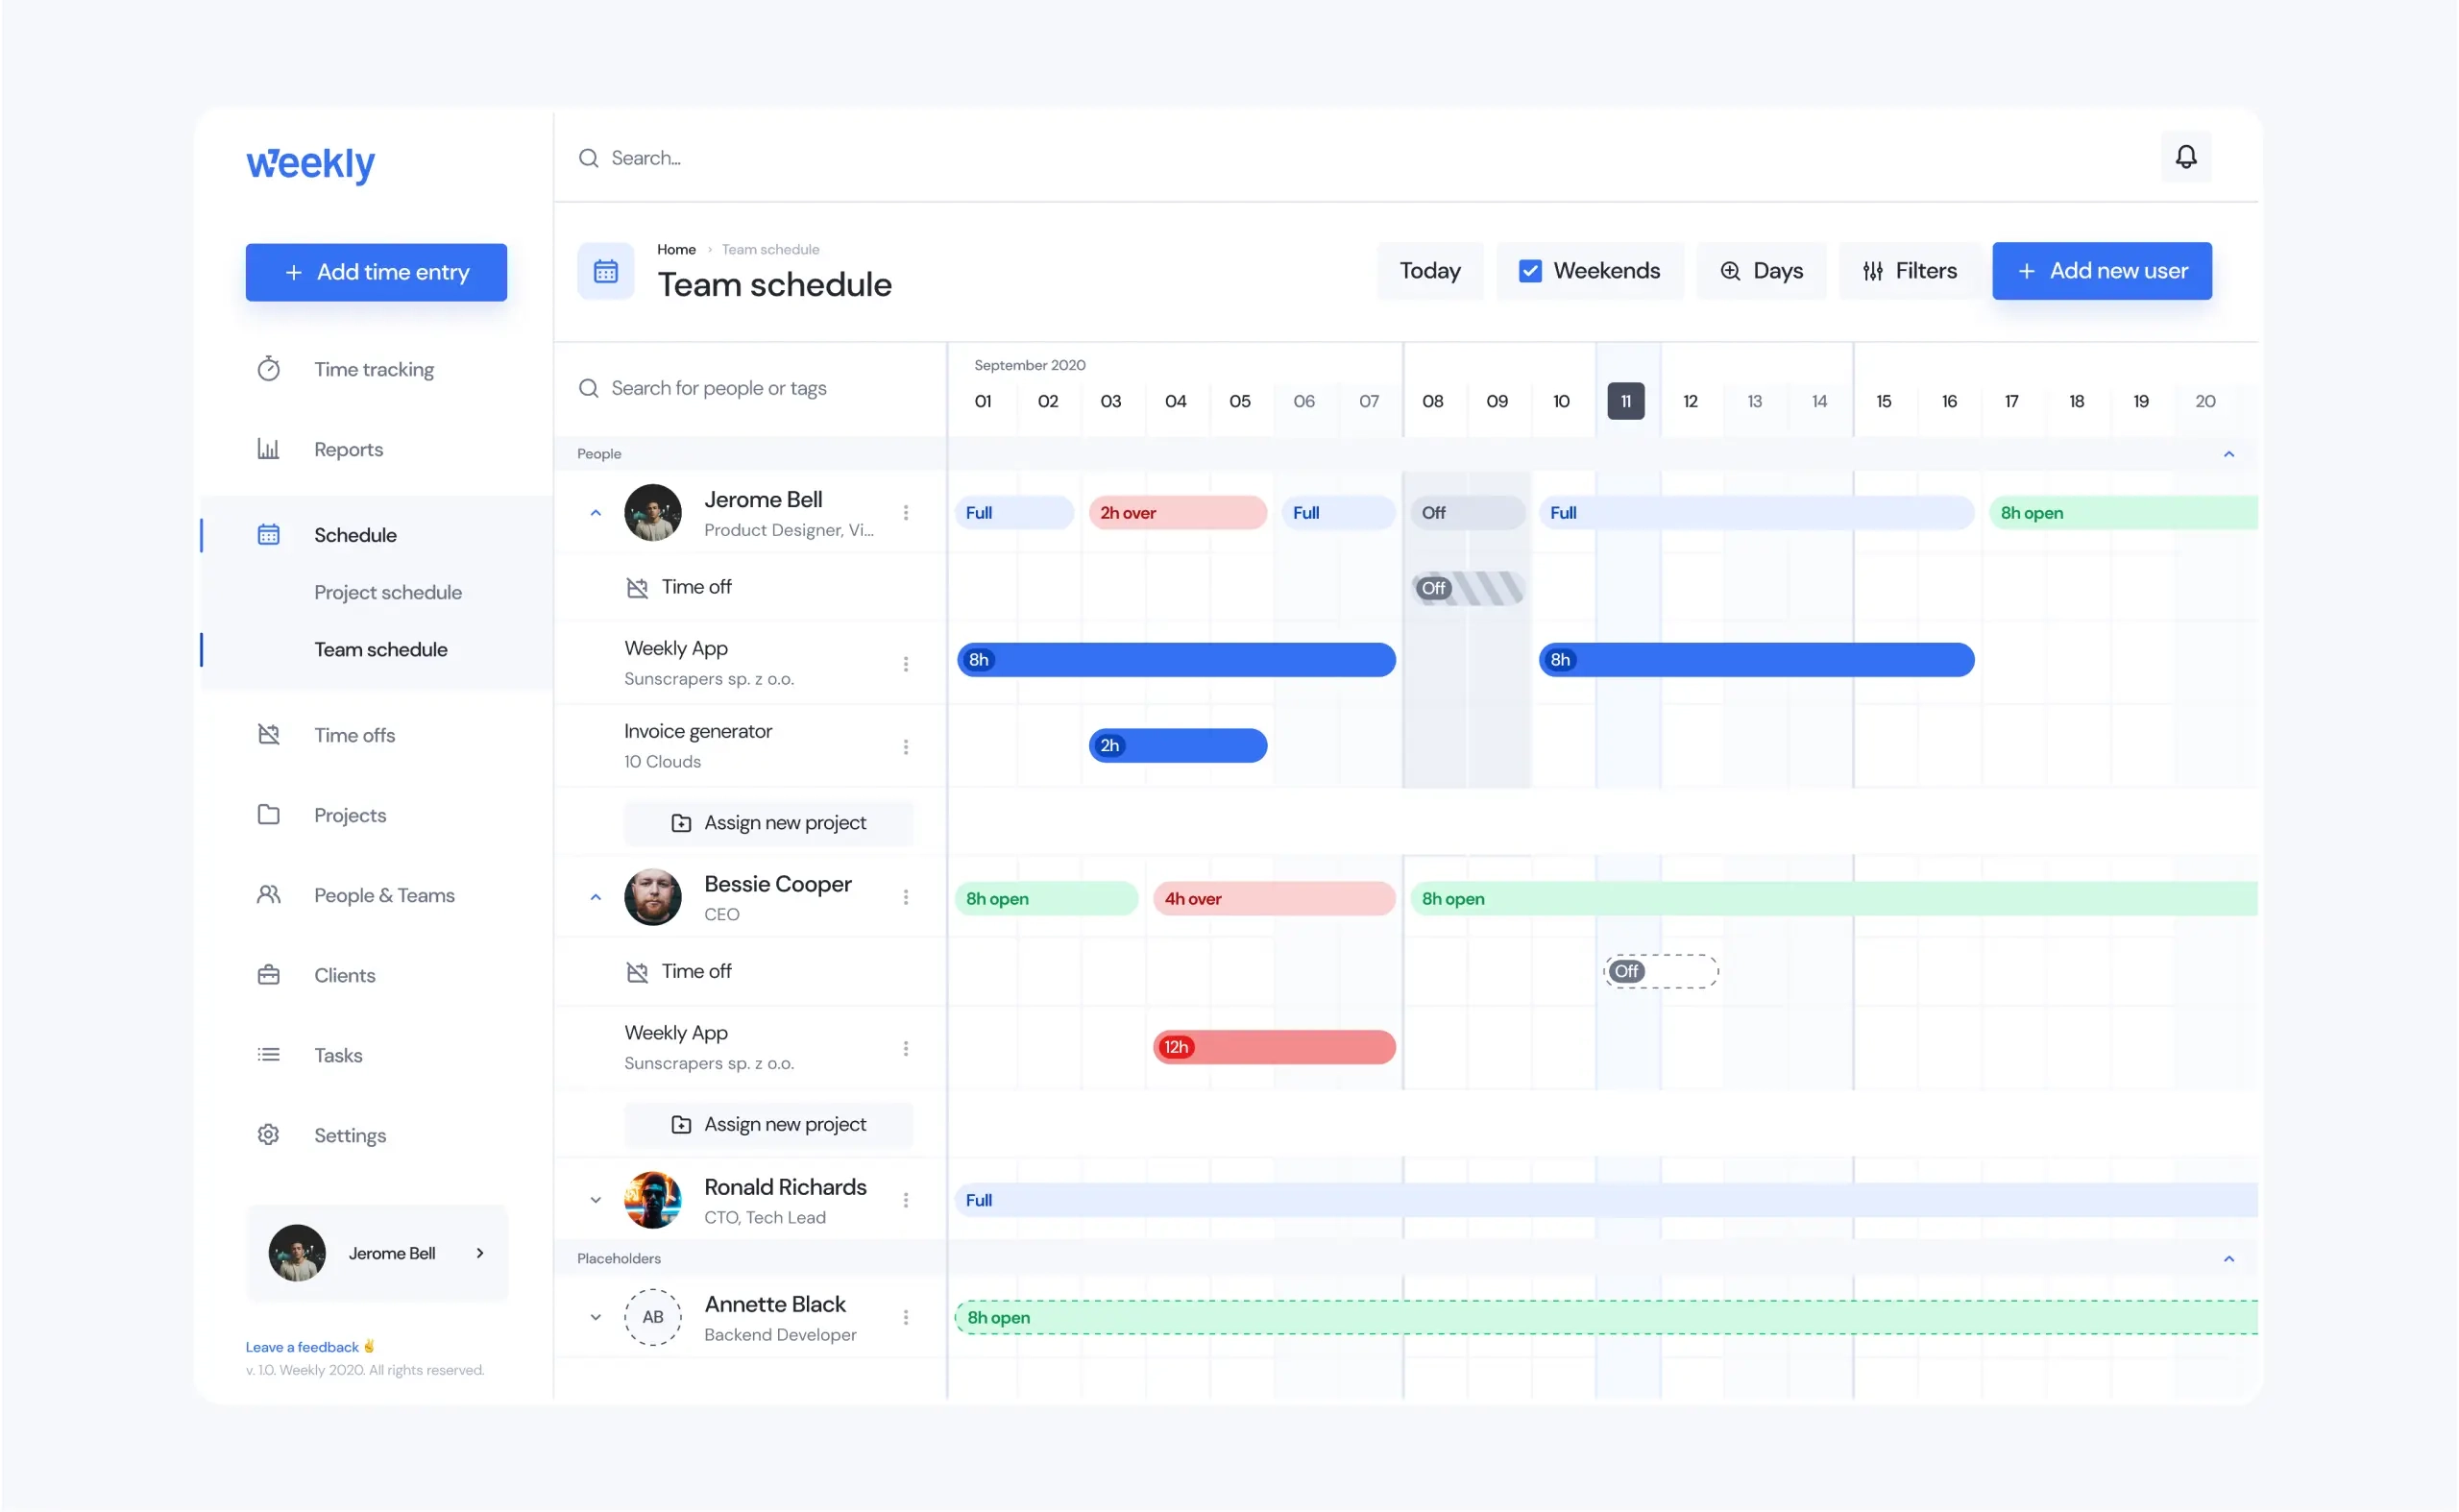
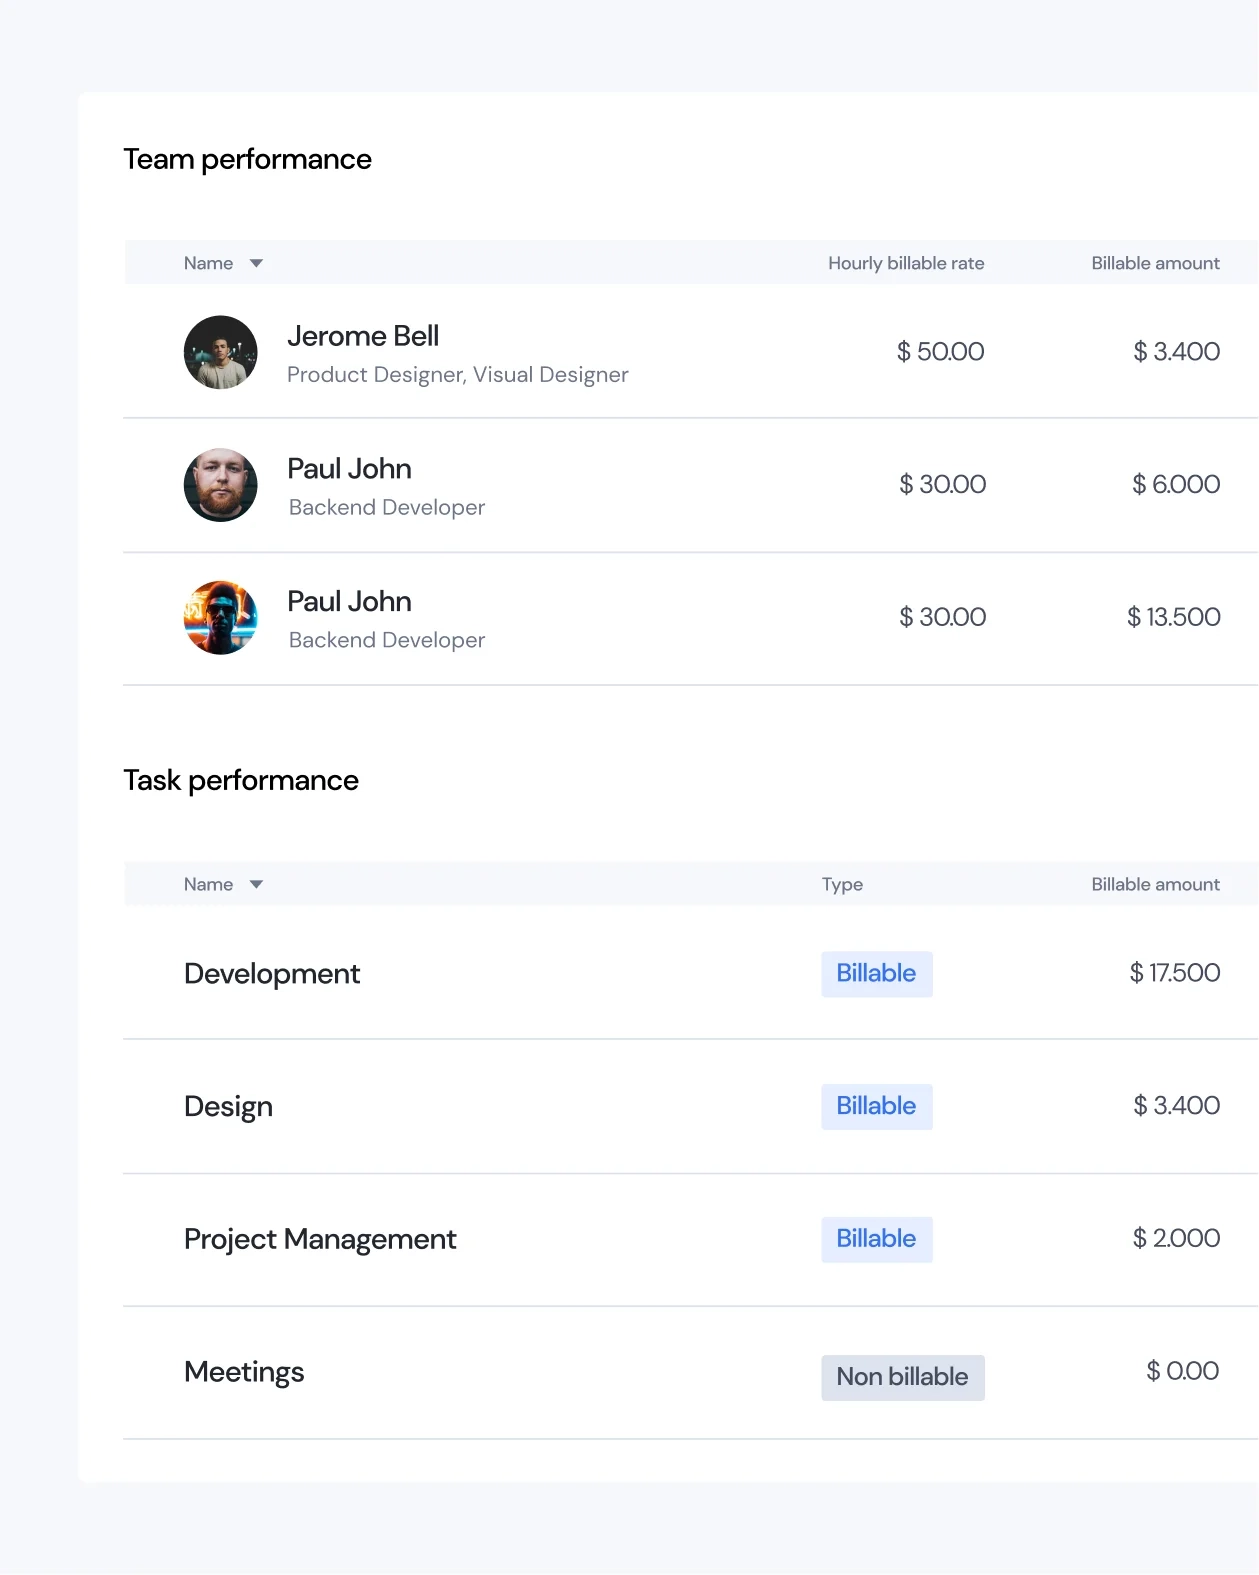
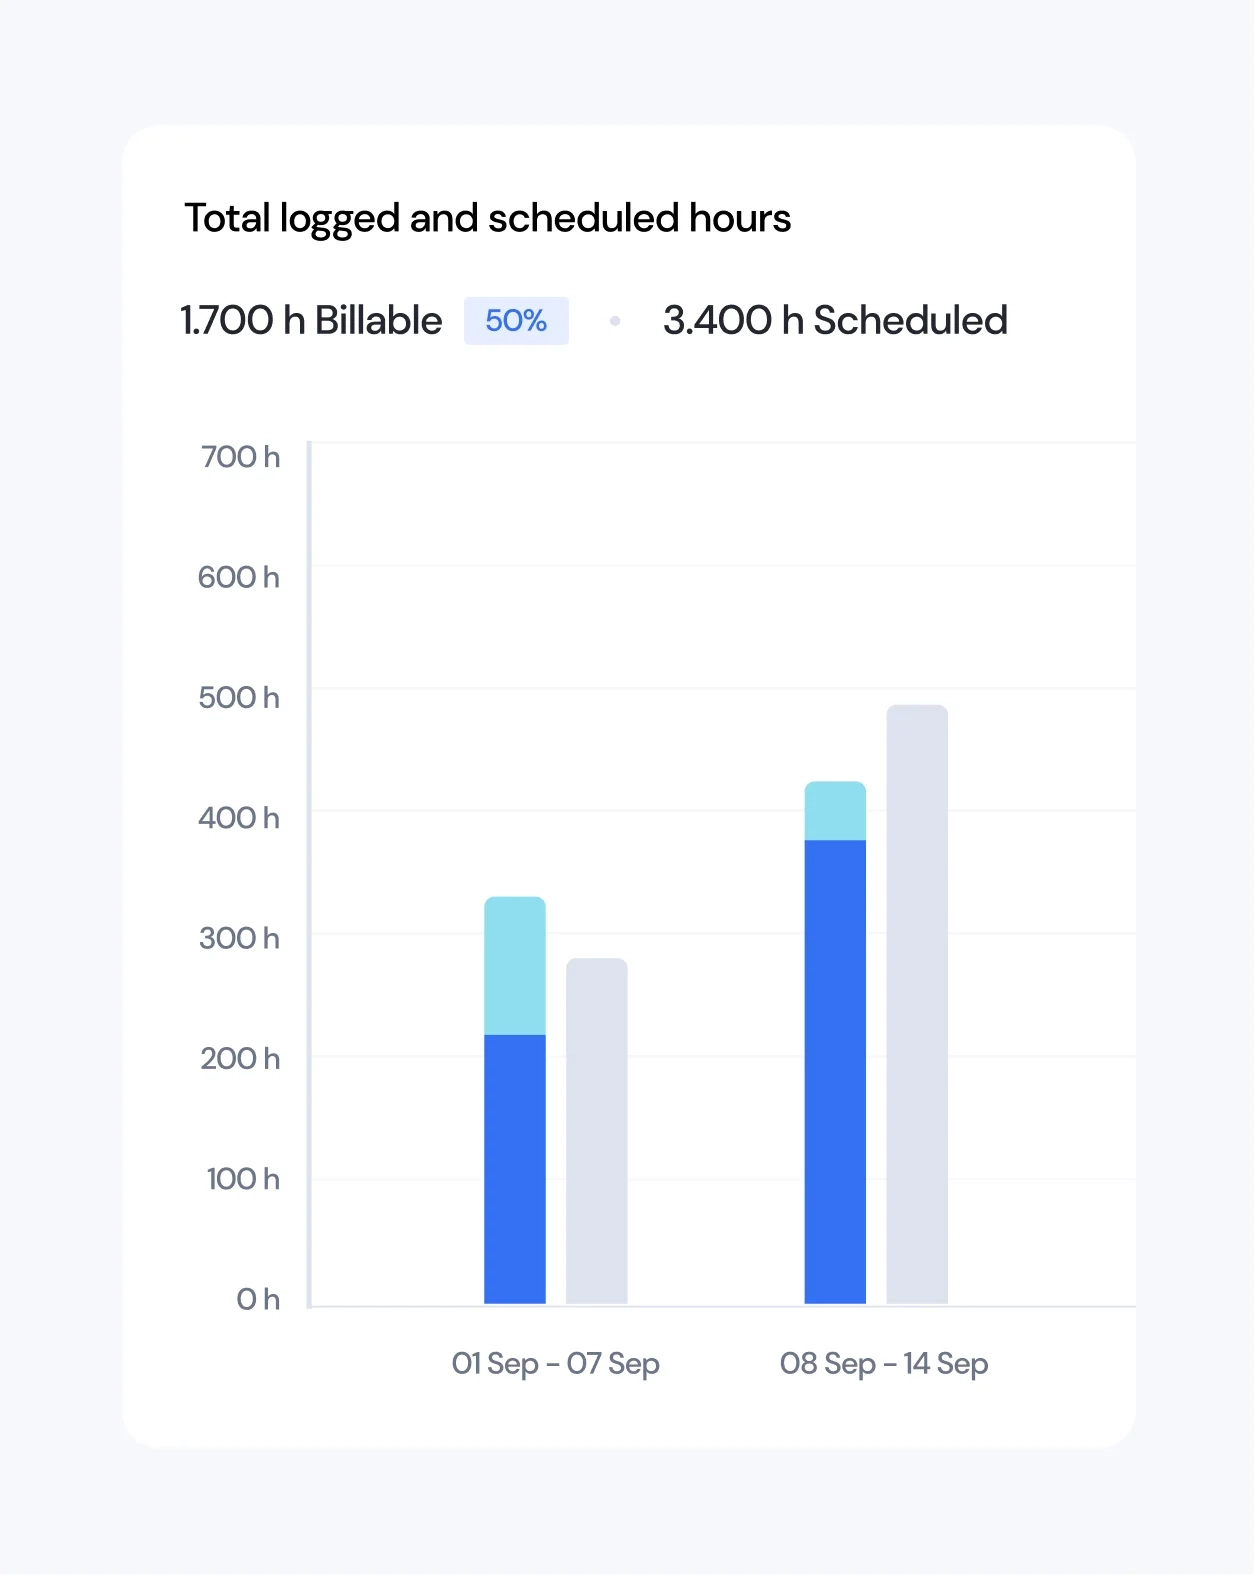
Weekly App is supposed to become the essential tool for professional services companies (such as software development consultancies, design and marketing agencies) to run their day to day operations. That involved managing all company’s information related to working time: work allocations (who should work on what, when), time tracking and absence management.
The benefit of such an approach was that Weekly would become a single source of truth for all time related information within a given company which, in consequence, would allow it to generate many extremely valuable and accurate operational and financial reports.
Phase I
Preliminary backlog of features
The first step of the journey to materialise our idea was to create a preliminary backlog of features:
Company account
- Country
- default currency
- default language
- default working days calendar
- Preferences
- time format
Time tracking
- Timer
- (real time) start / stop ticker
- (post factum) duration based
- Time entry
- Project
- Task
- Descr (category)
- Description (optional)
- Submitted / Approved
- Locked / Unlocked
- Invoiced / Uninvoiced
- Written-off
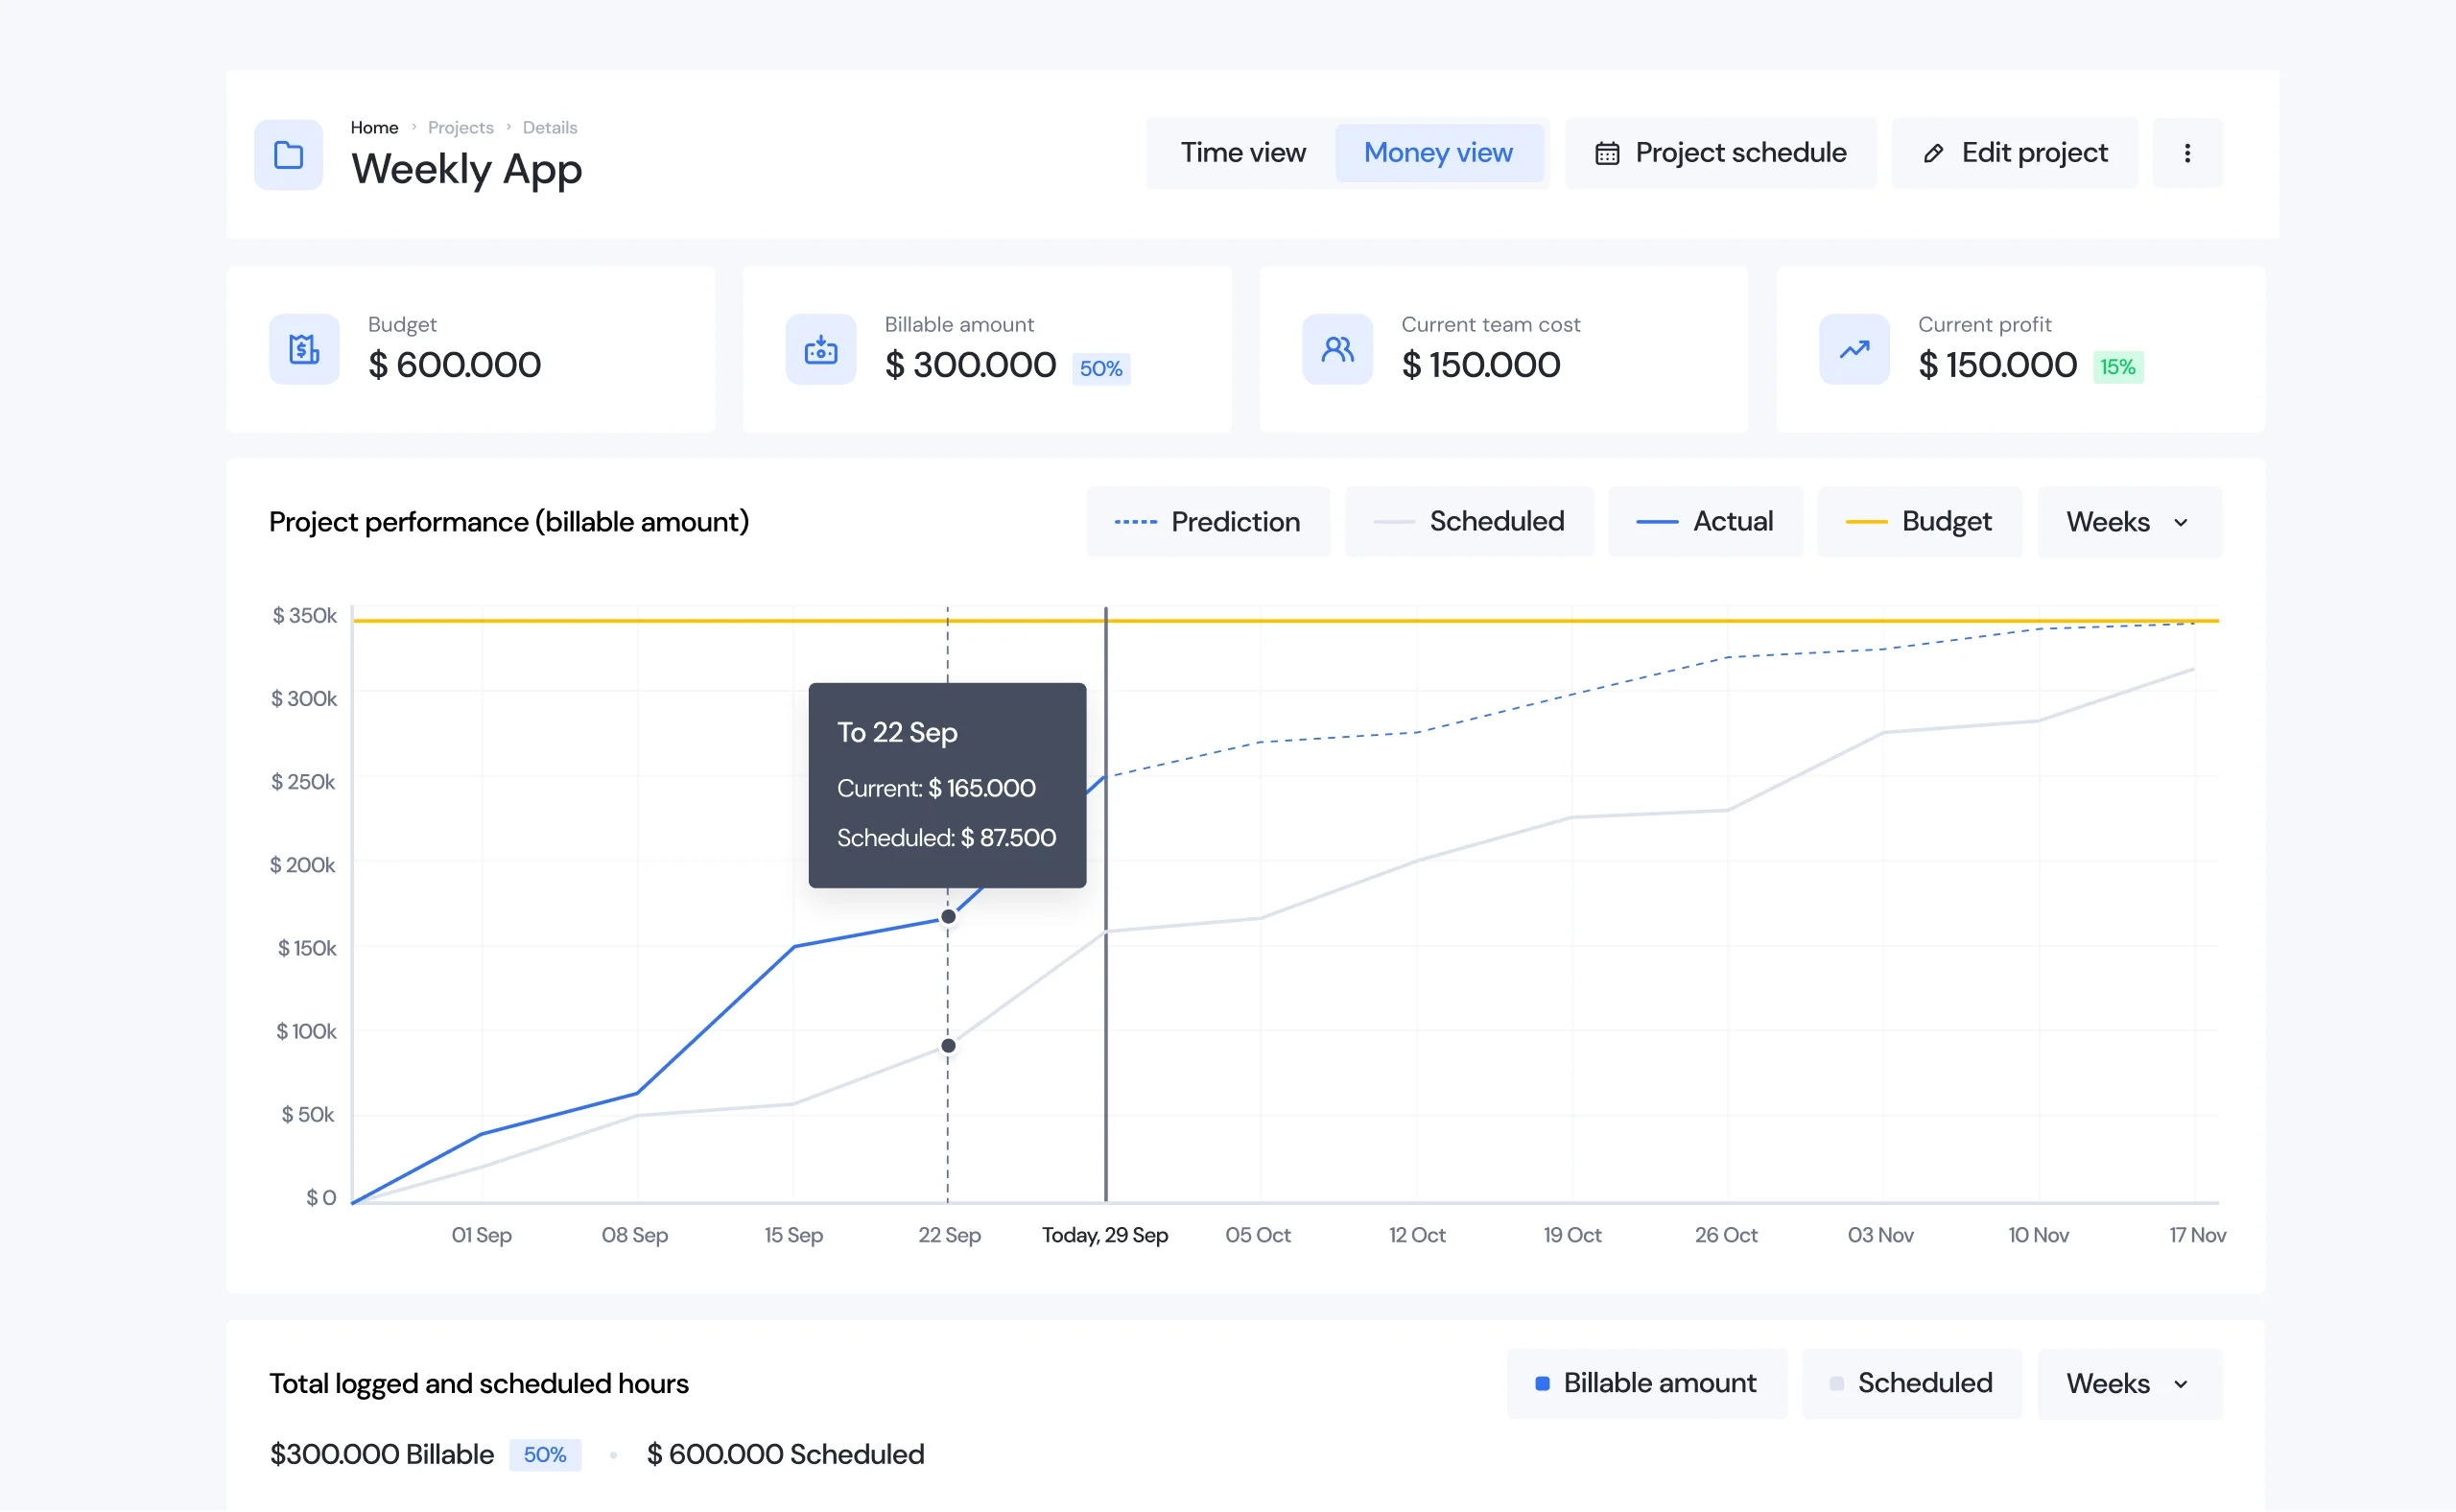
Time reports
- Filter by client, project, task, dates
- Filter by team member
- Grouping: team member, client, project, task, date
- Summary & detailed views
- Export as a file
- Publish as a dashboard
- Submitted for approval
- Approval by team lead / project manager
Tasks
- Parent (tree structure, 1-level nested)
- Name
- Billable / Non-billable
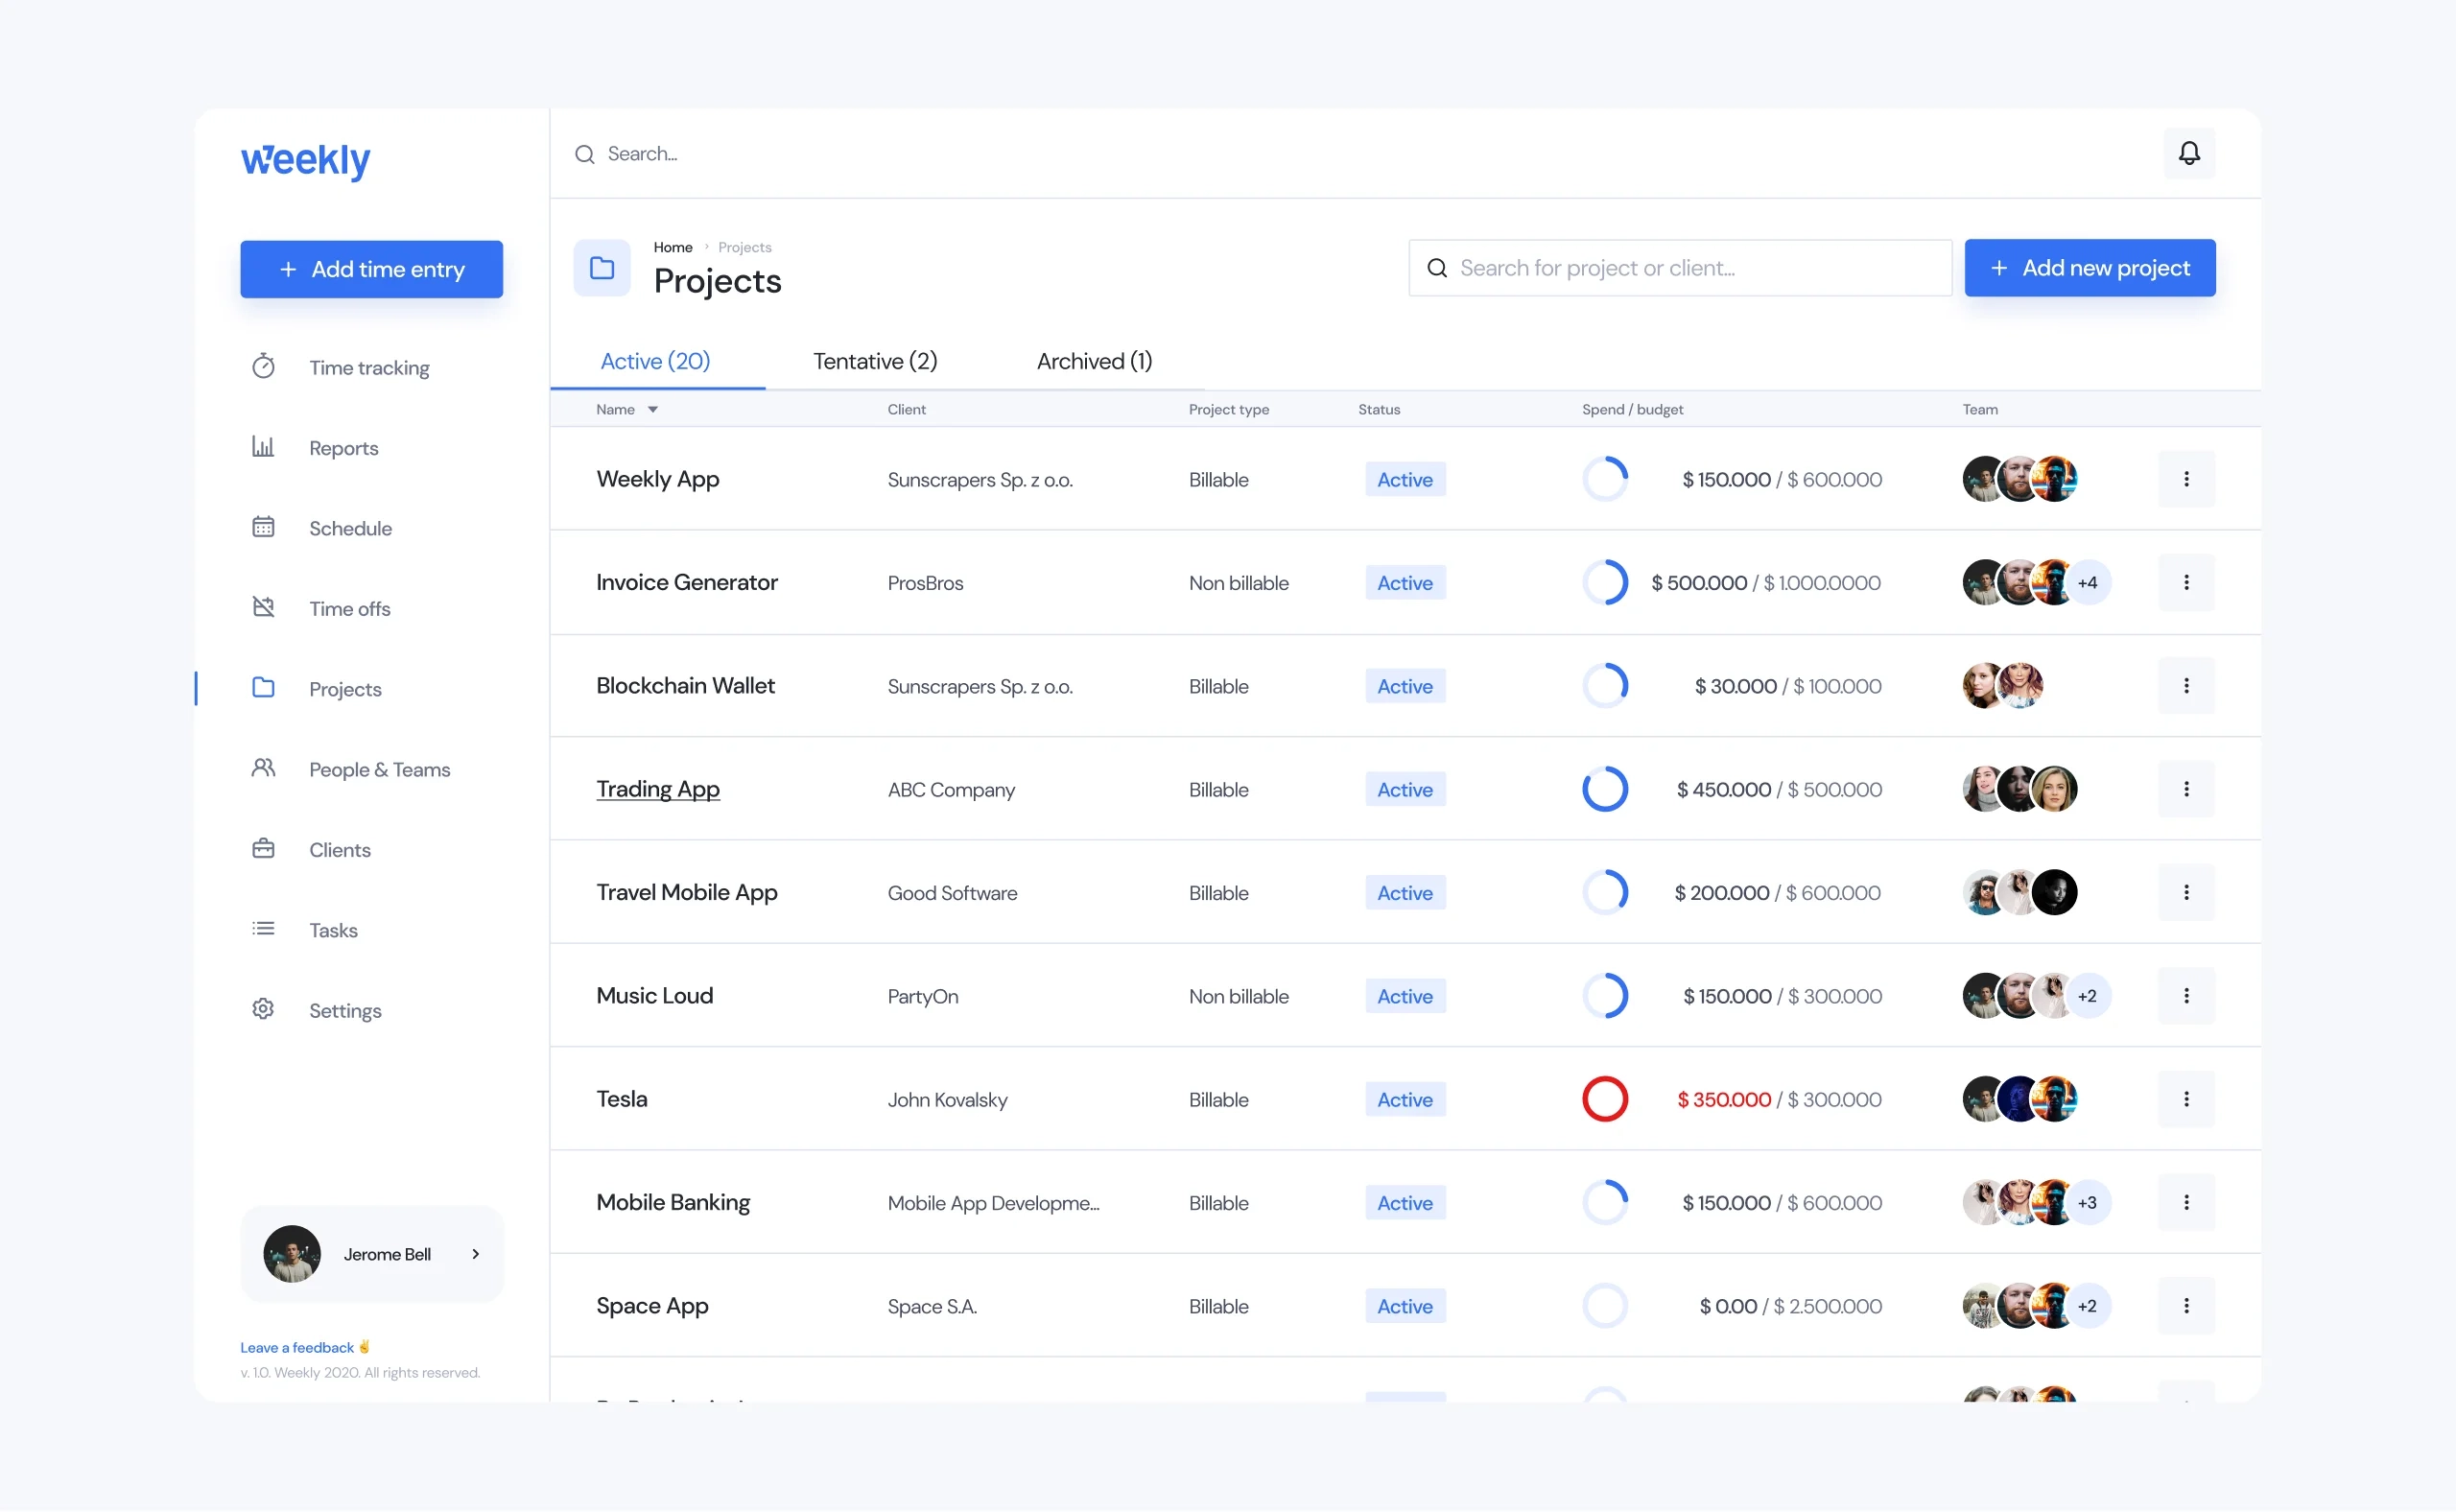
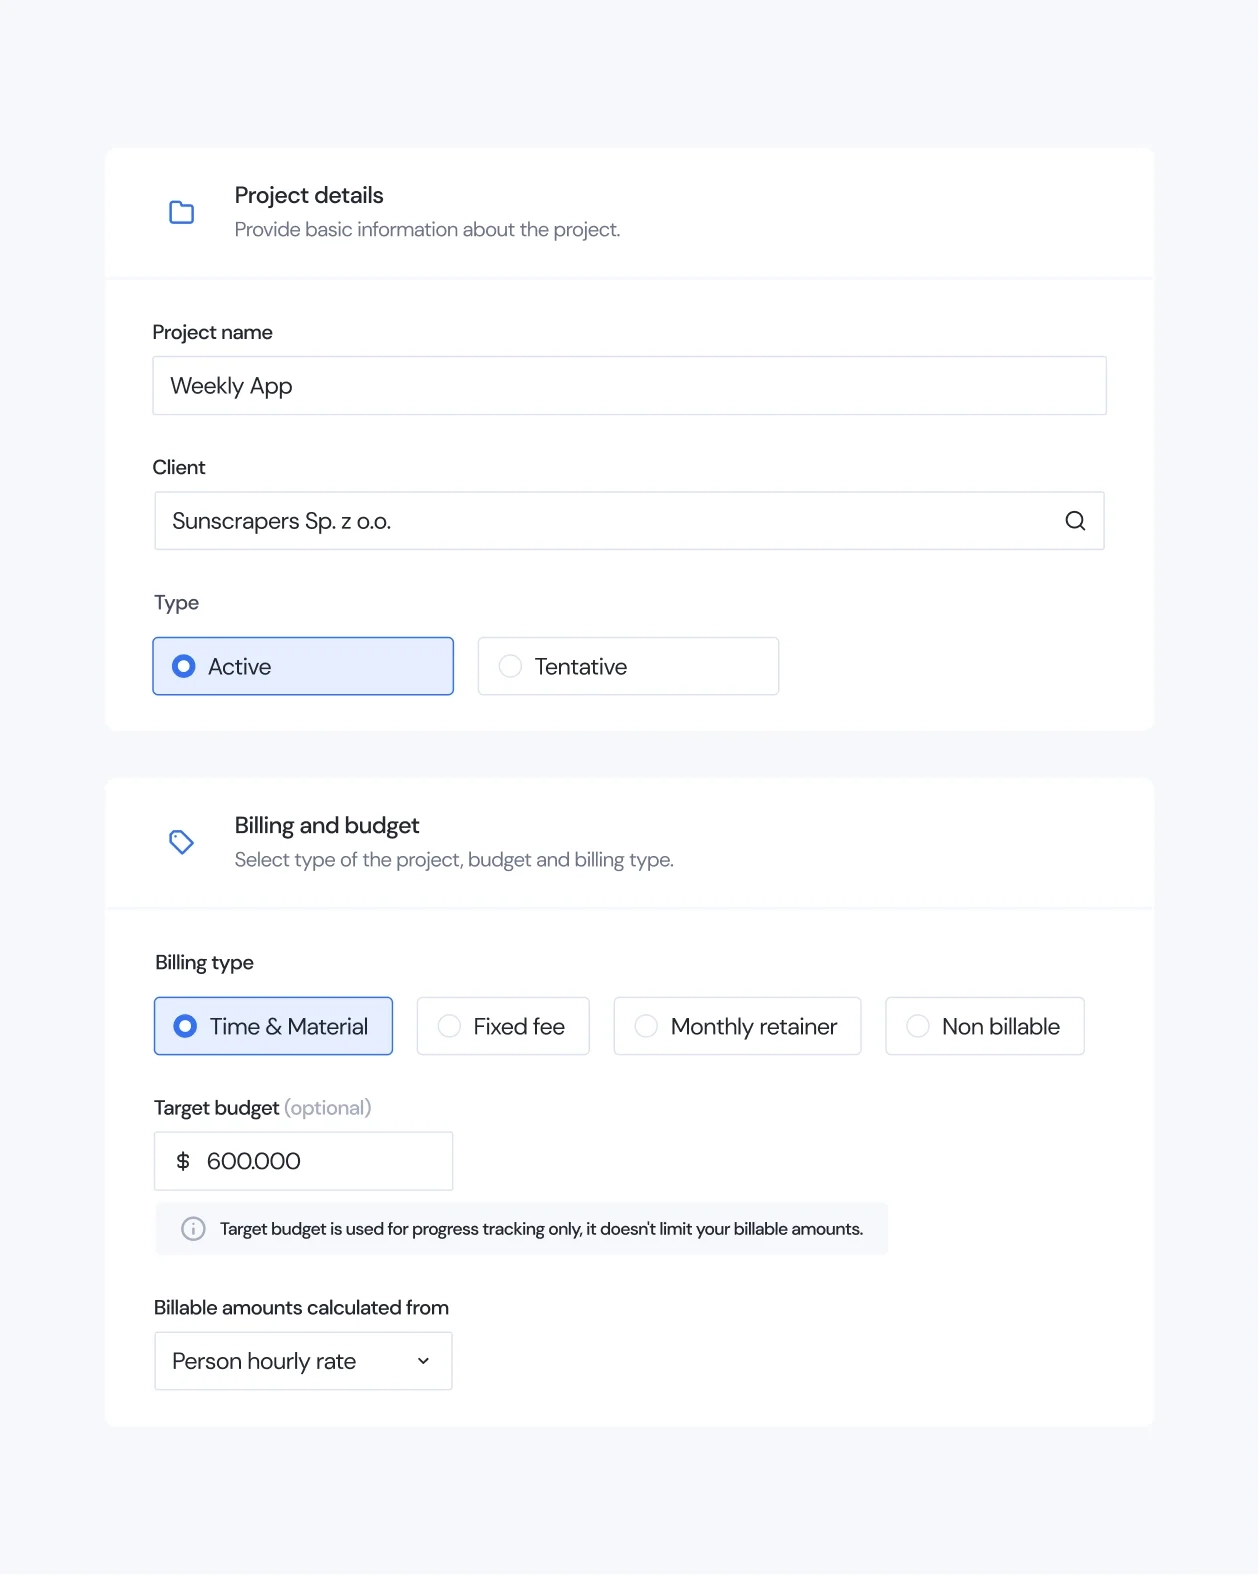
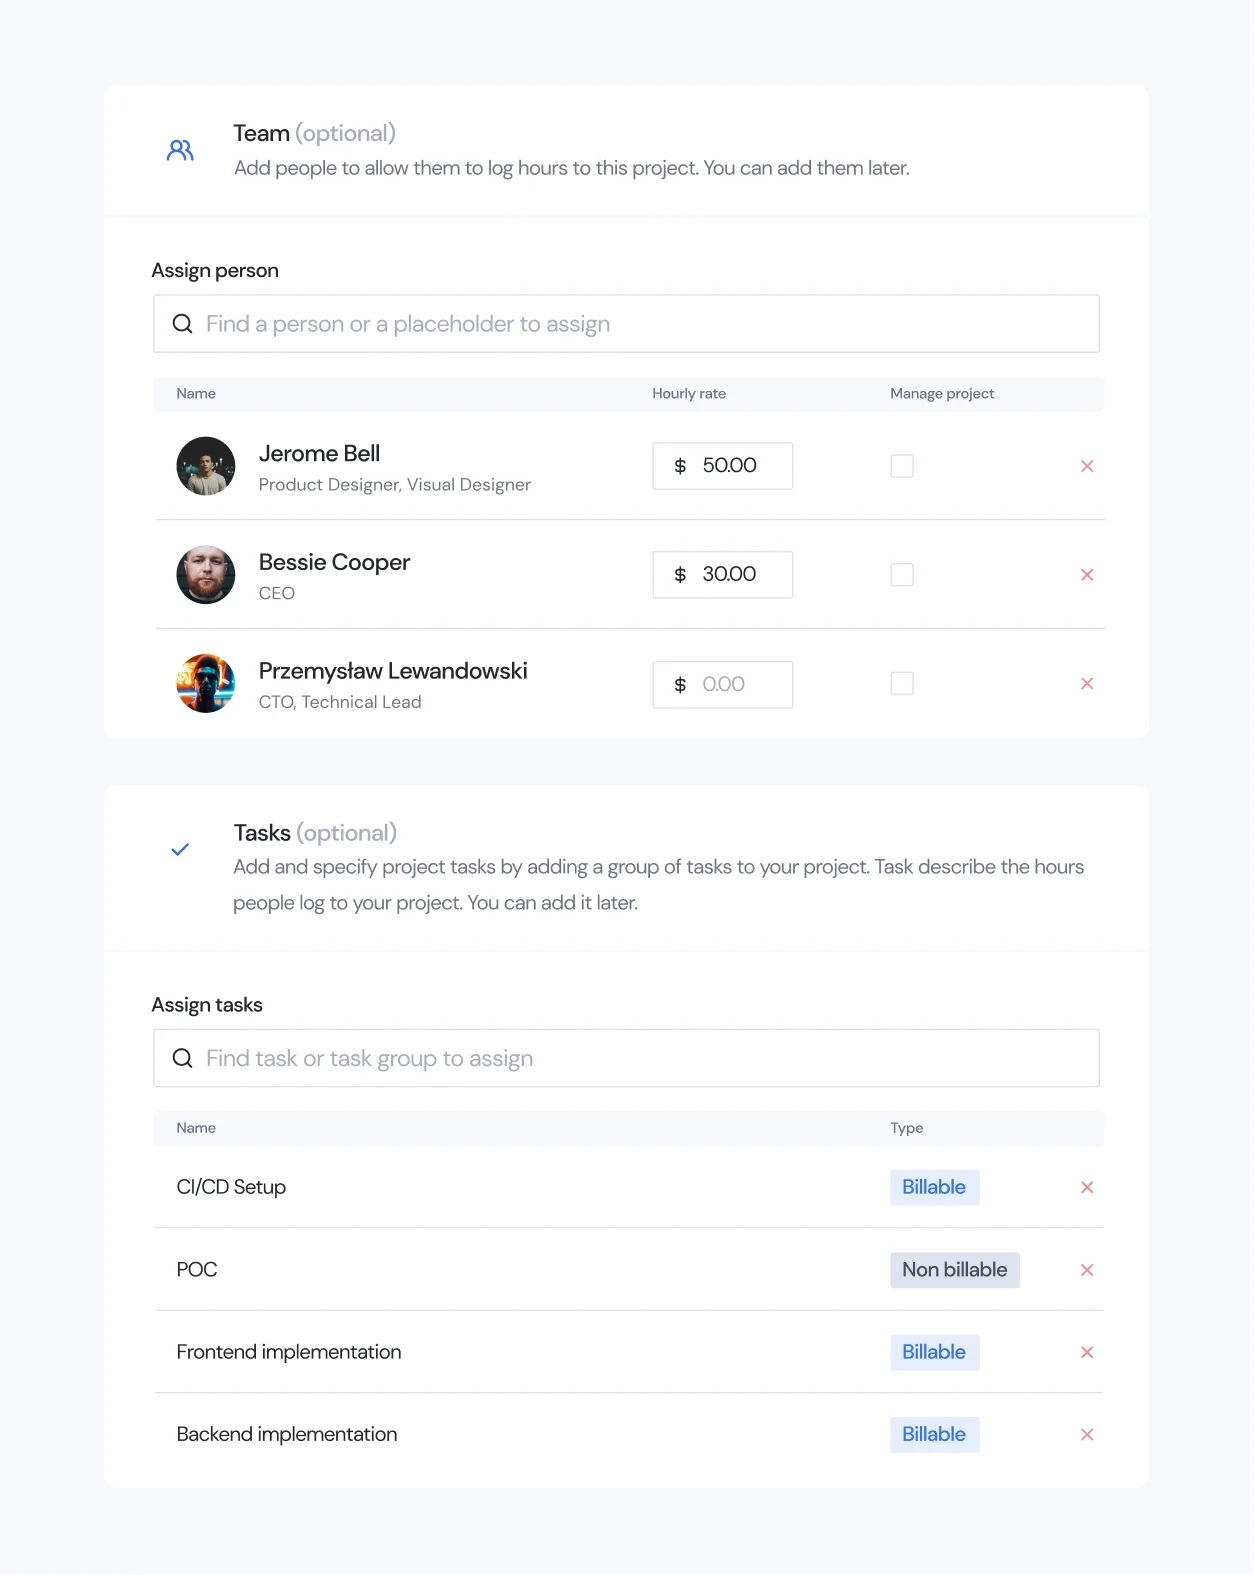
Projects
- Client
- Name
- Tentative / Confirmed
- Color
- Billable / Non-billable
- Team member
- Billable
- Allocation
01
Company account
- Country
- default currency
- default language
- default working days calendar
- Preferences
- time format
02
Time tracking
- Timer
- (real time) start / stop ticker
- (post factum) duration based
- Time entry
- Project
- Task
- Descr (category)
- Description (optional)
- Submitted / Approved
- Locked / Unlocked
- Invoiced / Uninvoiced
- Written-off
03
Time reports
- Filter by client, project, task, dates
- Filter by team member
- Grouping: team member, client, project, task, date
- Summary & detailed views
- Export as a file
- Publish as a dashboard
- Submitted for approval
- Approval by team lead / project manager
04
Tasks
- Parent (tree structure, 1-level nested)
- Name
- Billable / Non-billable
05
Projects
- Client
- Name
- Tentative / Confirmed
- Color
- Billable / Non-billable
- Team member
- Billable
- Allocation
Phase I
Mock-ups
Next, we supported our discussions with a series of notes and drawings on the whiteboard and created the very first mockups of a few key screens.
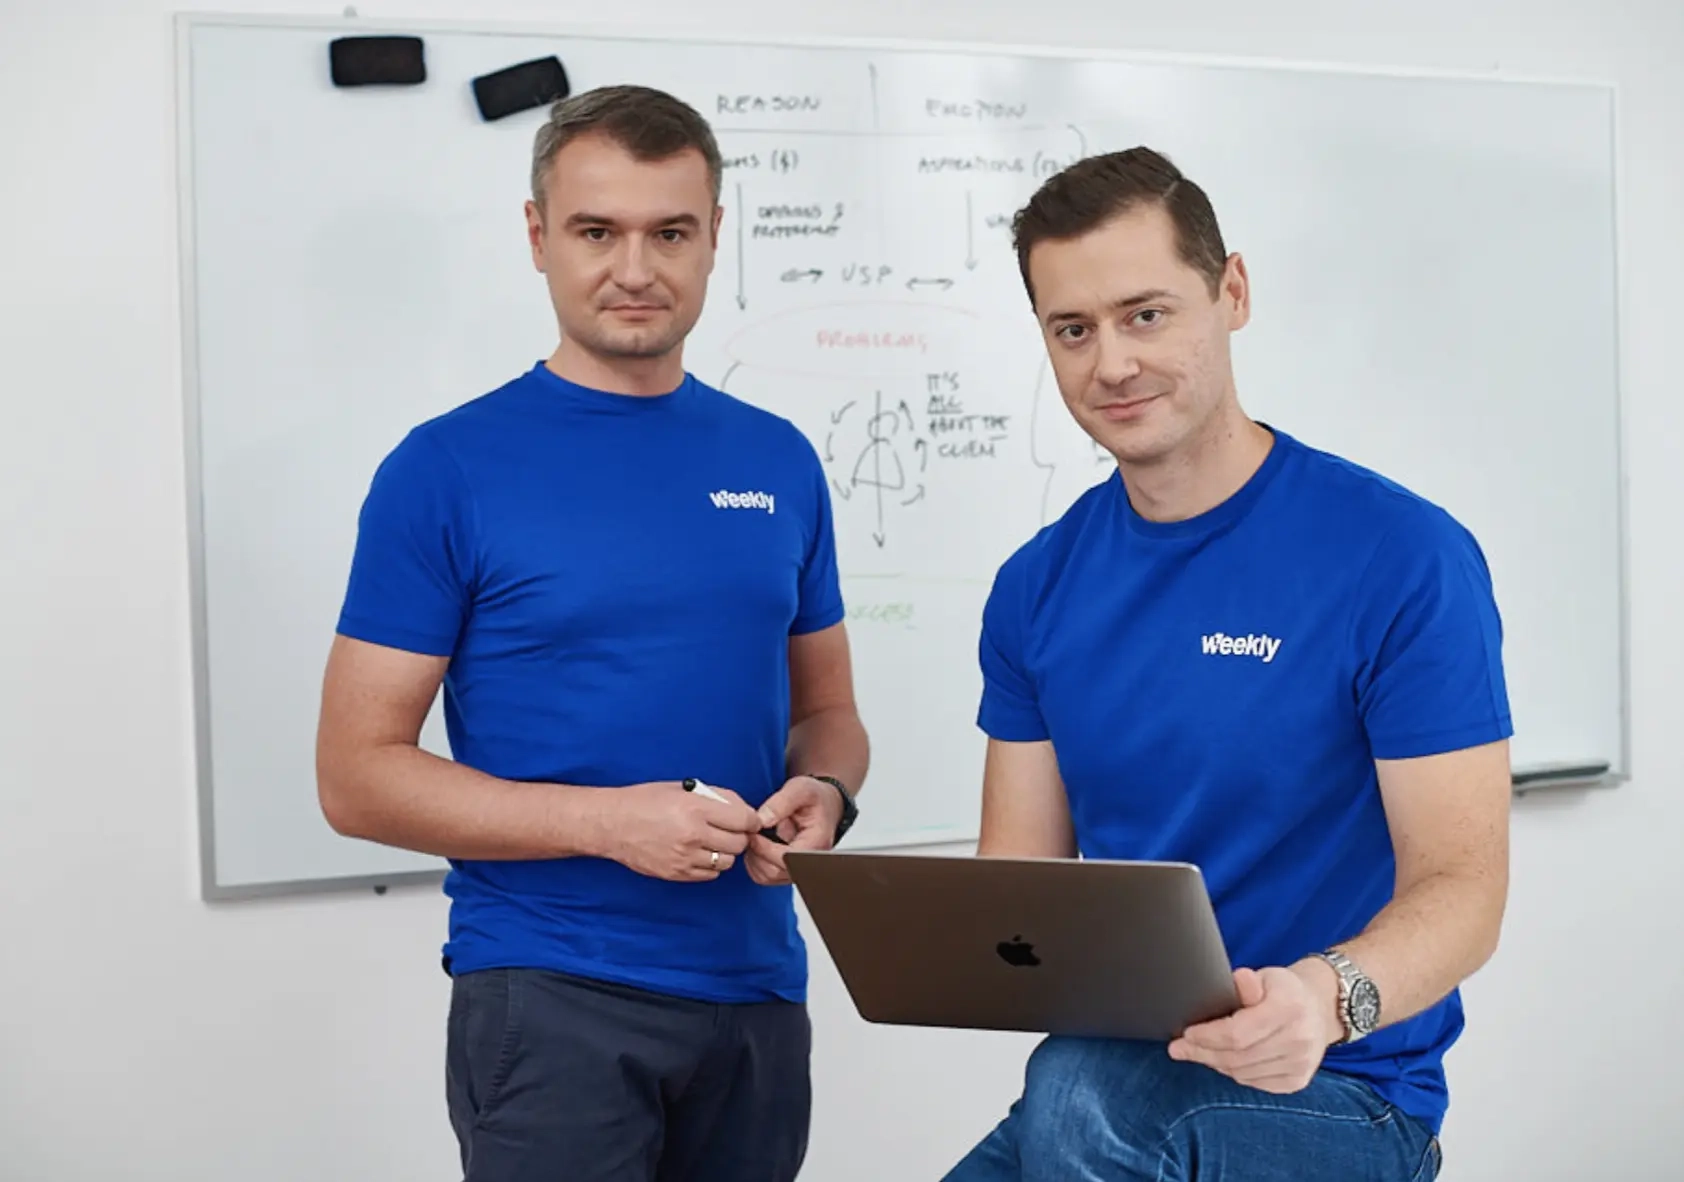
Unfortunately I haven’t photographed the contents of our whiteboard at the time, hence I hope that a picture of us standing next to it will do 😊
Phase I
Going deeper with selected topics…
Our product vision and vast feature set meant that the resulting product would be non-trivial when it comes to the features themselves, user interfaces, user permissions, data manipulation, security and performance. Hence, we’ve hosted a series of discussions around complex topics such as project billing types, user permissions or business reports and created a documentation that described the logic underneath:
Project billing types

User types and permissions

Business reports

All of these constituted supportive documentation that was frequently updated to reflect the most up to date agreements.
Phase I
Tech stack
Having considered project requirements, our skills and preferences, we’ve made the following assumptions and decisions with respect to technology.
Platforms
Web Application
with responsive design
Mobile PWA
with reused web responsive design
Desktop Application
separate codebase, communication with API
Browser Extension
separate codebase, communication with API
Architectural approach
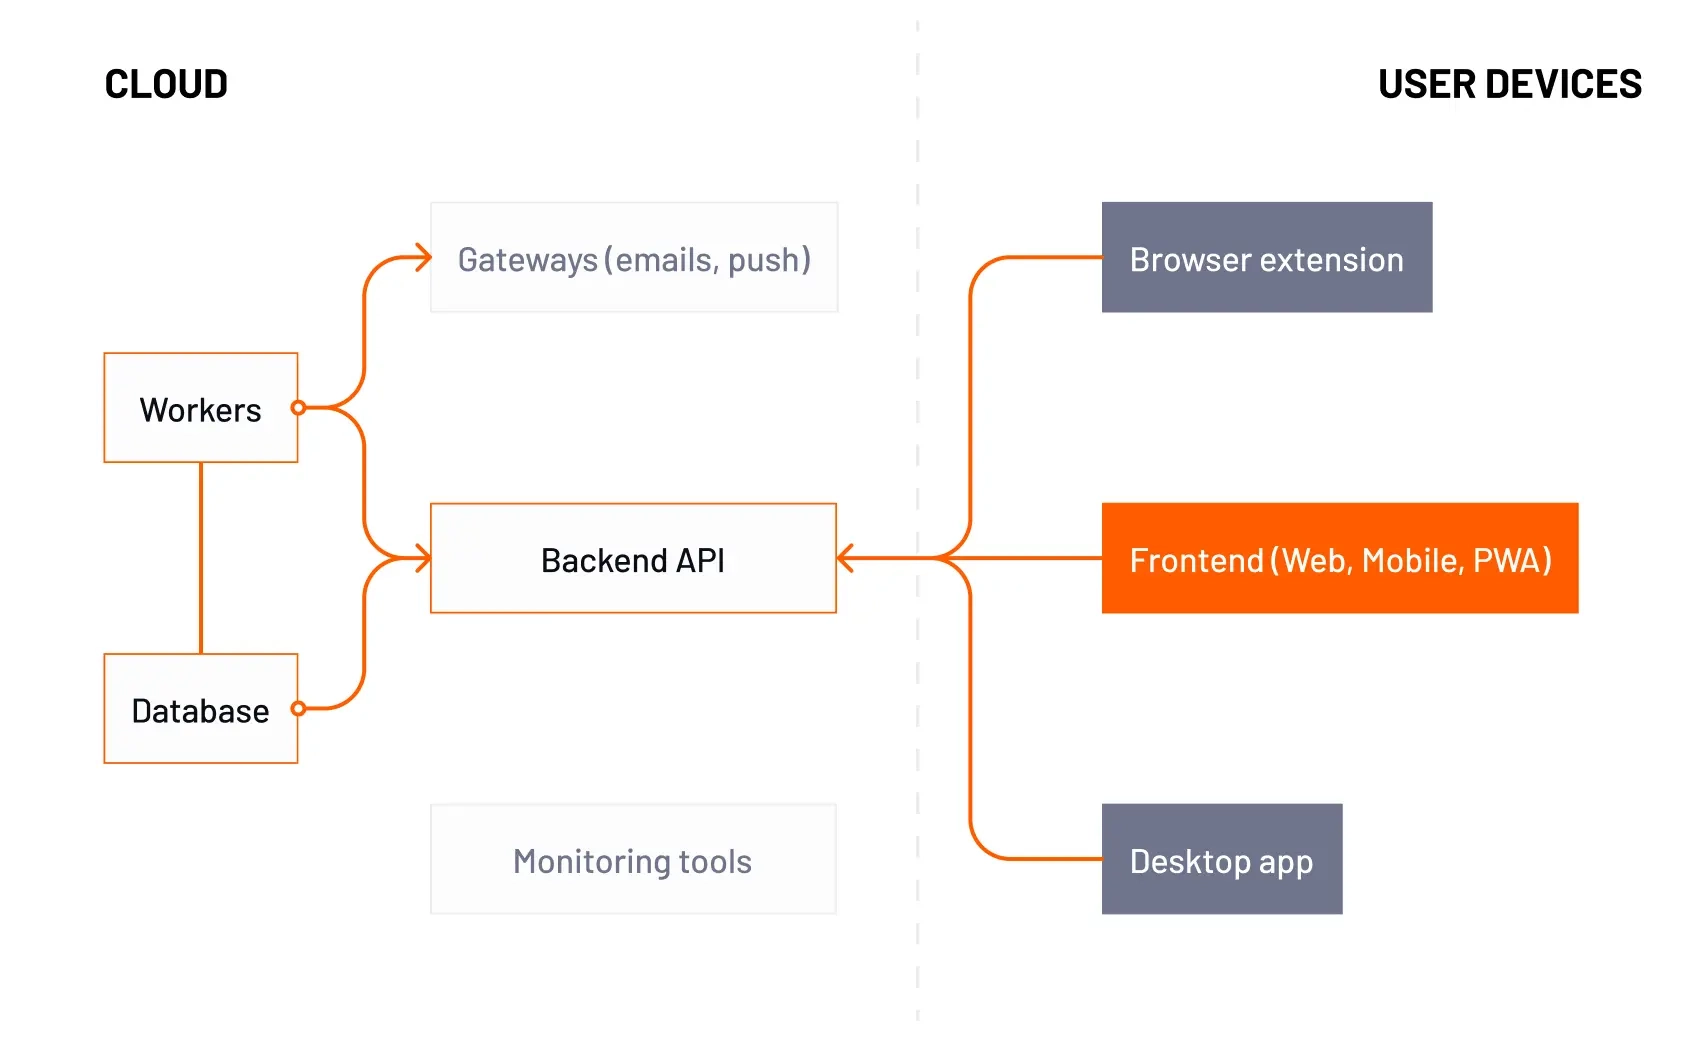
Frontend
- Based on modern JS framework, yet lightweight
- Basic PWA support
- Offline support just to display connectivity error
- In-app and push notifications
- Based on an existing design system (optionally with custom theme)
Vue.js
Nuxt.js
Typescript
Backend
- Monolithic approach
- REST API based (probably not GraphQL)
- Database centralized for all customers (may change in the future)
Python
Django
Celery
Infrastructure
- Europe based data center and GDPR compliant
- Easily reproducible (ideally Docker based)
- Cloud-based core services, e.g. database (like AWS RDS)
Docker
AWS
Kubernetes
Phase I
Go to market approach
On a high level there are two main approaches to building a product: bootstrapping and with external funding.
Bootstrapping is a self-funding approach to building a digital product, where entrepreneurs rely on their personal savings, revenue from initial sales, or other internal resources to finance product development and growth. This method emphasizes financial independence, lean operations, and organic growth, allowing founders to maintain control and ownership of their business while being frugal and resourceful.
External funding involves raising capital from outside sources, such as angel investors, venture capitalists, or crowdfunding platforms, to develop and scale a digital product. This path offers access to significant financial resources, expertise, and networking opportunities, but may require founders to give up equity, control, and potentially, decision-making authority in their business.
We’ve decided to go with bootstrapping, as Weekly would operate in a well-established category (PSA software) hence steady, gradual but continuous development was more important than the speed of getting a product to market. The choice of product category also implied that there were already a bunch of mature products on the market, therefore a too simplistic MVP would not cut it, we too needed a solid, well rounded product to be able to compete.
Also, the bootstrapping path allowed us to share our energy and resources over a few projects, rather than requiring us to go all-in with the product built. Considering that we also run Sunscrapers, that aspect was important to us.
Phase I
Time and cost estimate
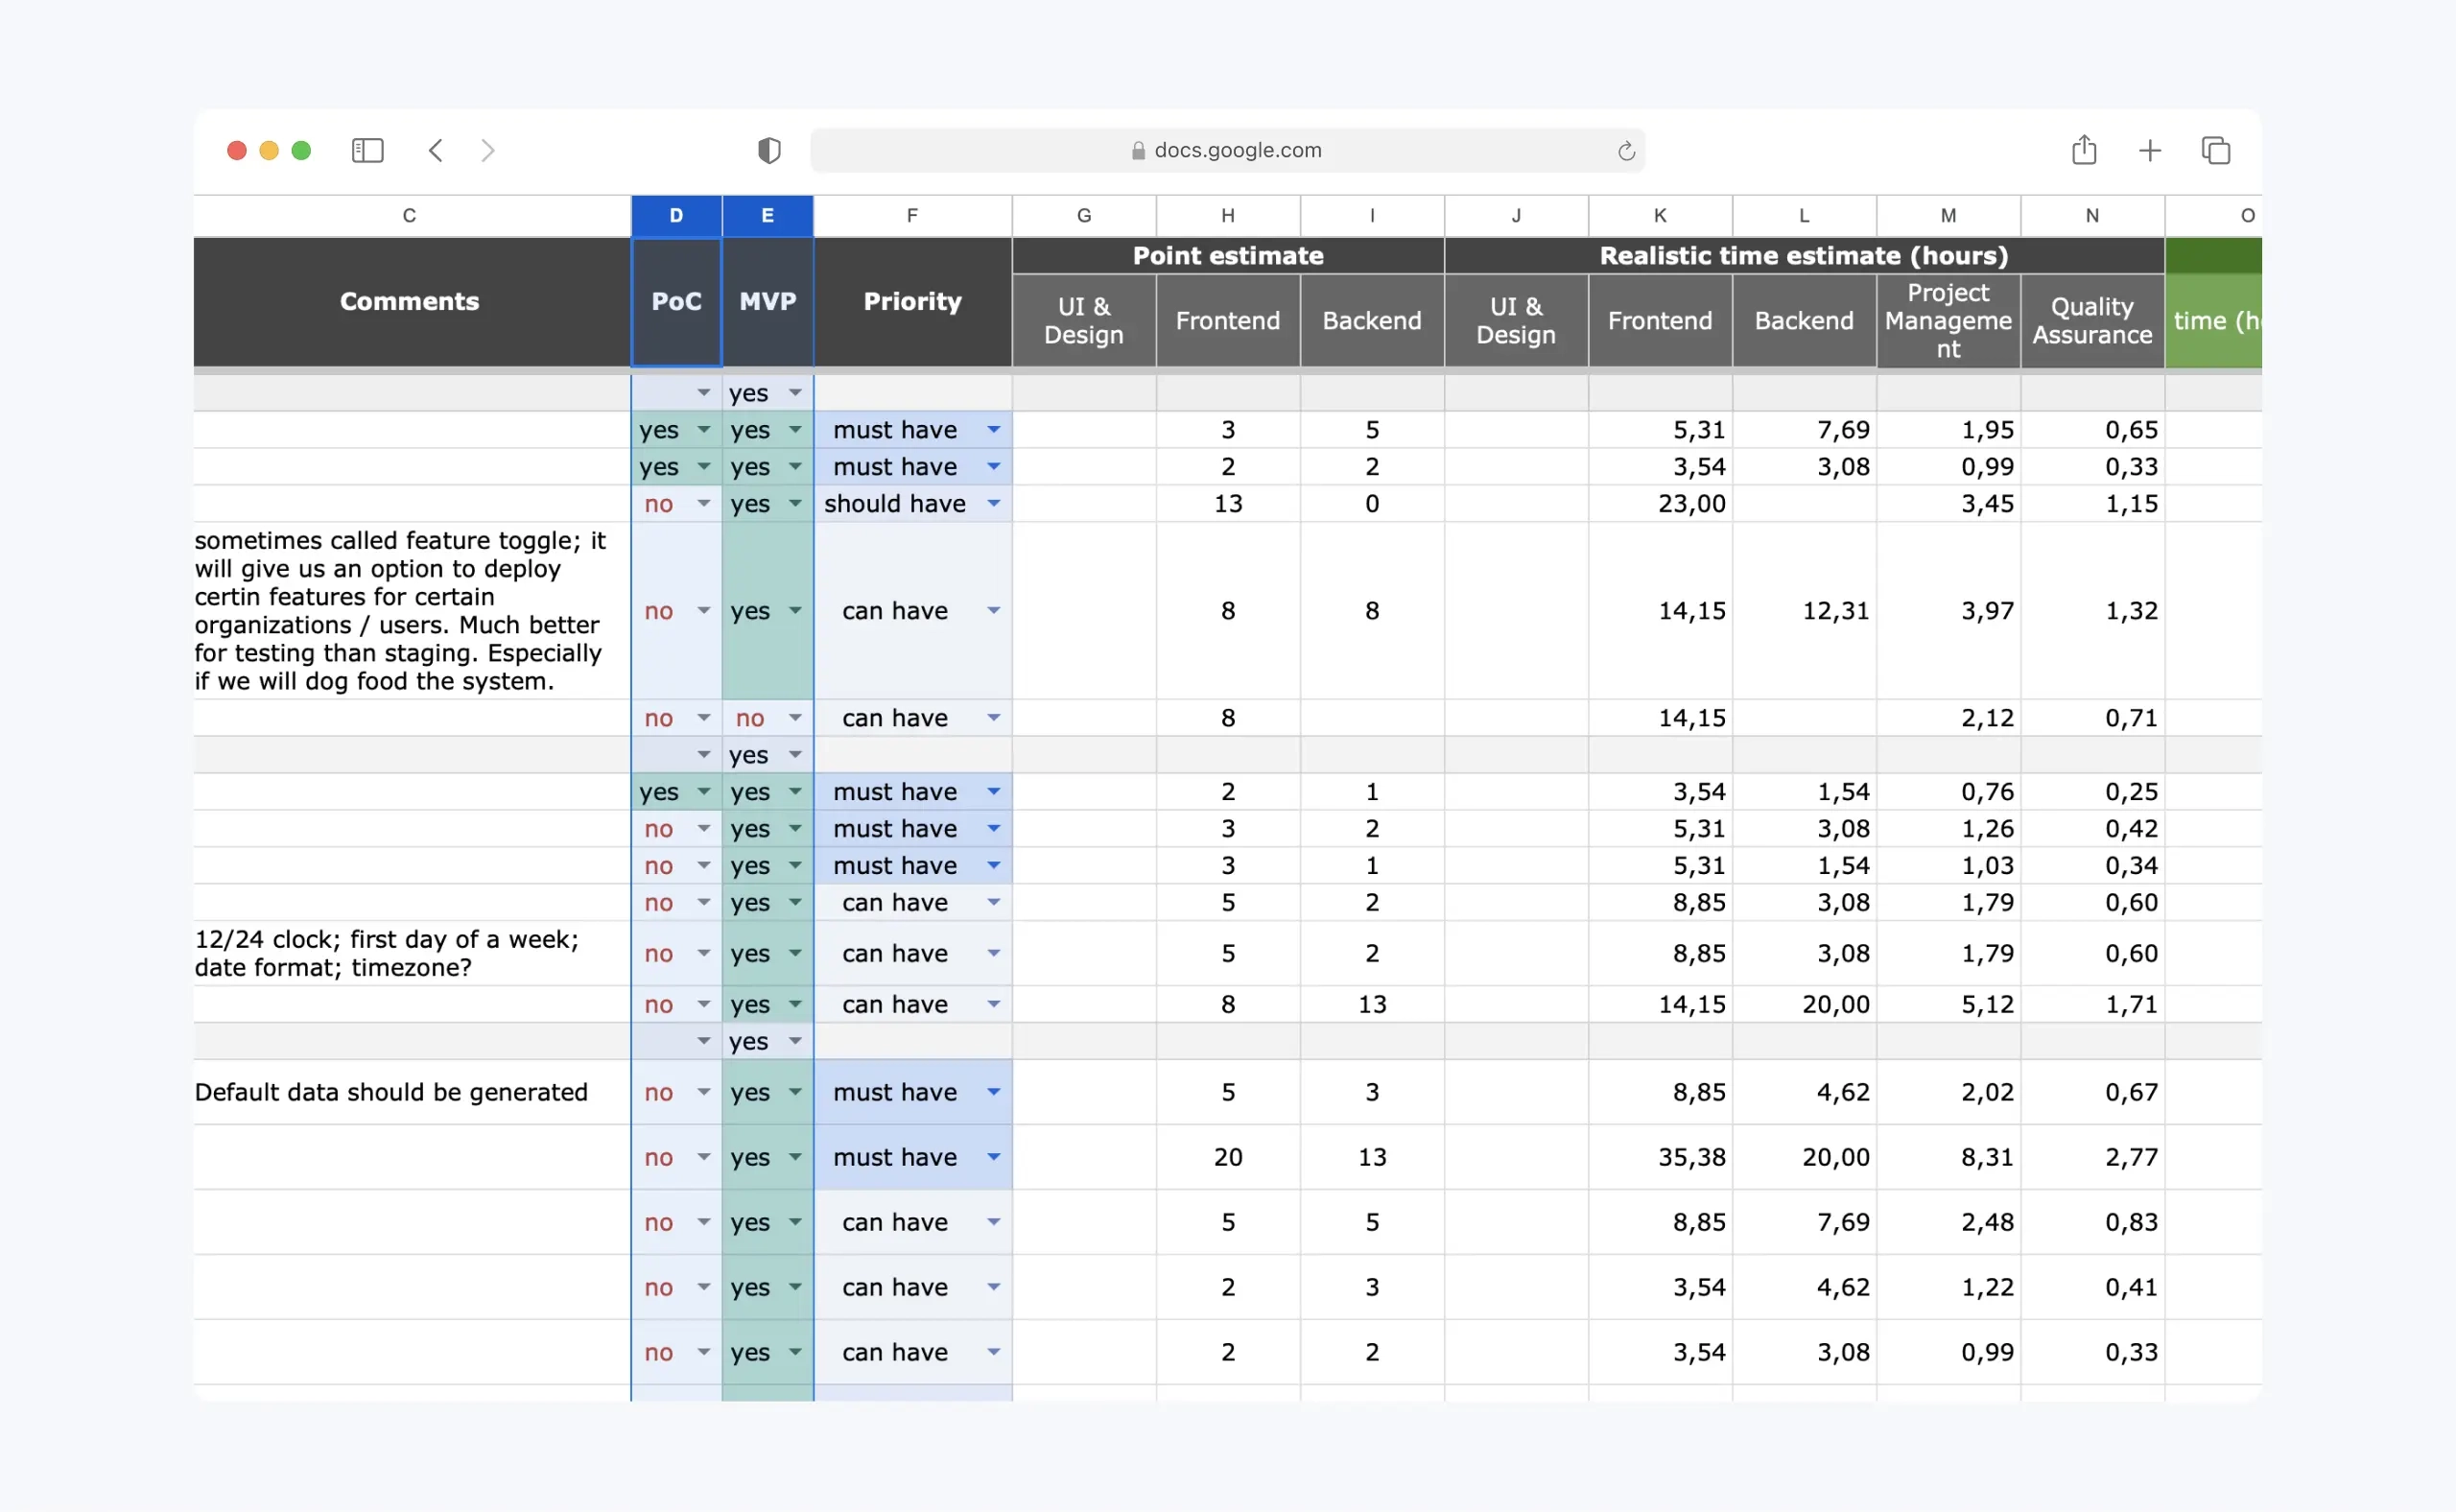
Based on all our explorations and decisions re functionality and tech stack we were ready to revisit the preliminary backlog of features.
Here are the steps we took:
- We’ve converted a simple list to a more robust epic / user story / comments format that allowed for adding more detail.
- We’ve estimated how long it will take to complete each user story by assigning points for design, frontend and backend work.
- Points were then automatically recalculated into man-hours based on a range of variables such as focus factor, project management factor and quality assurance factor. The values of those factors are determined based on our assessment of project complexity and past experience with similar projects.
- By assuming a given hourly rate we were able to determine the actual cost of each user story
- We’ve assigned priorities to each user story using MoSCoW methodology to assess relative importance of features
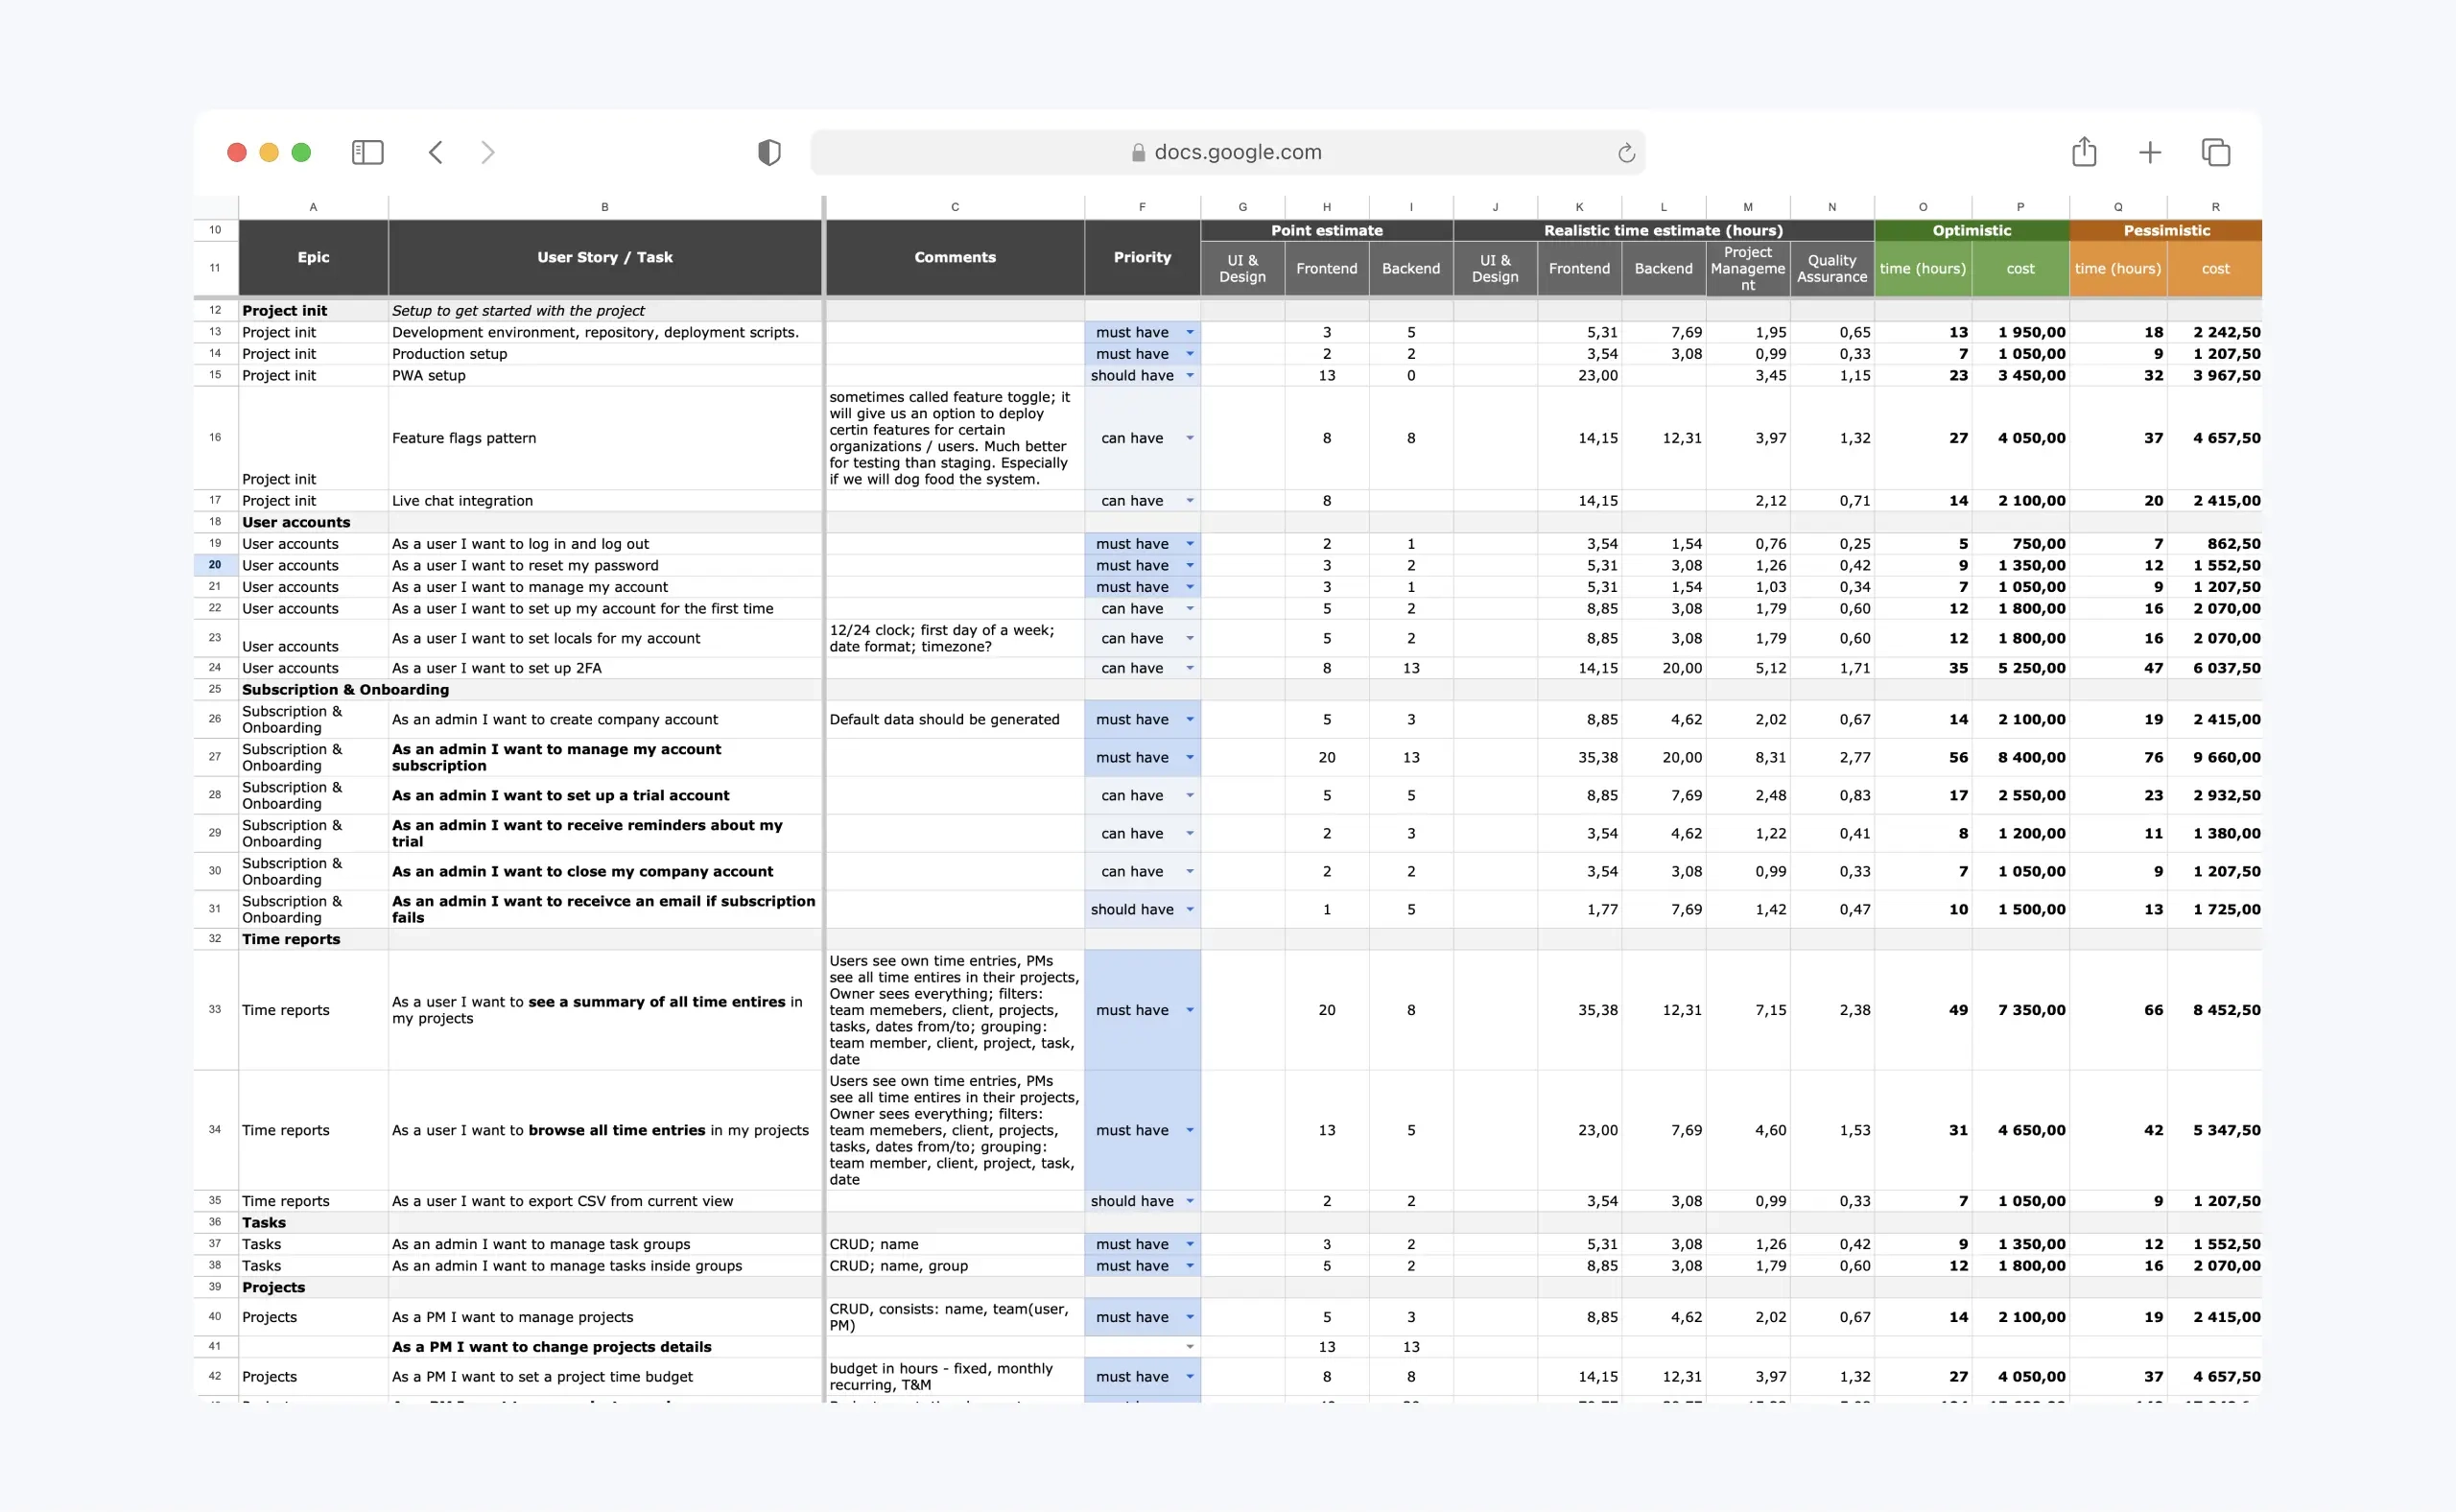
At the end of the process we had a complete time and cost estimate.
One extra step of this phase was to approach development priorities from a more product-oriented angle. In addition to the existing MoSCow classification, we’ve introduced the concepts of PoC (Proof of Concept) and MVP (Minimum Valuable Product) which allowed us to decide which features must be included in the those first releases so that the product will feel like a logical (although still limited) whole.
Phase I
Team composition, budget and timeline
Thanks to the detailed time & cost estimate we had a pretty good idea of how much the MVP would cost. Based on this information we’ve agreed on a total budget for the project which would allow for the build and launch.
Next, we made a decision to set up a product team consisting of a part-time designer and two full-time developers. We felt that such a team will make progress fast enough, while keeping the monthly cost sustainable. The roles of a product owner, project manager, and a CTO were left for me and my partner.
Now, knowing how much work is required for the MVP (our total budget) and our team composure (our monthly burn rate) we came up with a project timeline of 18 months.
That was it! The planning phase was completed and we were now ready to start the product design phase.
Phase II: Design
It was now time for a product designer to take the lead.
Phase II
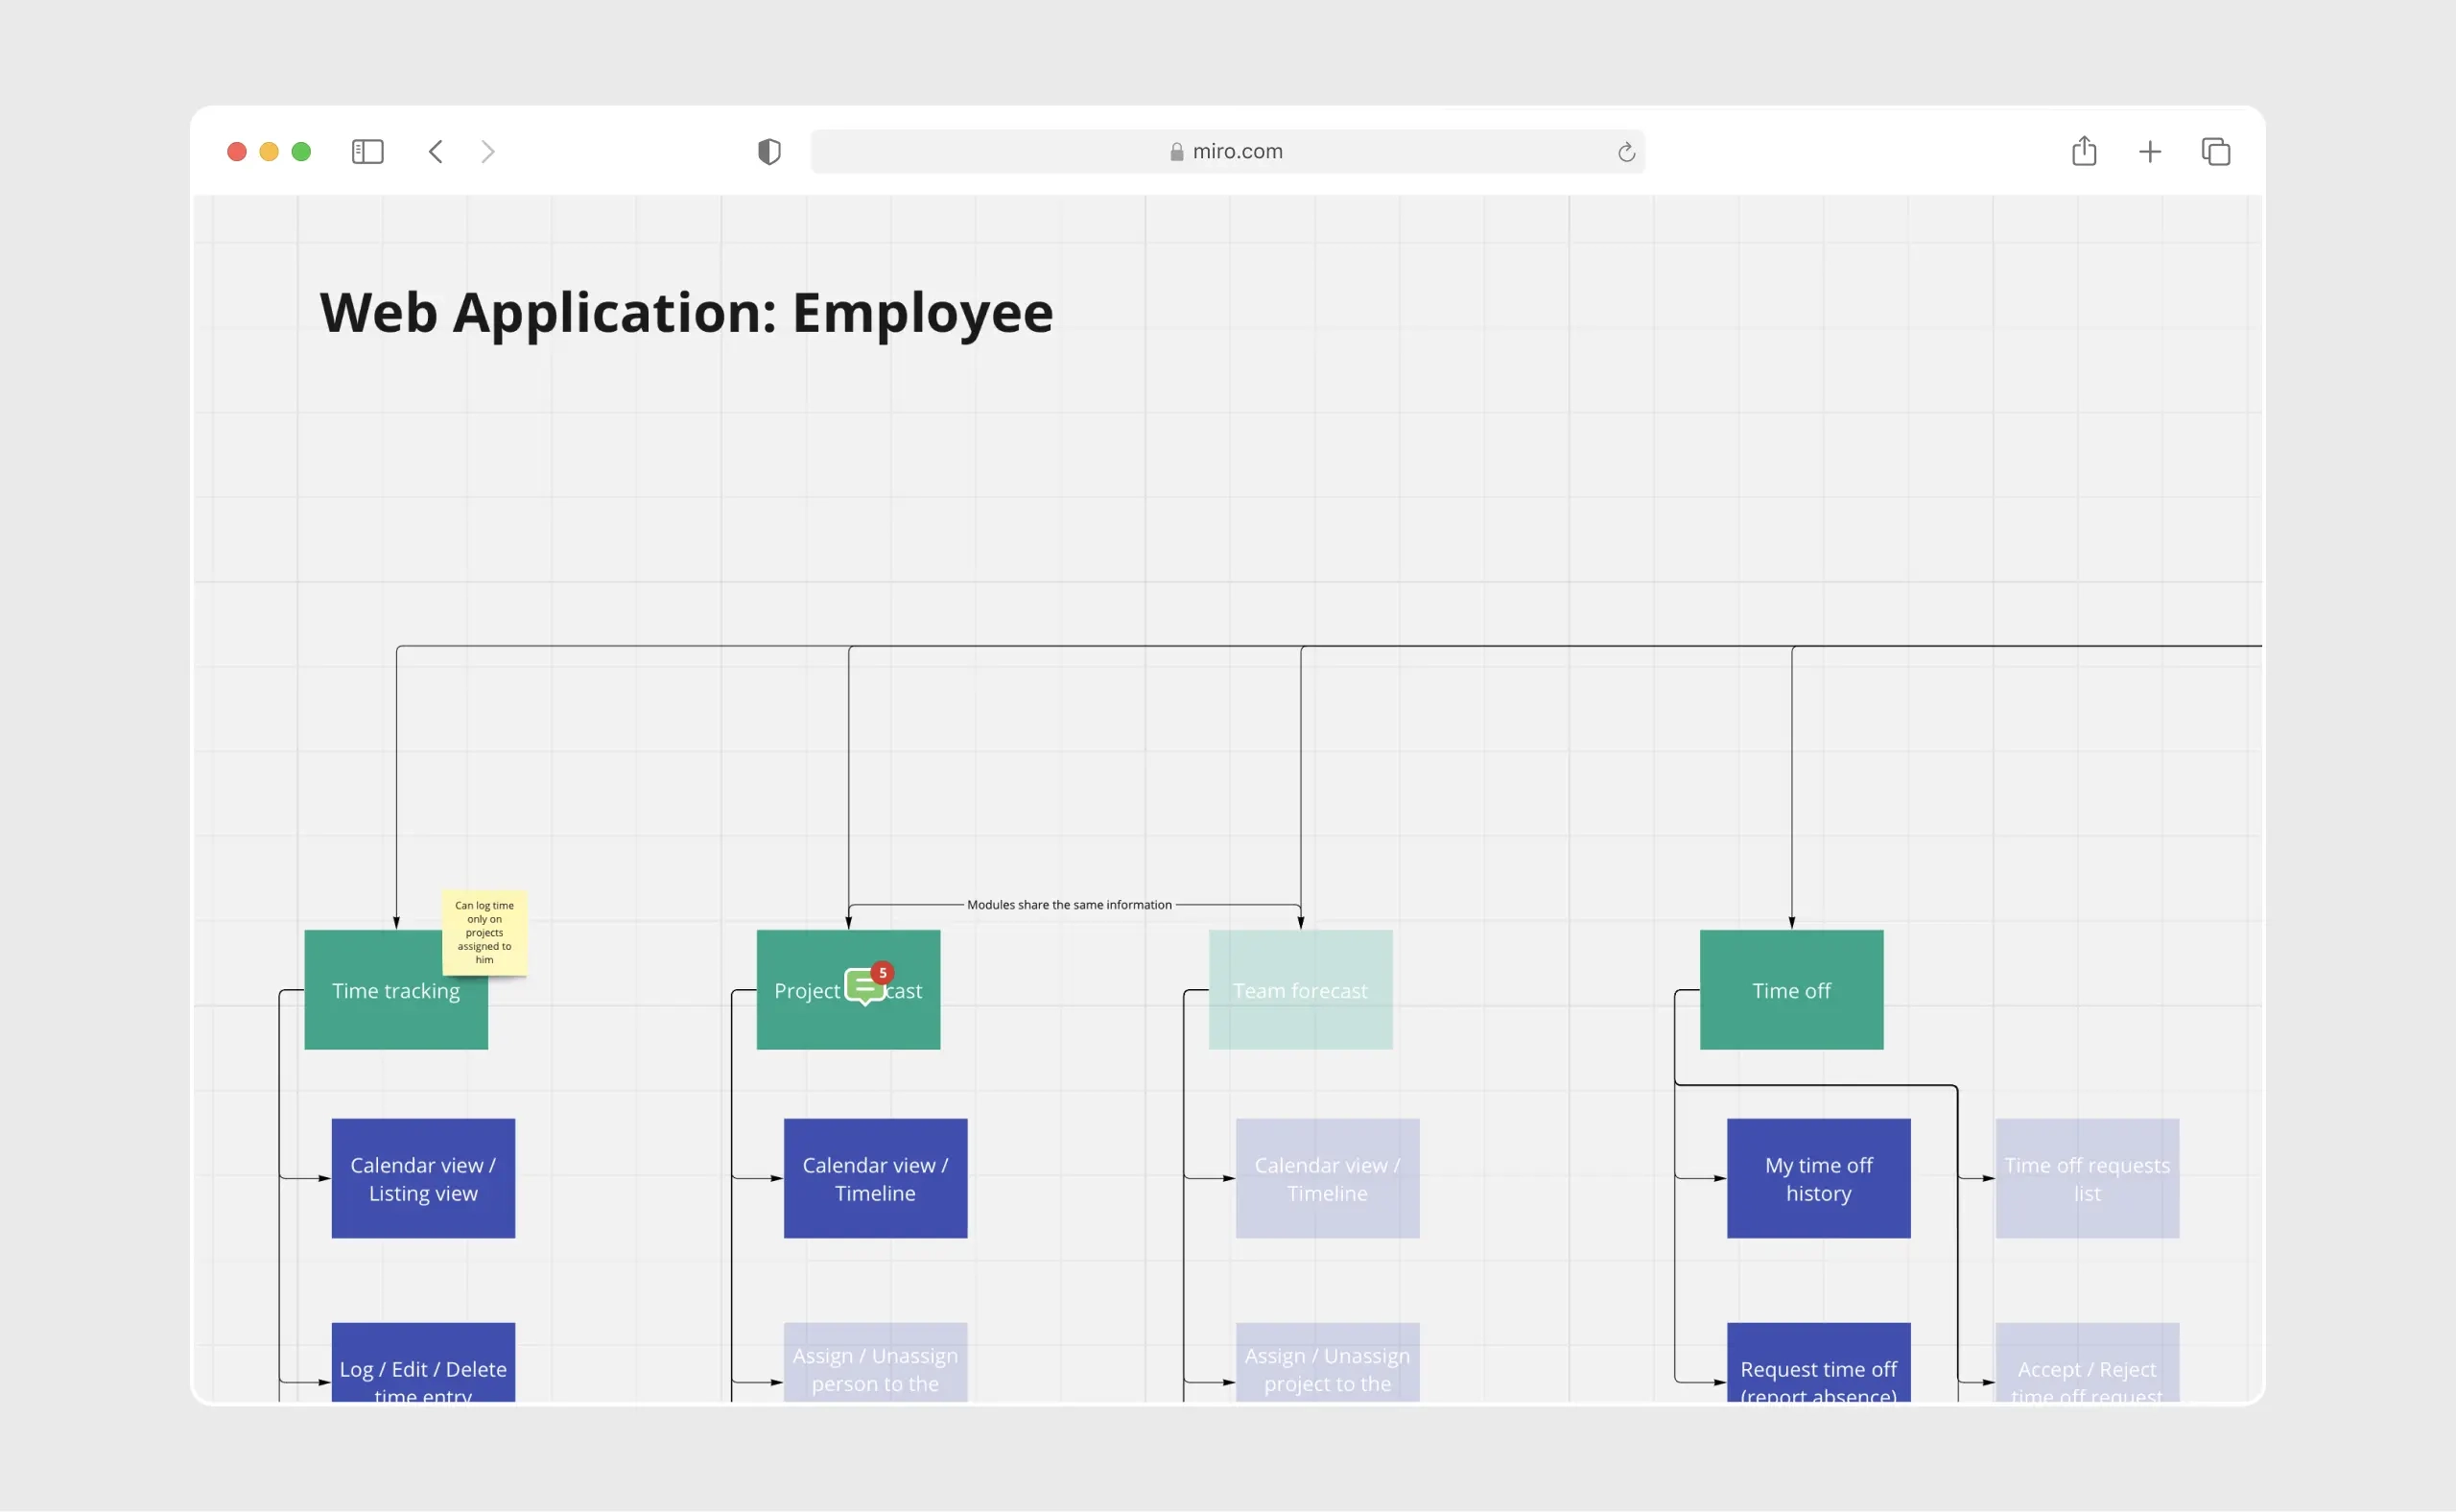
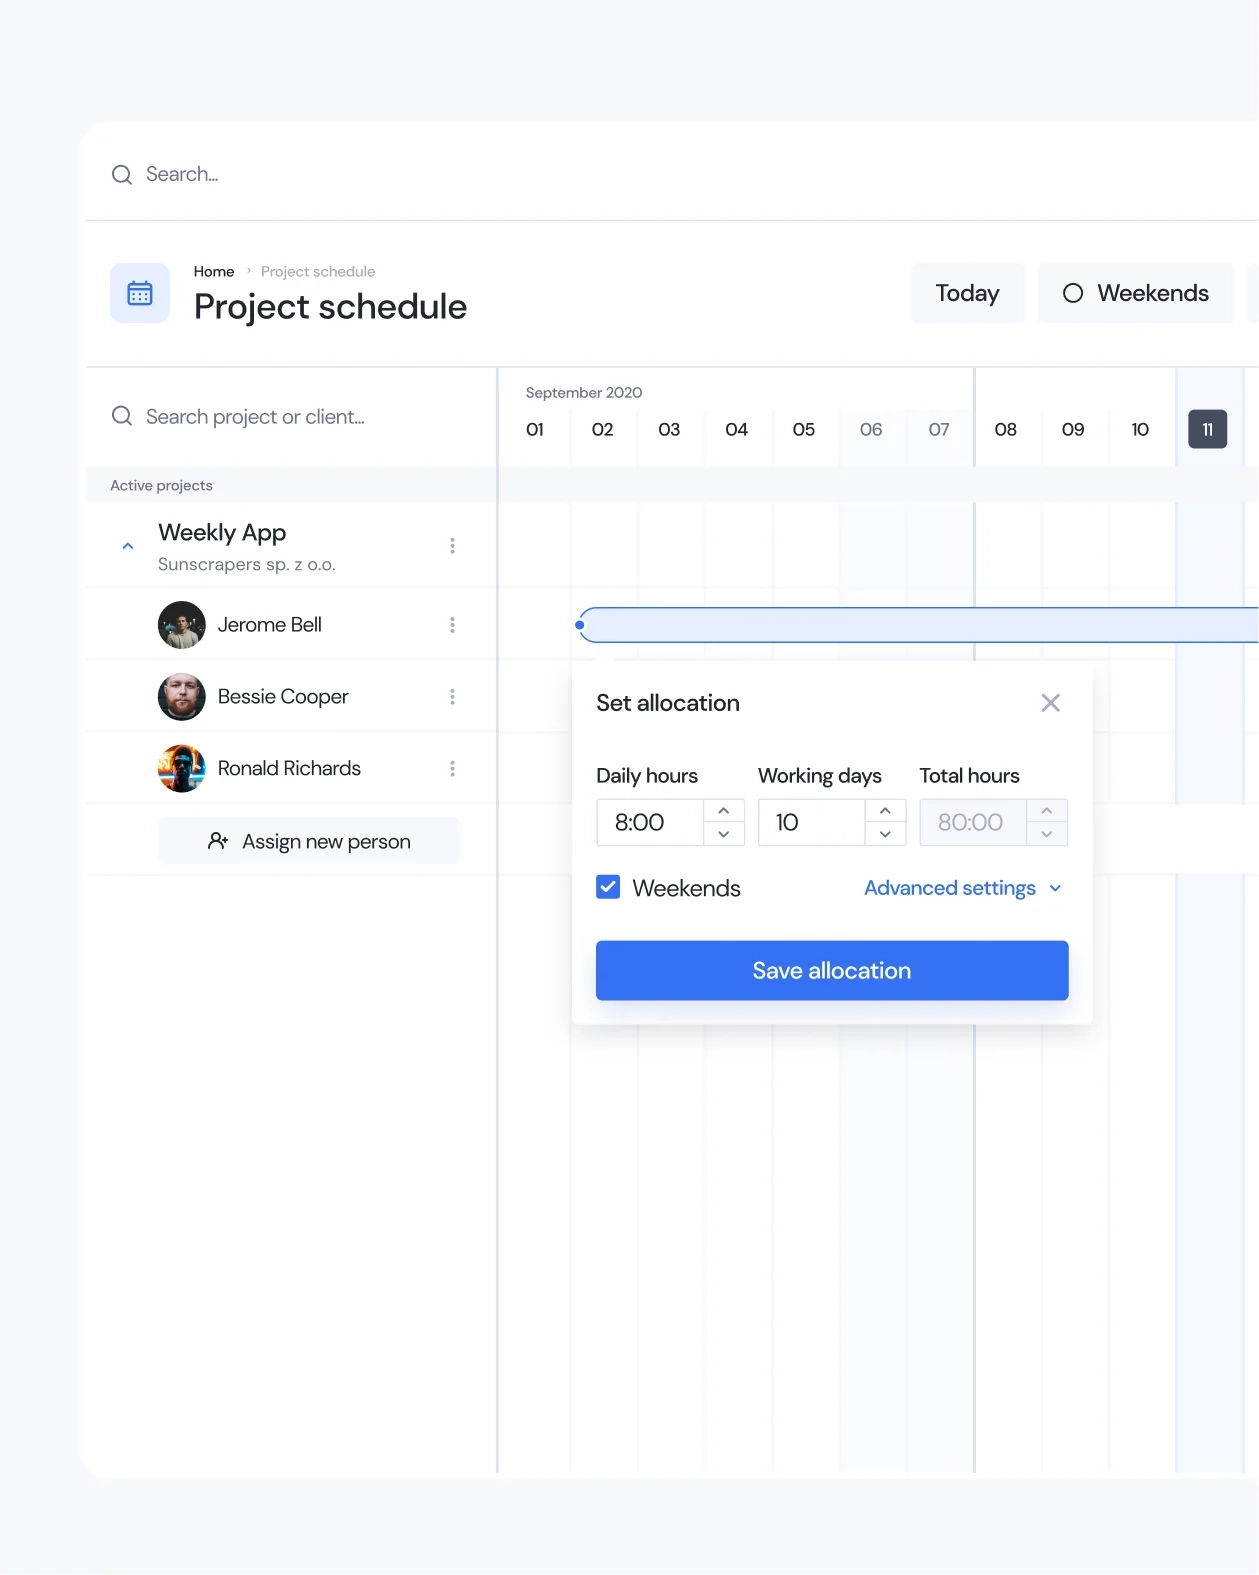
Sitemap
We’ve started off with a sitemap - mapping all key epics and functionalities on a canvas.
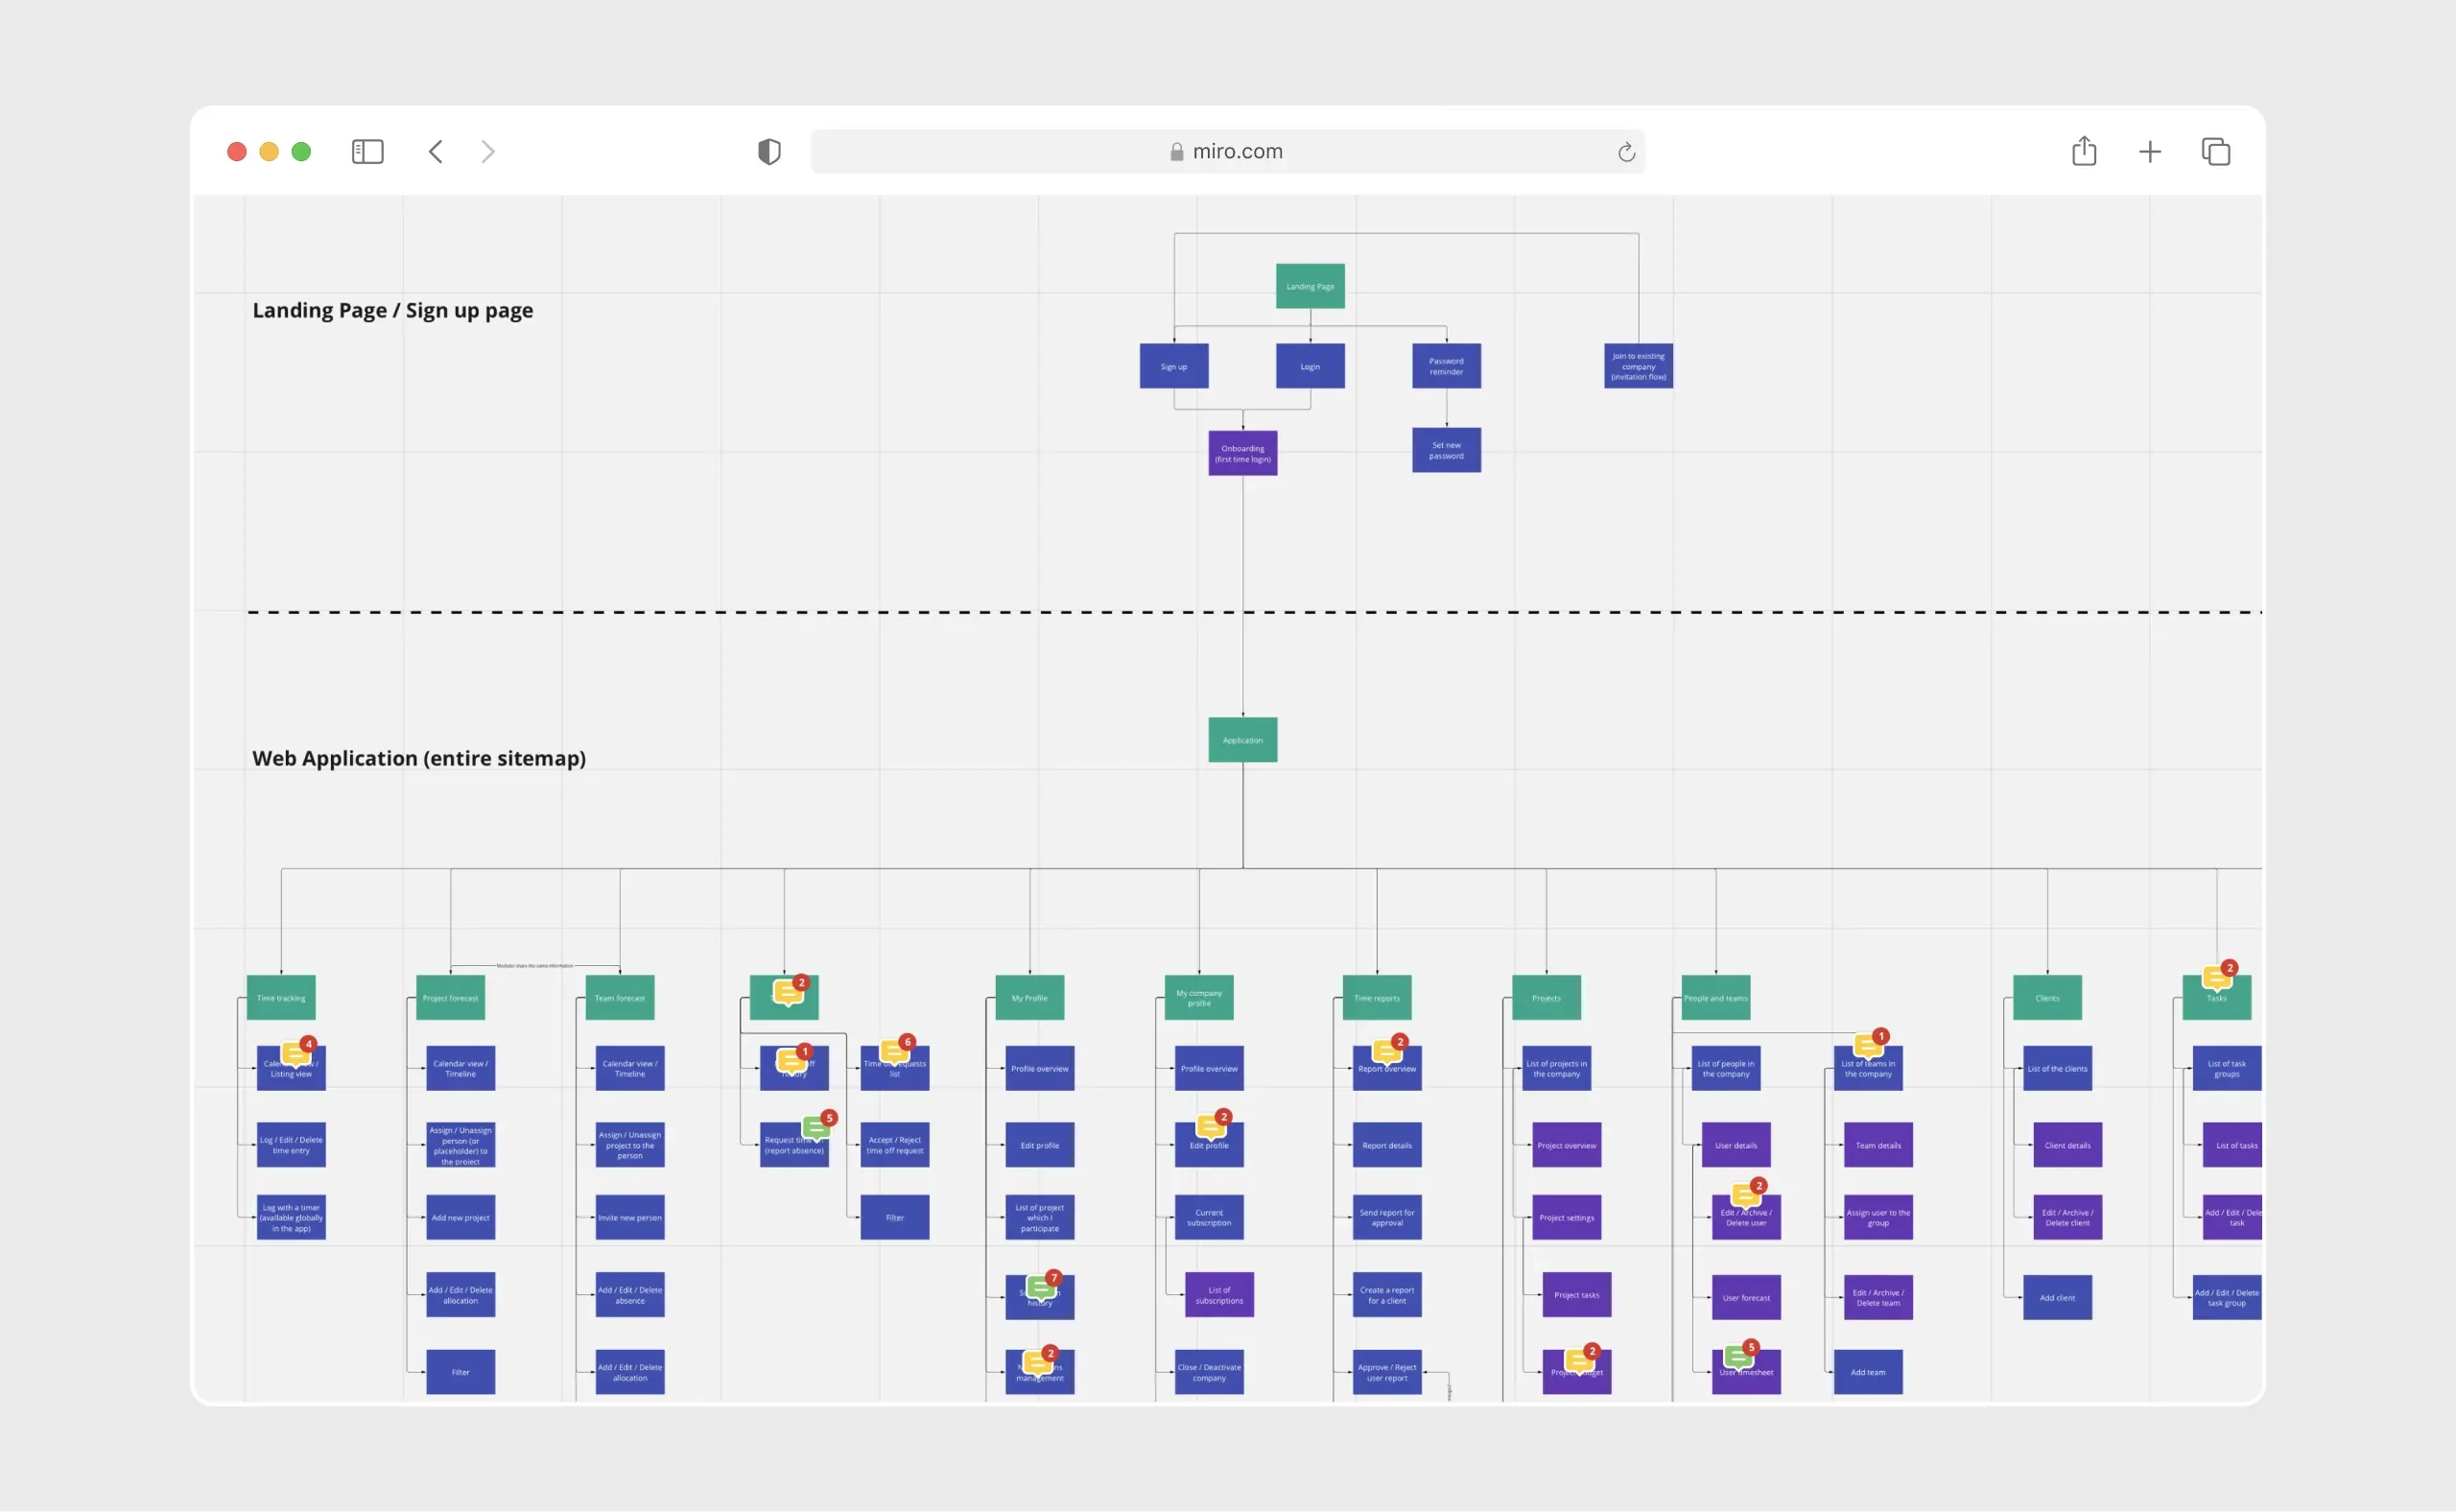
We’ve also created sitemaps based on different POVs, taking into account different user roles and permissions so it’s easier to grasp who can access what.

Phase II
Flowcharts
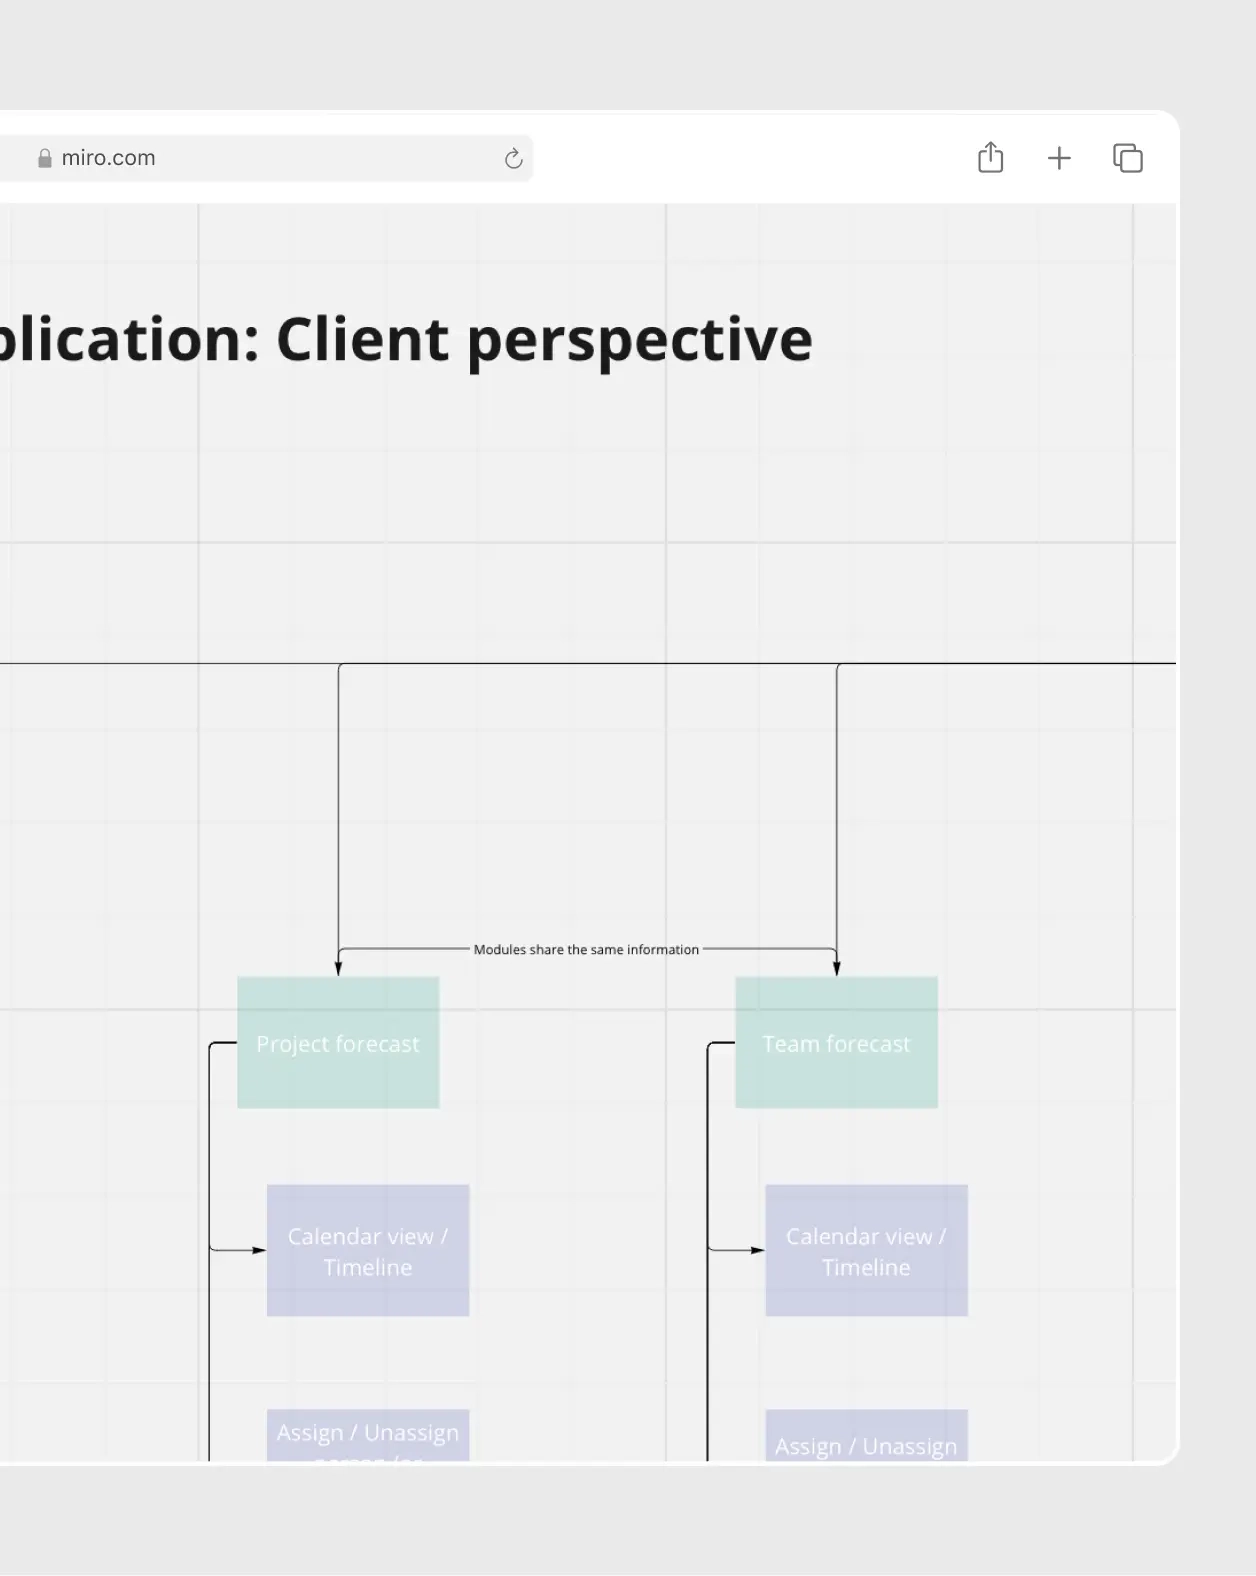
Next, we’ve identified key use cases and have visualised user journey with possible actions.
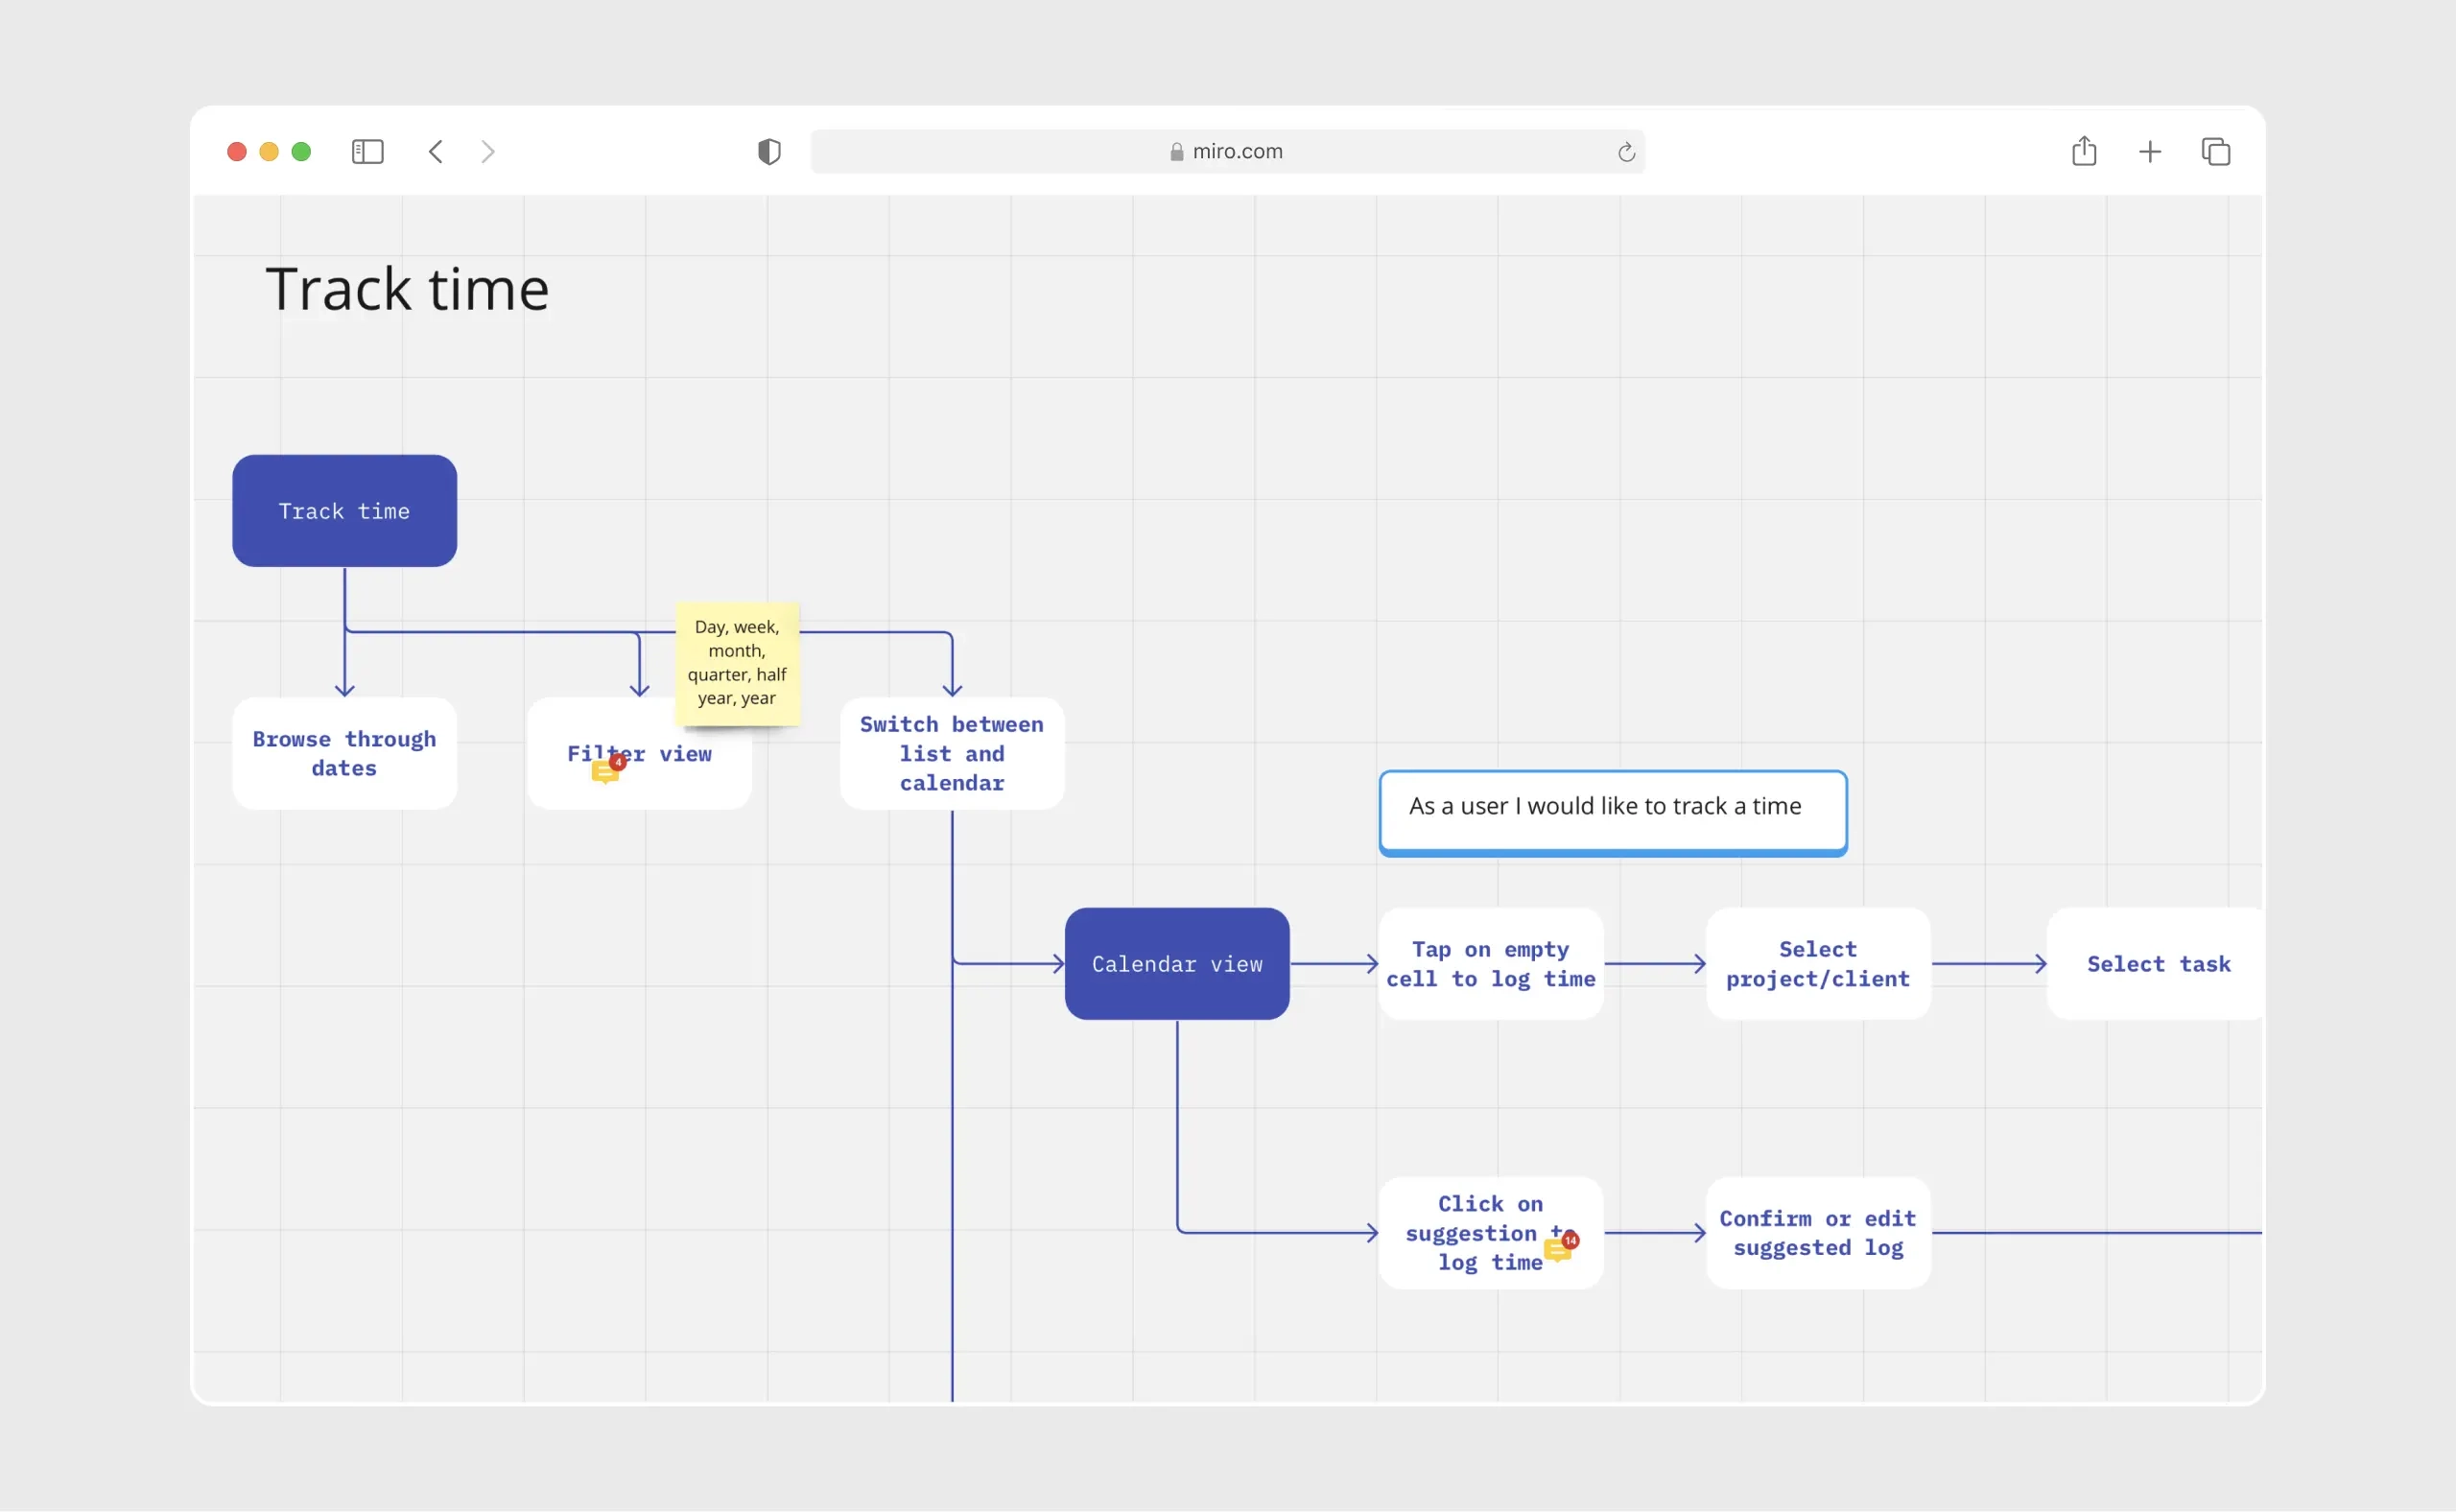
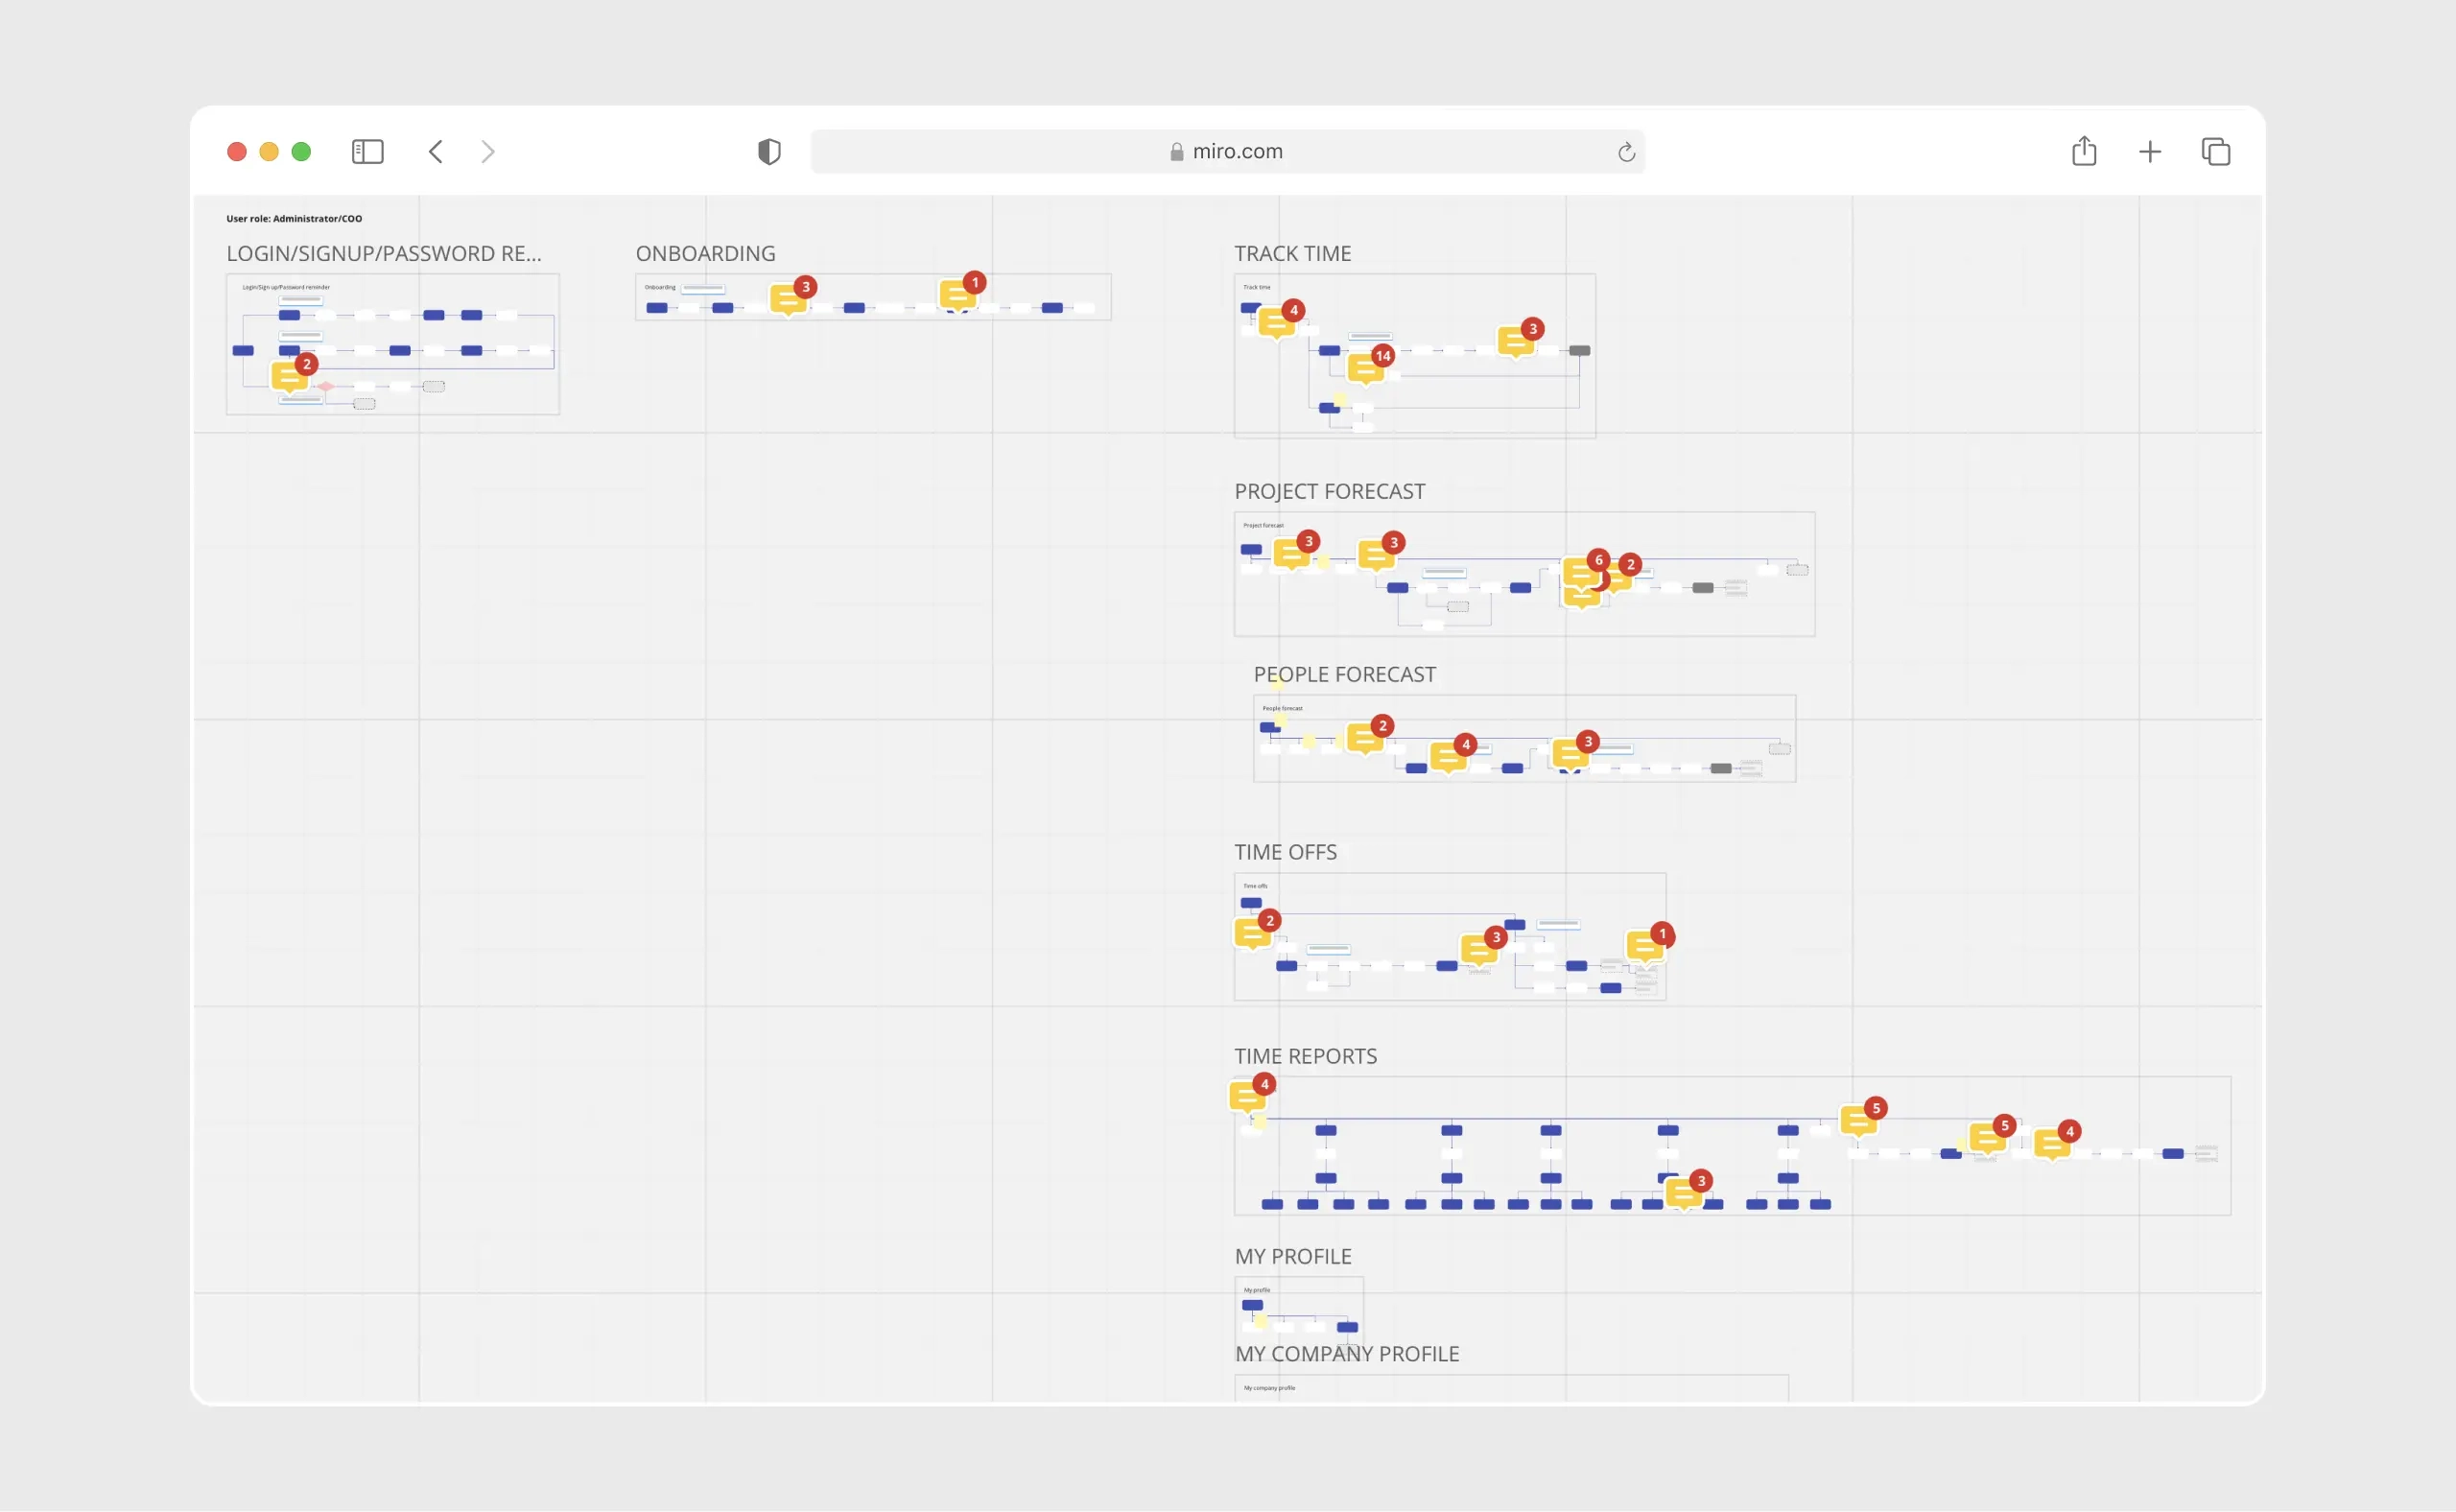
You may have noticed numerous discussions happening in comments at every stage - once you start visualising things you quickly discover gaps, inconsistencies and errors you need to sort out before moving forward.
Phase II
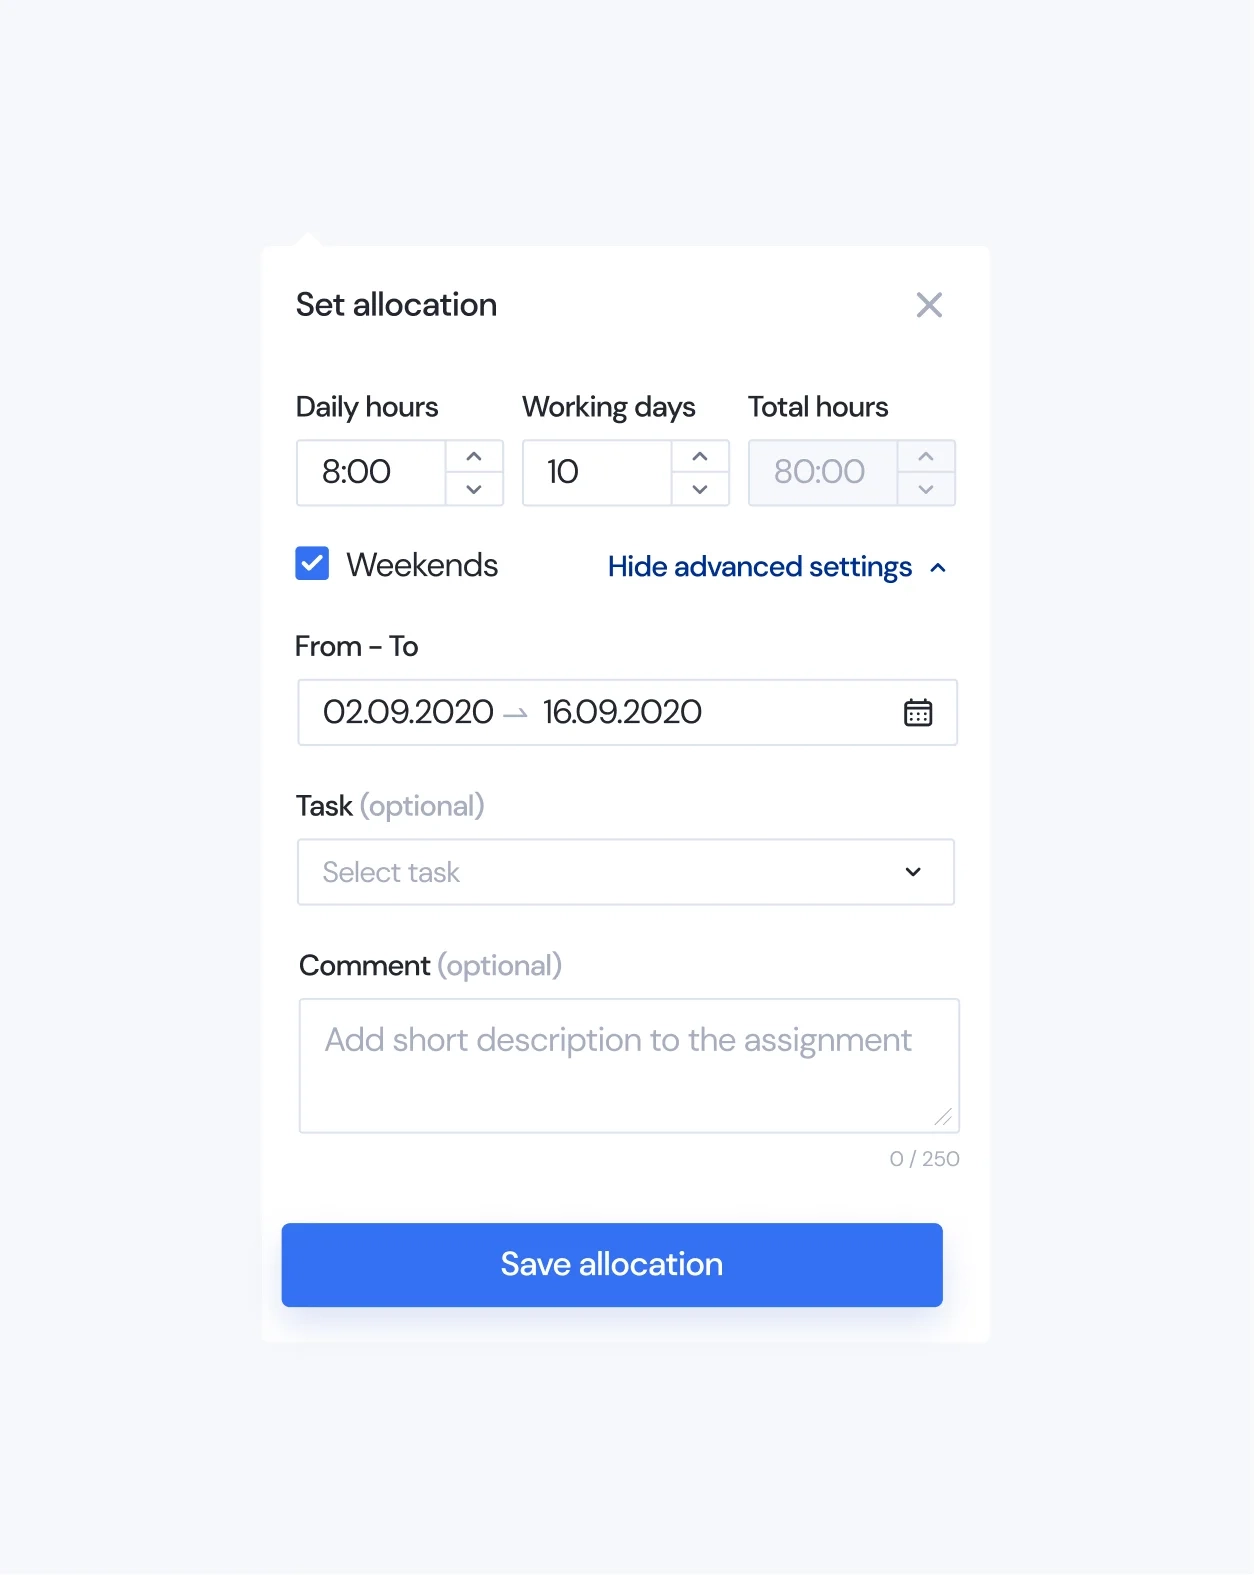
Low fidelity designs
The next step was to create low fidelity designs (also known as wireframes, mock-ups or prototypes). This is where the app has really started to take shape. We went on and mocked-up screen by screen…
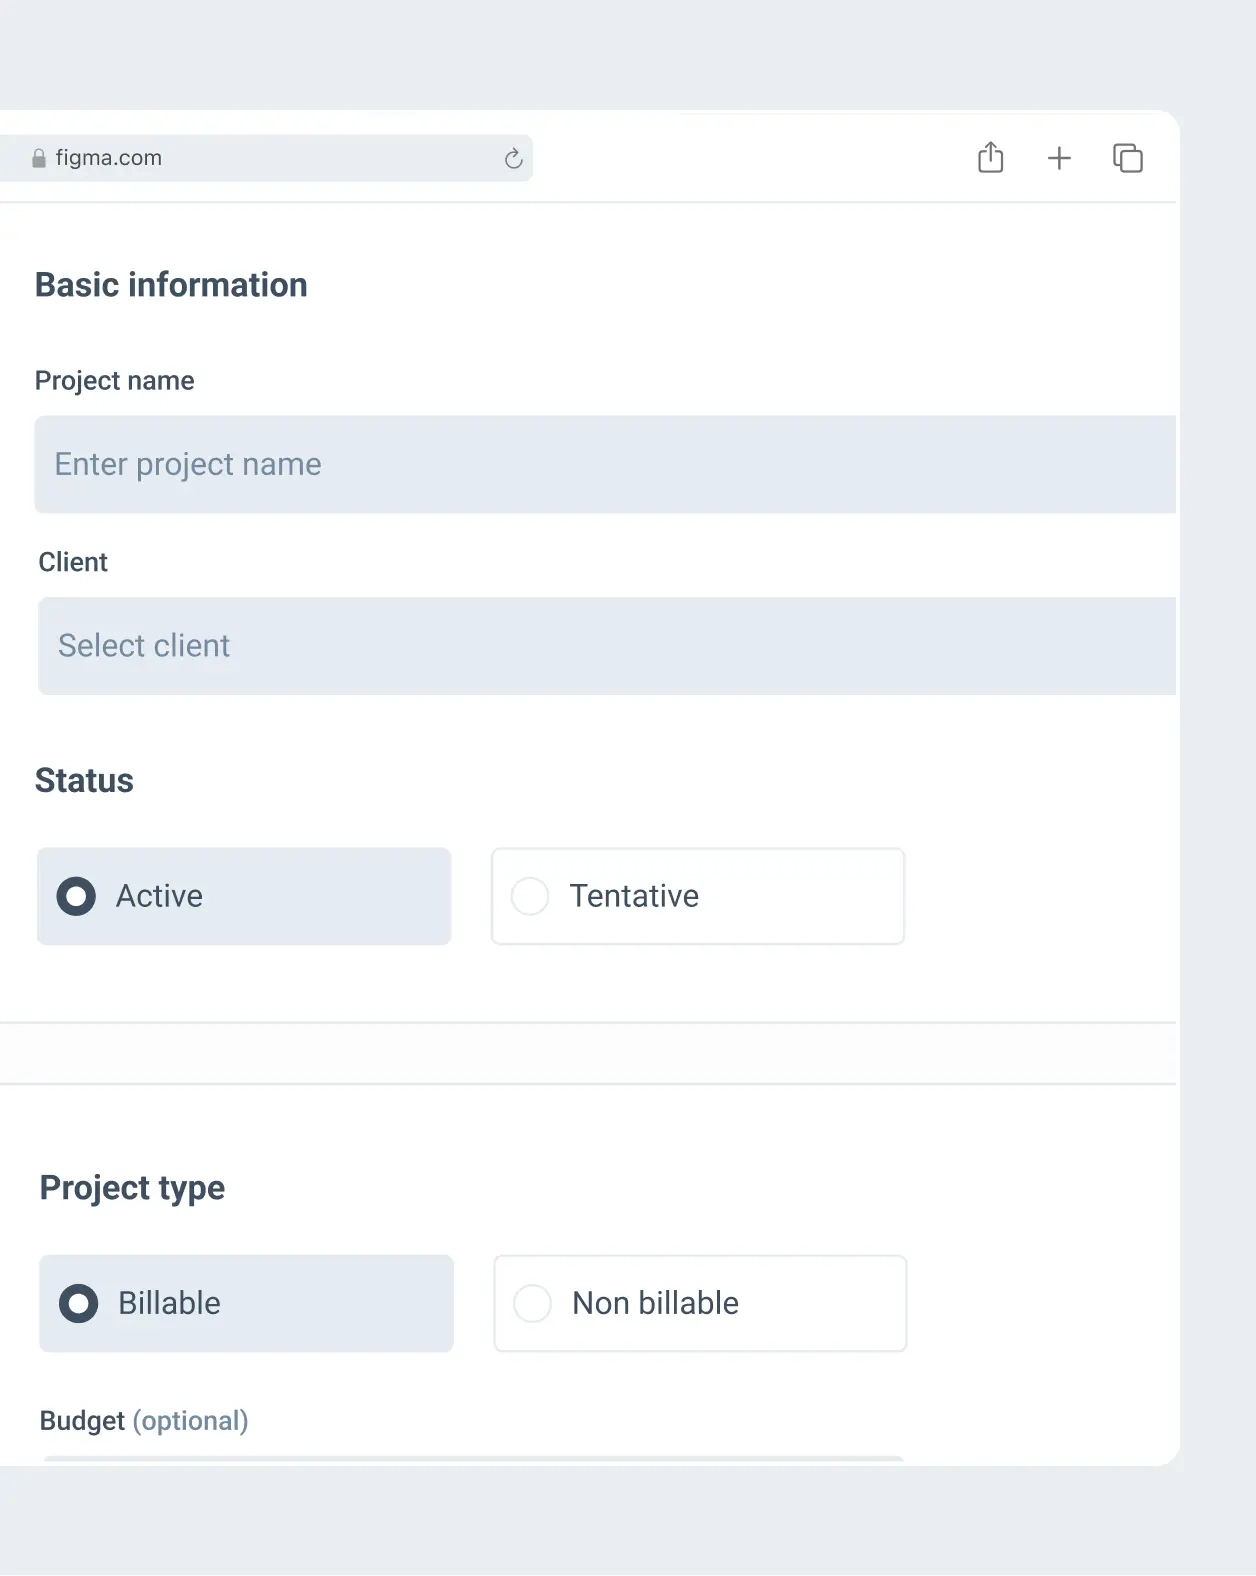

…which, together with different alternative versions, resulted in over 400 screens.
The whole prototype was made interactive and allowed us to simulate many user actions.
Low fidelity designs allowed us to focus on user experience and functionality before considering aesthetics. That way, we could discuss functionalities and introduce necessary changes early in the process (which is a considerably cheaper approach than introducing changes to high fidelity designs later on). The general rule in both design and development is - the earlier you change things and fix problems the cheaper it is.
Phase II
High fidelity designs
Branding
In parallel to designing application interfaces we have commissioned the work on Weekly App’s branding. What we needed at this stage was a rather simple package: a logotype and a selection of brand colors and typefaces.

With that work done, we were ready to combine low-fi designs with branding guidelines to create the final look and feel of the application.
Design System
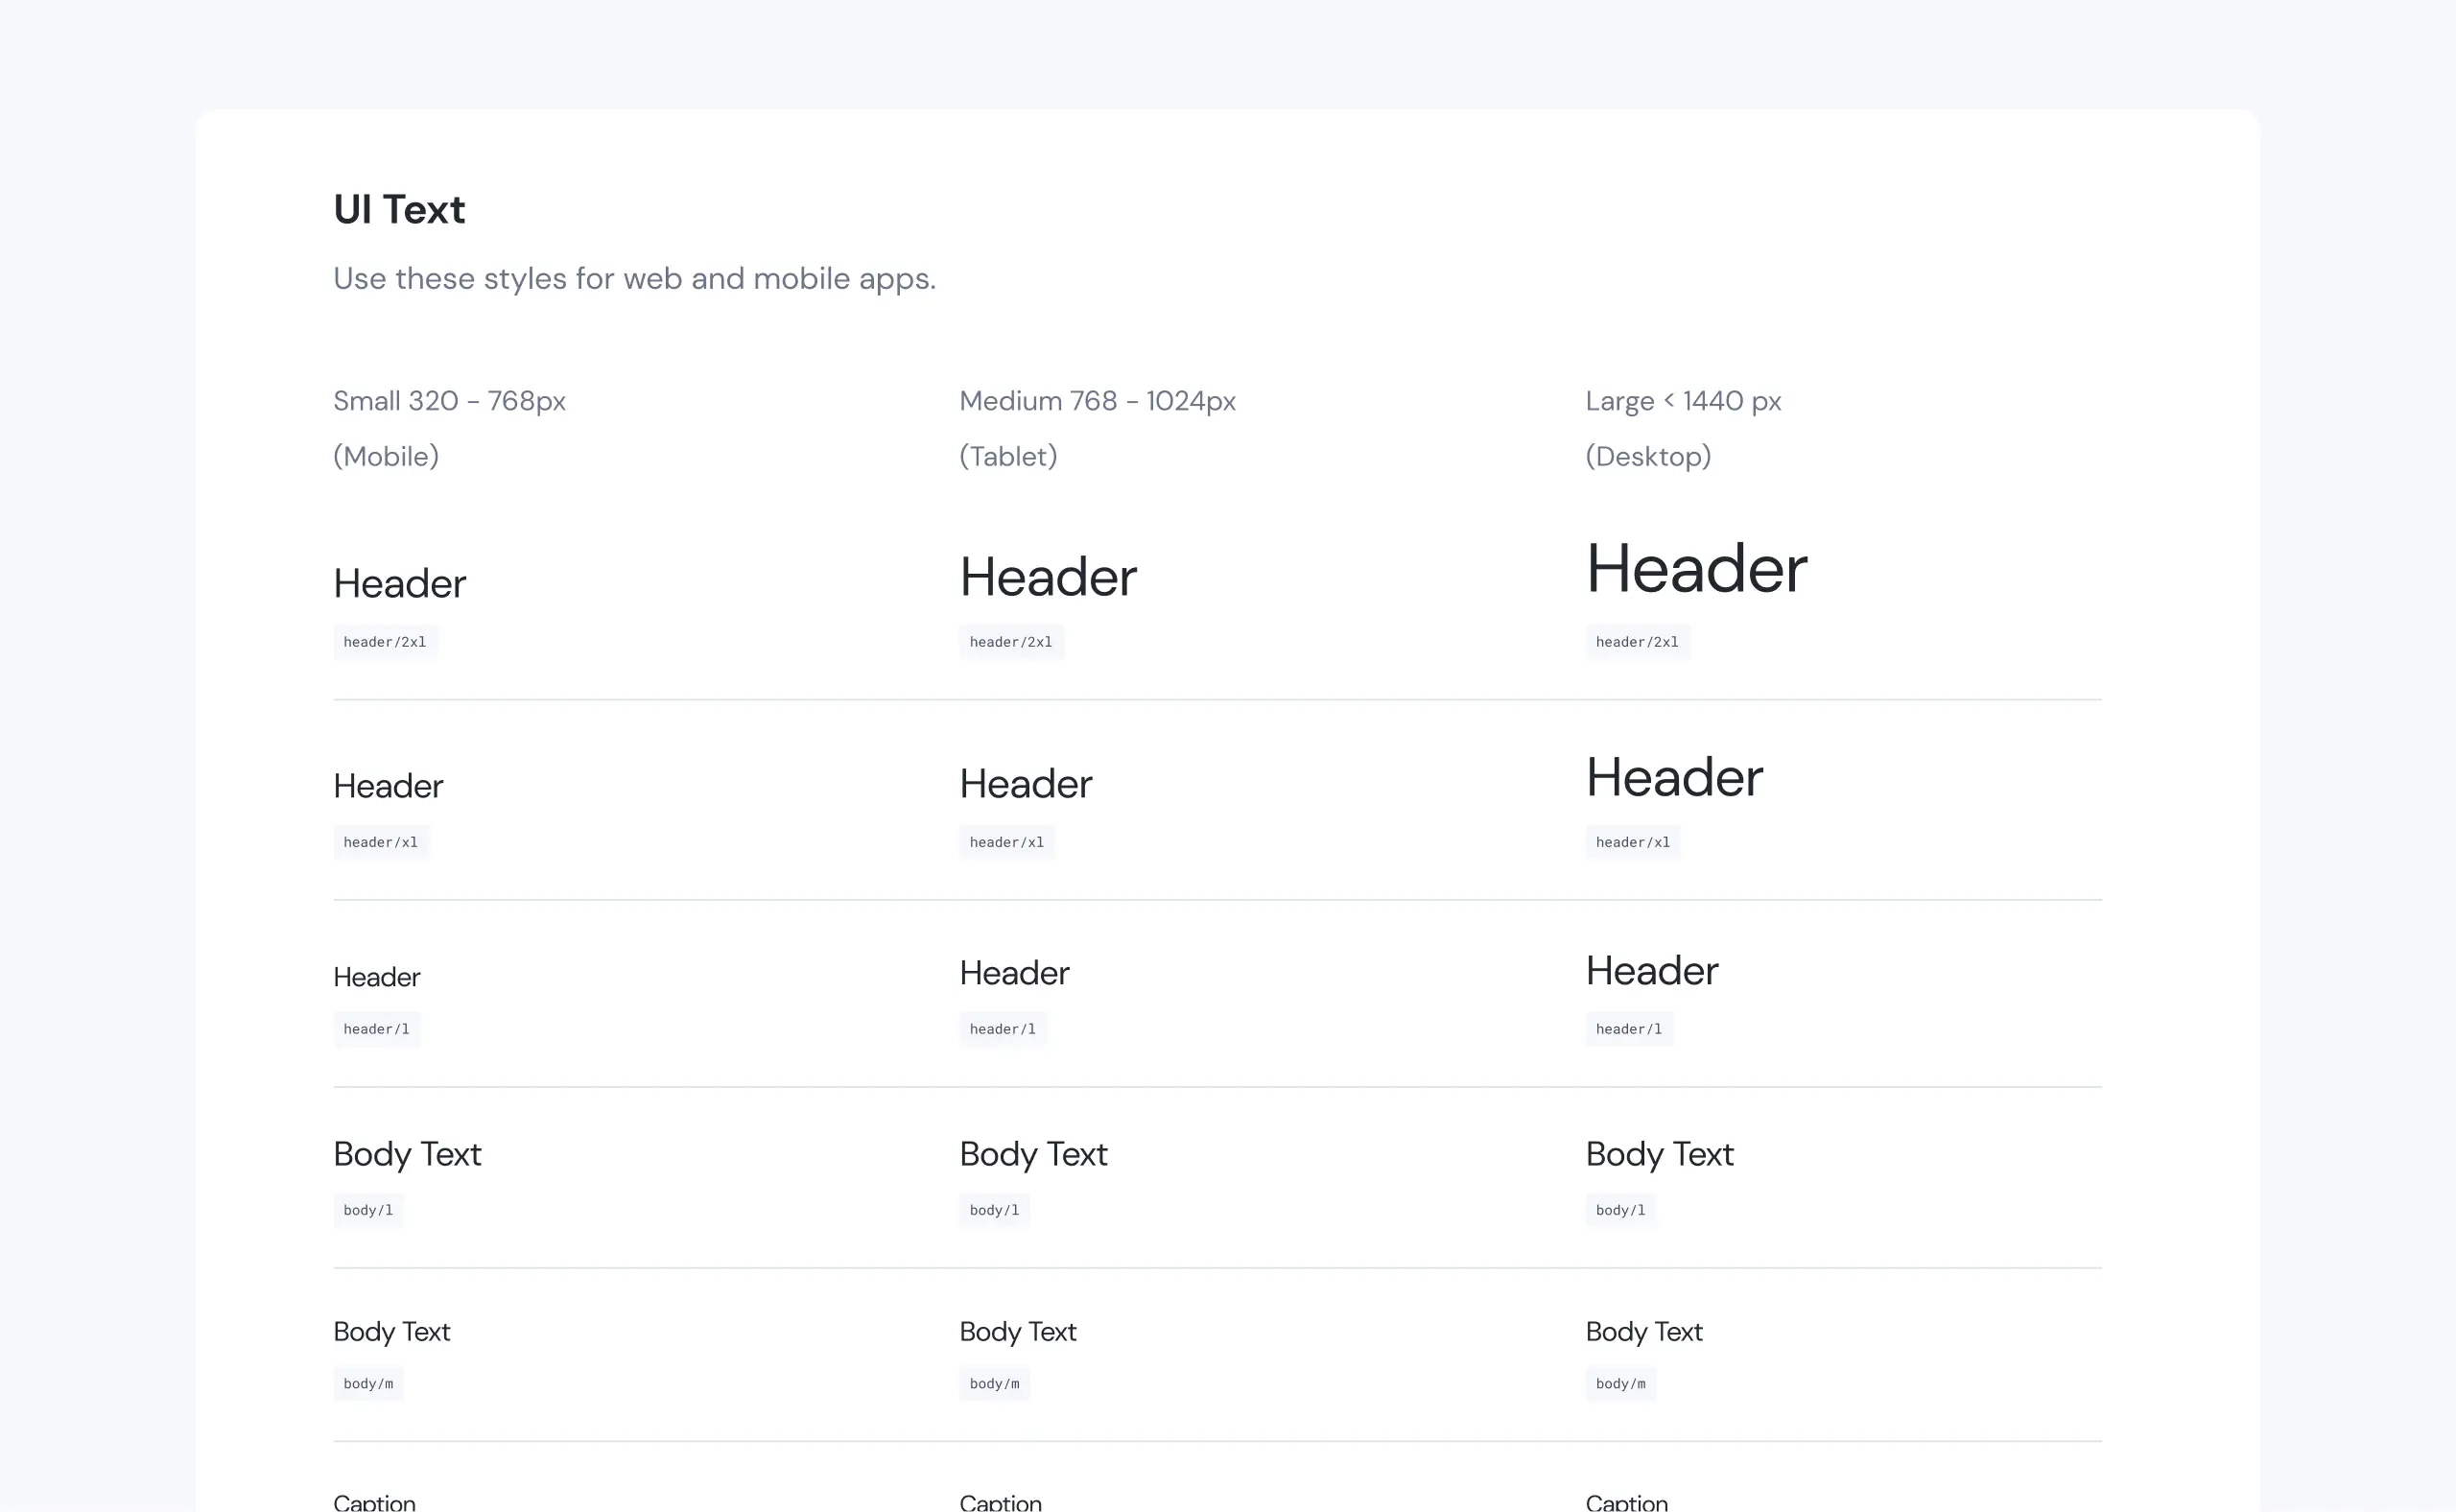
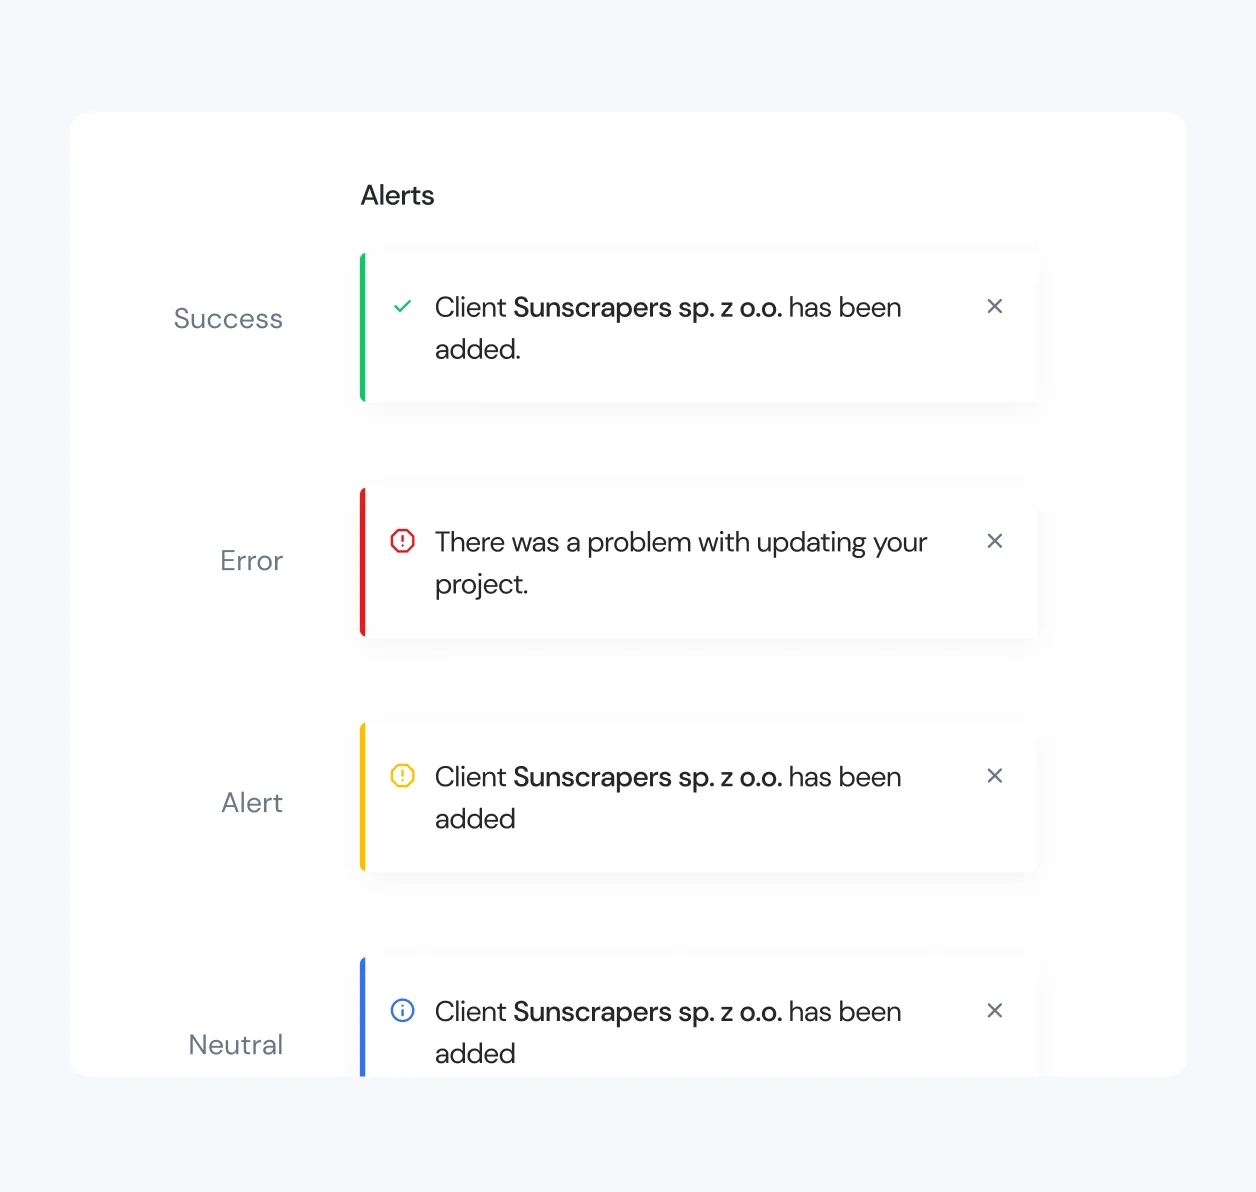
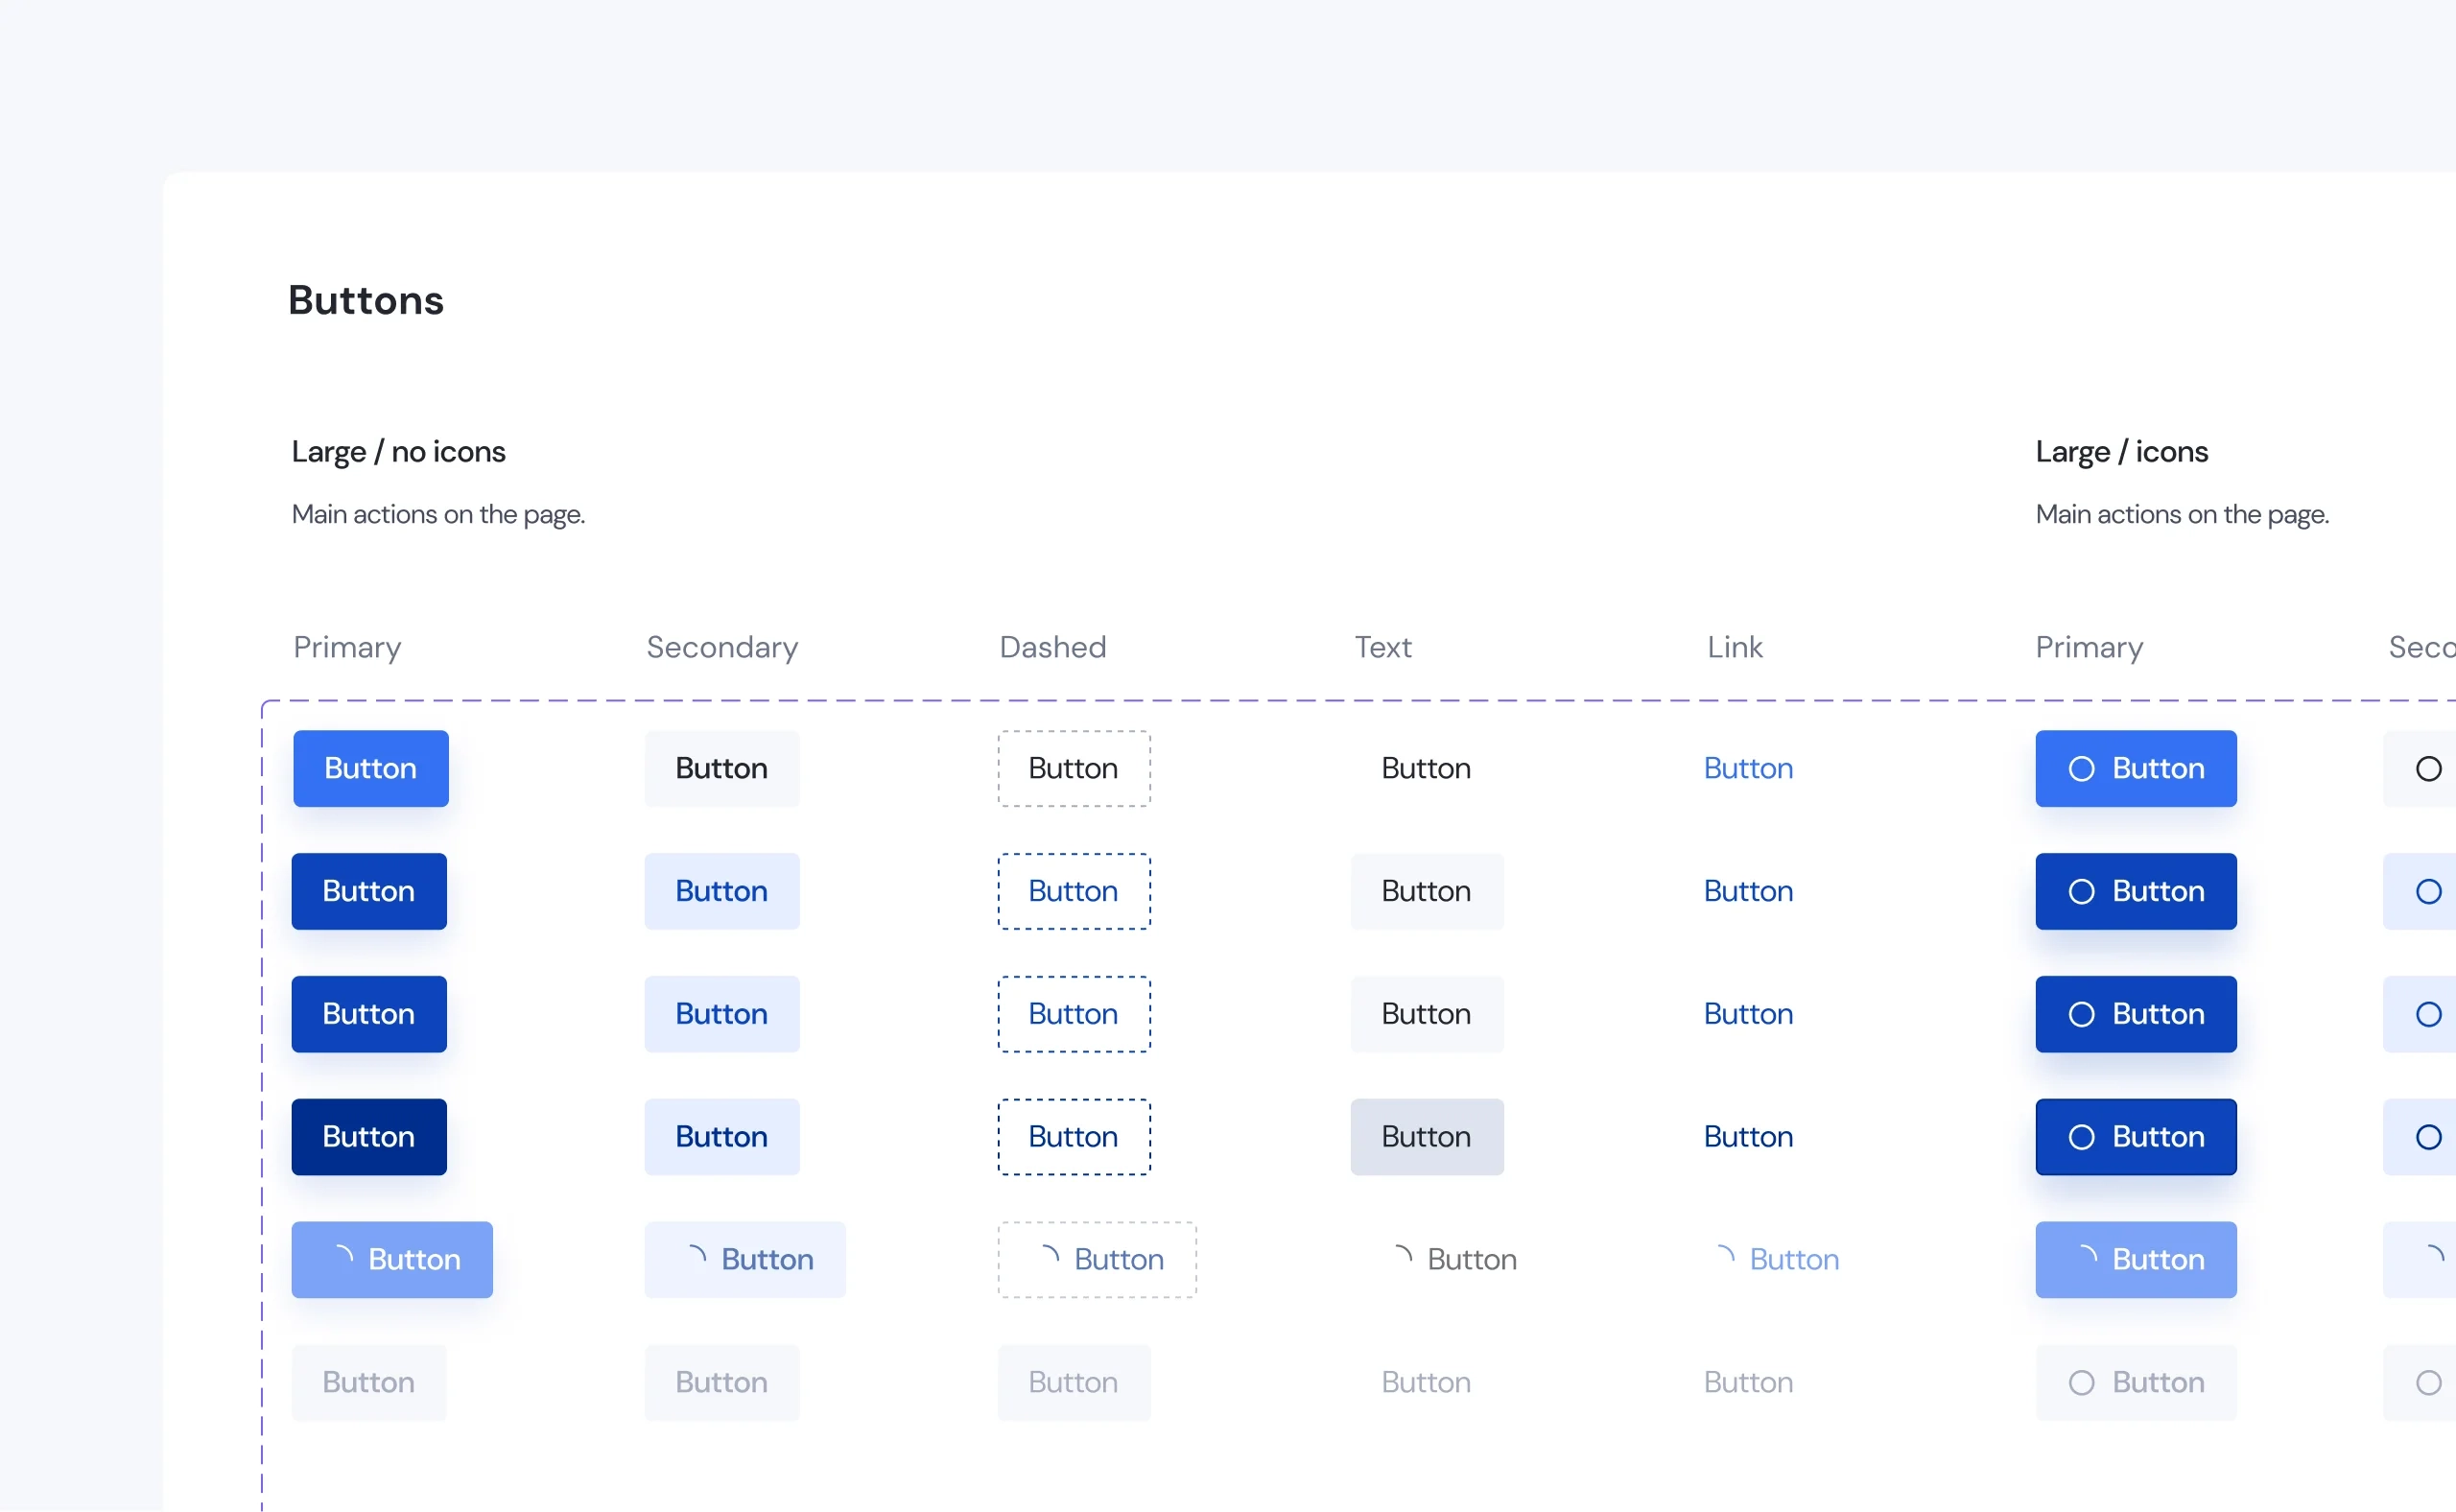
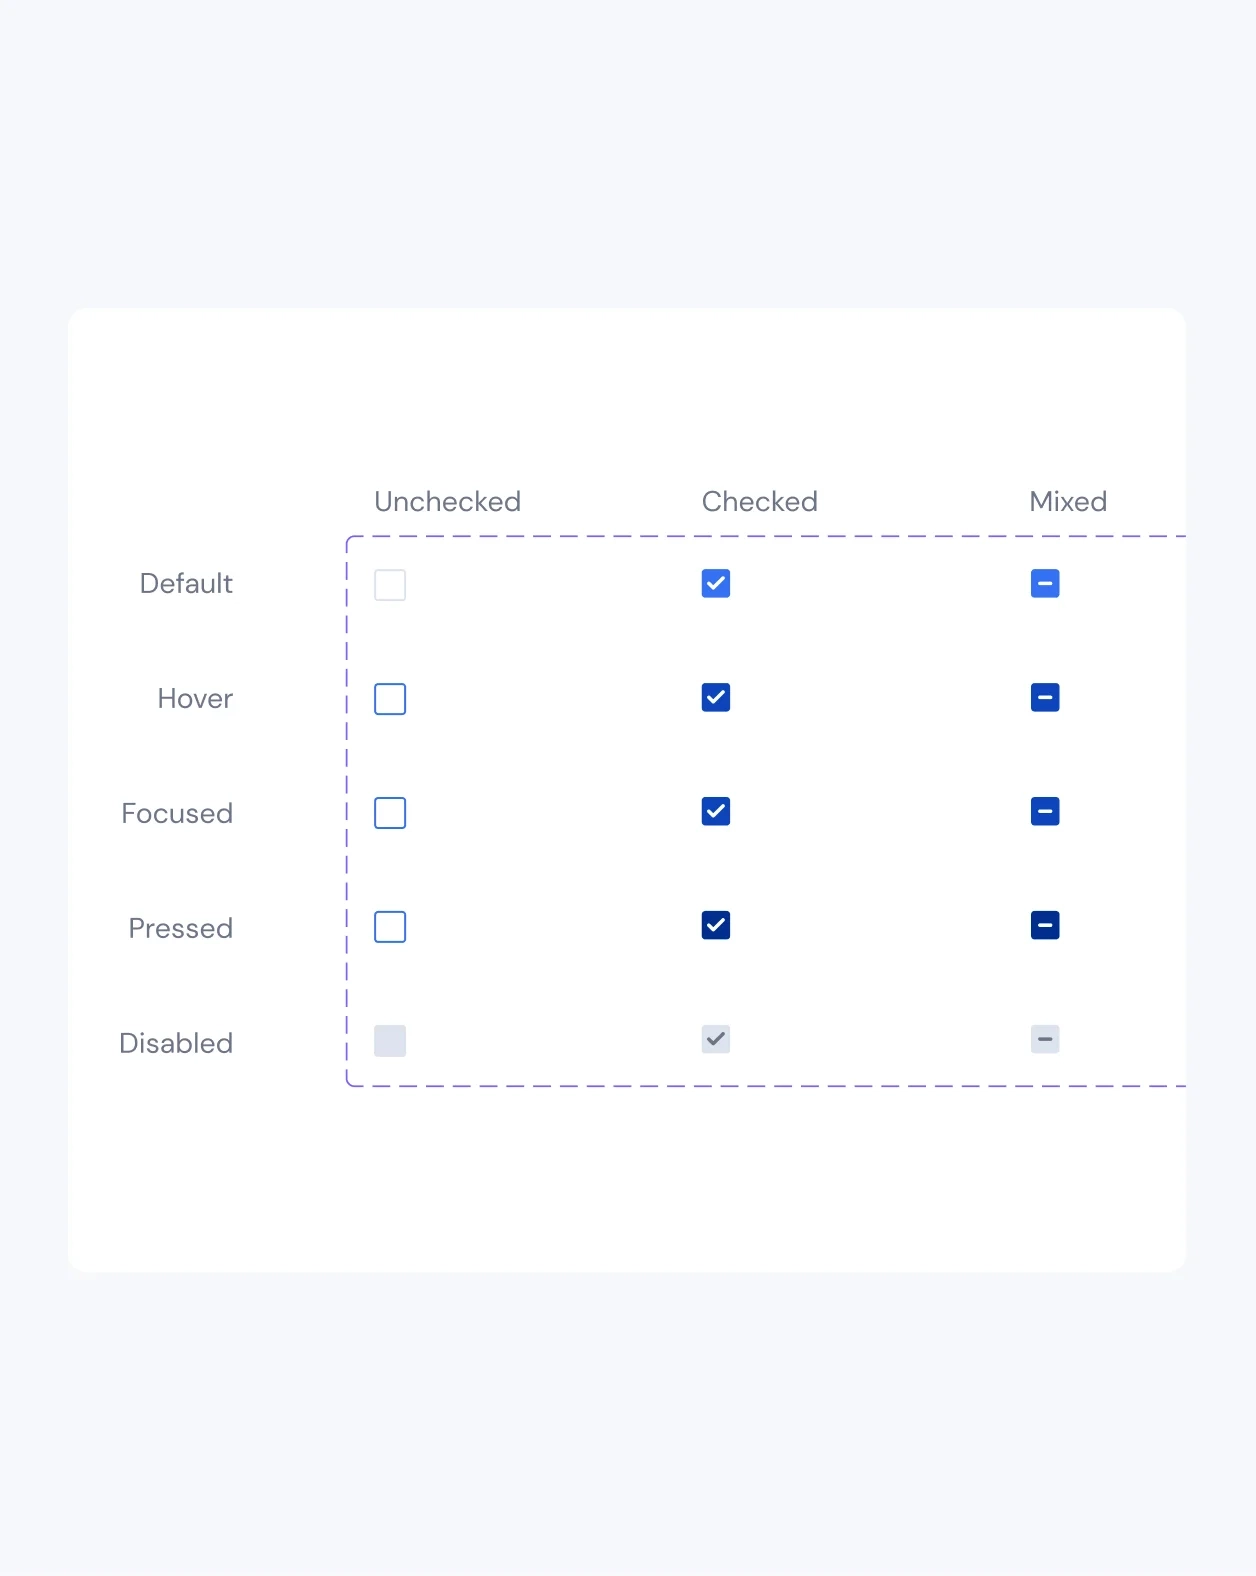
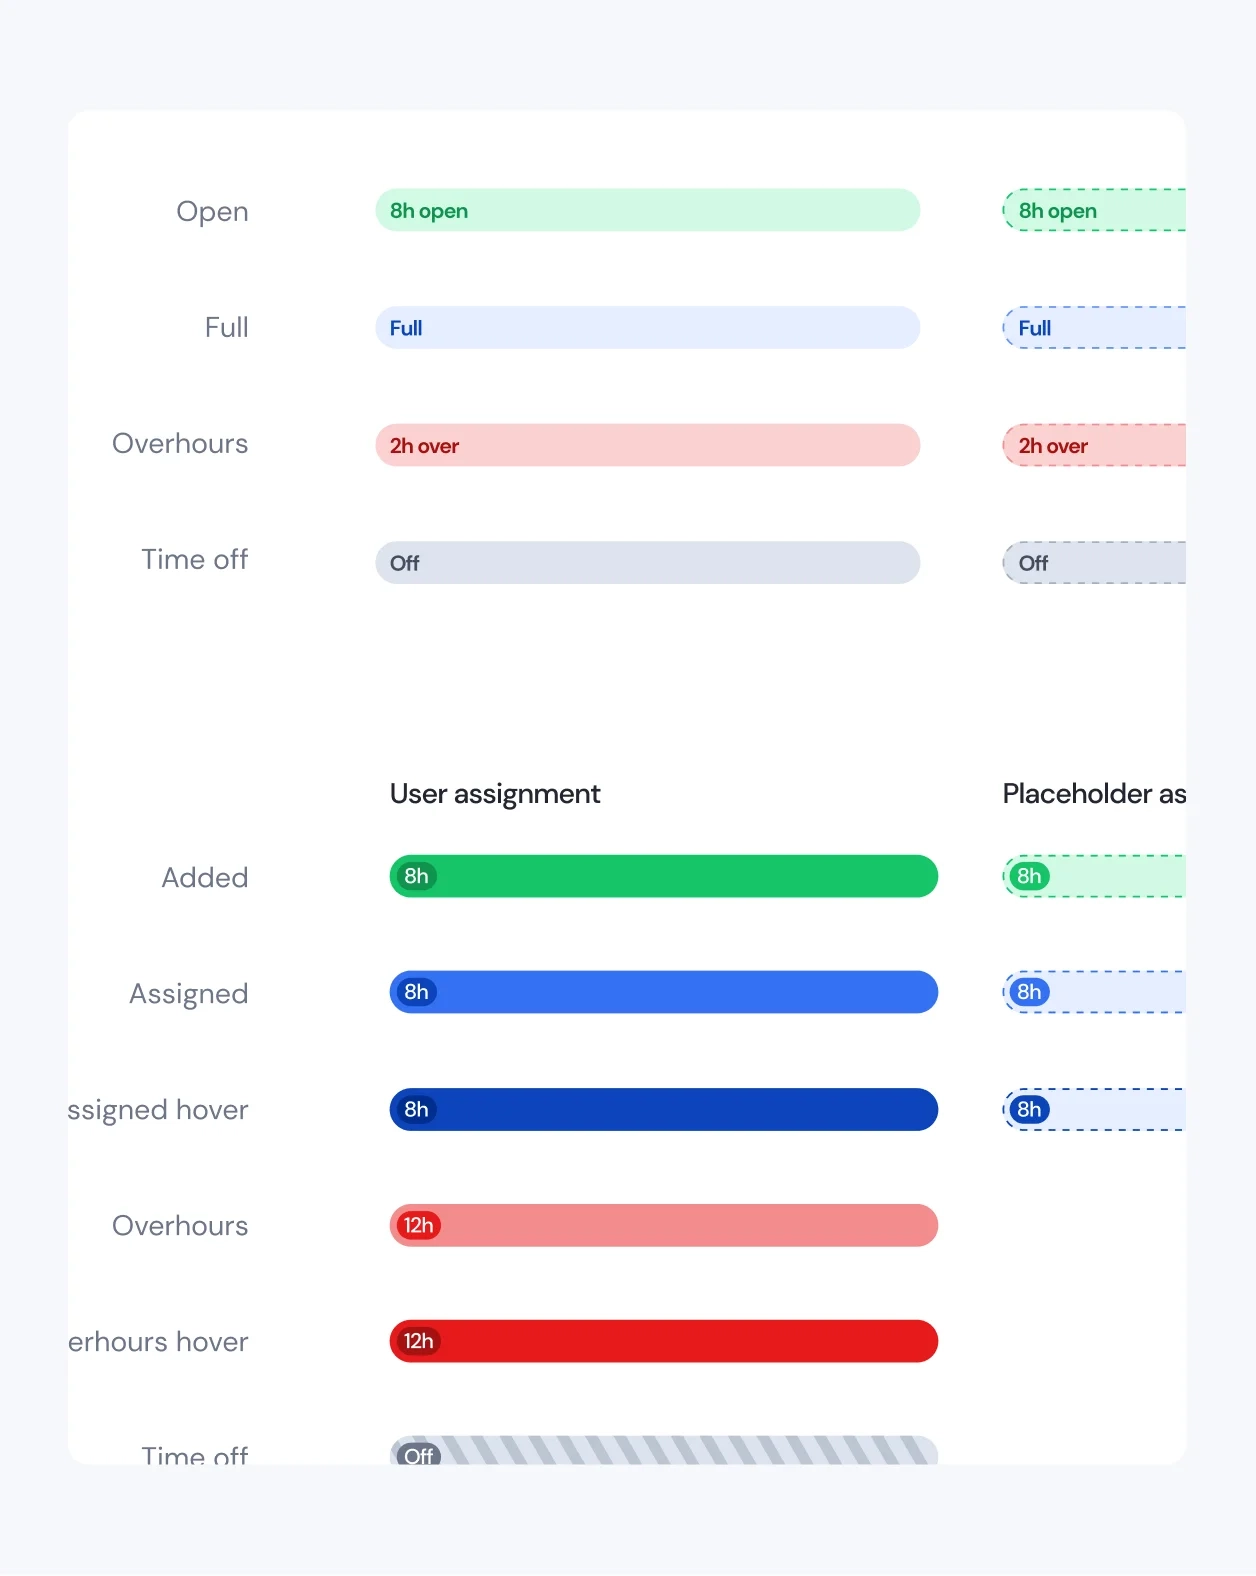
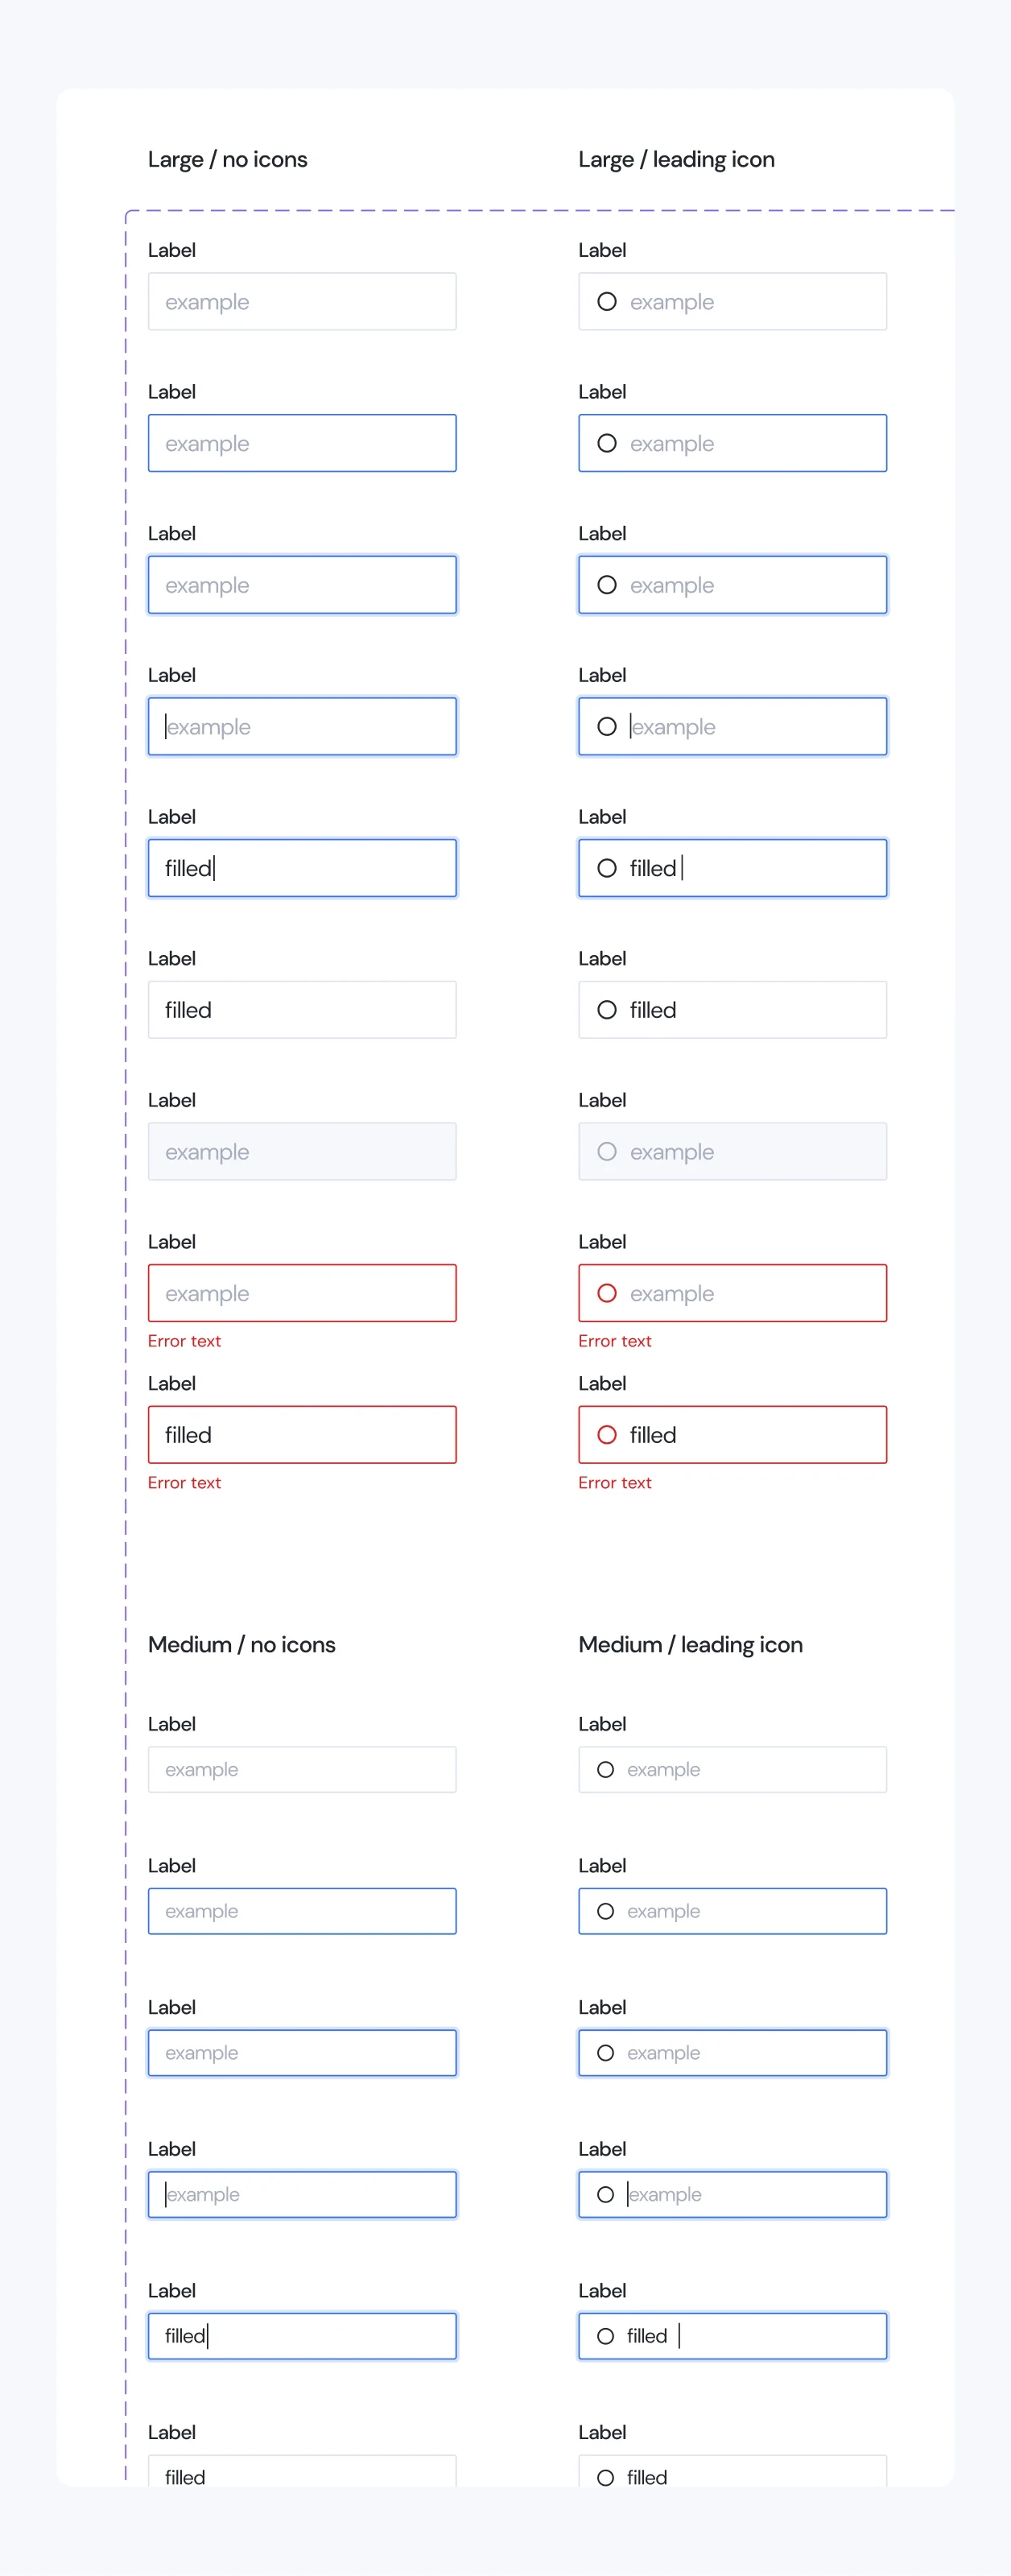
Taking into account the number of screens in the application as well as their relative complexity we’ve decided to invest into creating a design system.
A design system in web design is a comprehensive collection of reusable components, guidelines, and standards used to create a consistent user experience across digital products. It unifies visual elements, UI patterns, interaction principles, and a shared language for designers and developers, streamlining the design process, improving collaboration, and ensuring brand consistency throughout websites and applications.
This requires investing some additional time at the start but pays back many times in future, when introducing application wide changes, adding new screens and features or simply when converting designs into code as it’s easier to globally define the properties of a given element or component.
Our design system documented:
- Grid system, layout and spacing
- Color palette
- Typography
- Elevation
- Icons
- Buttons
- Forms
- Alerts
- Modals
- Dividers
- Reusable components
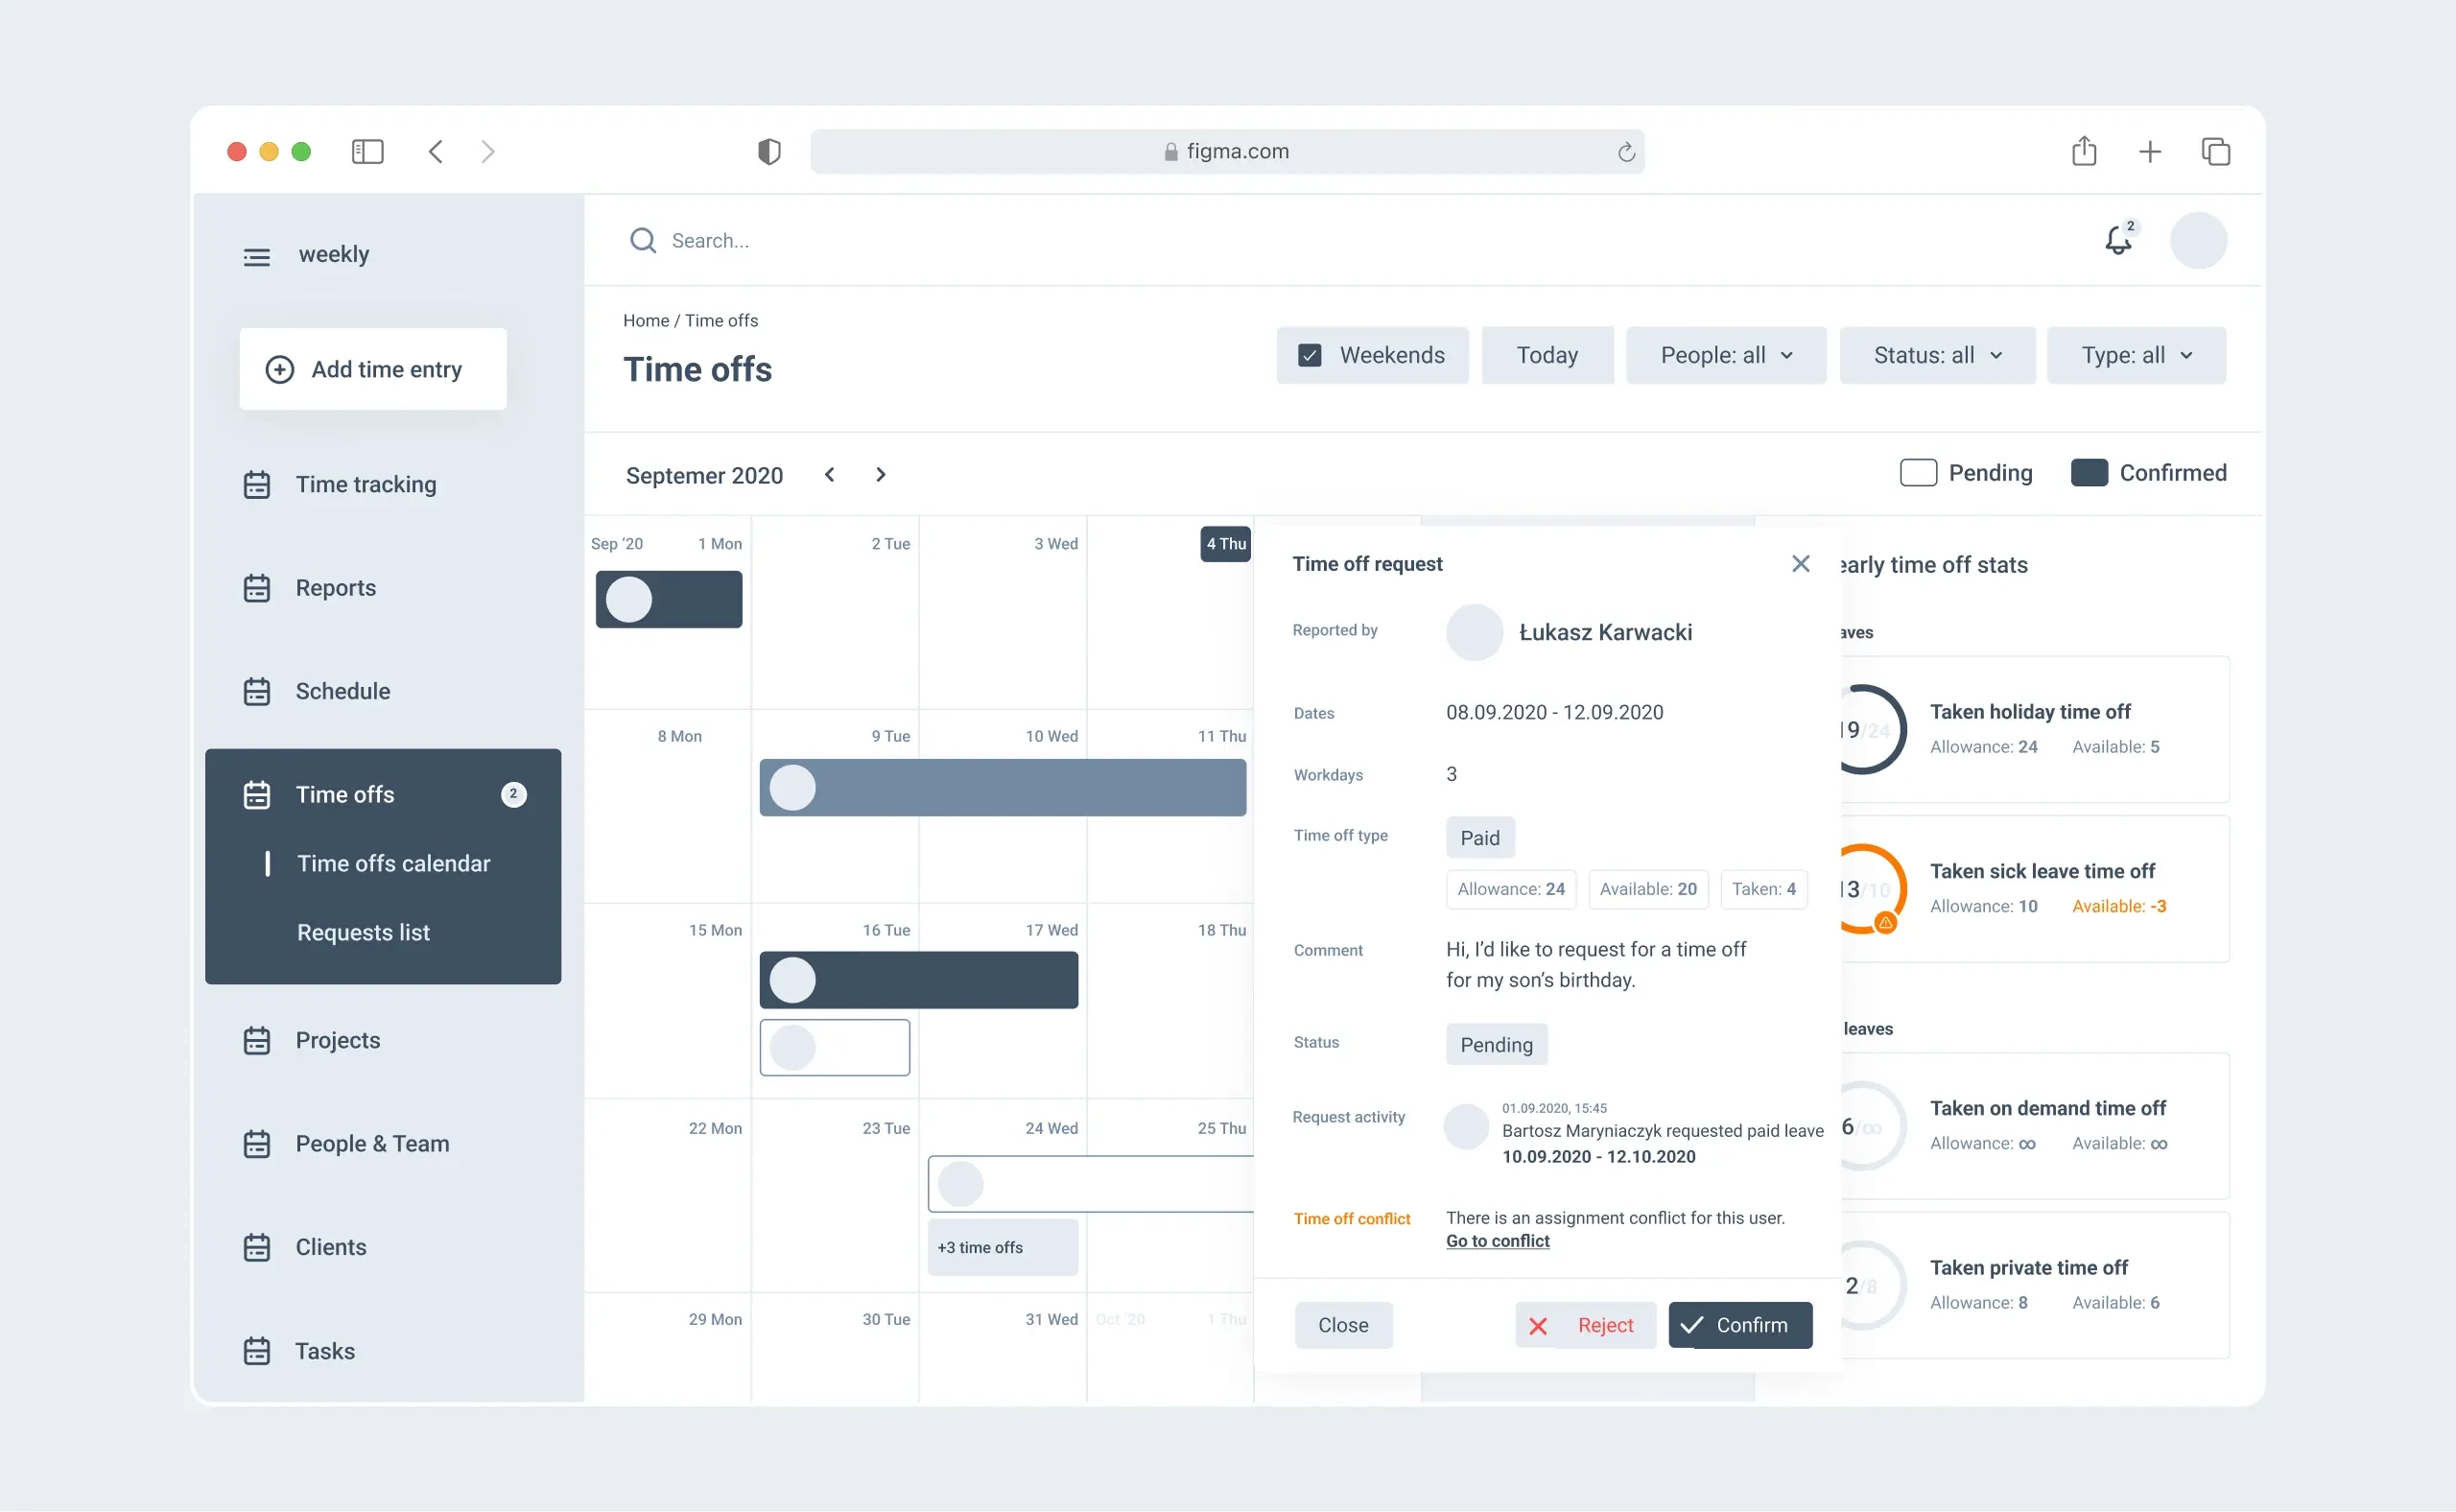
Final Designs
By applying the design system to our low-fidelity designs (all of them) we ended up with final, high-fidelity designs of the application.
This time, we have created an interactive prototype as well - a very close representation of the actual application.
Phase III: Build
OK - we knew how the application should work and look - it was the time to start building it.
Phase III
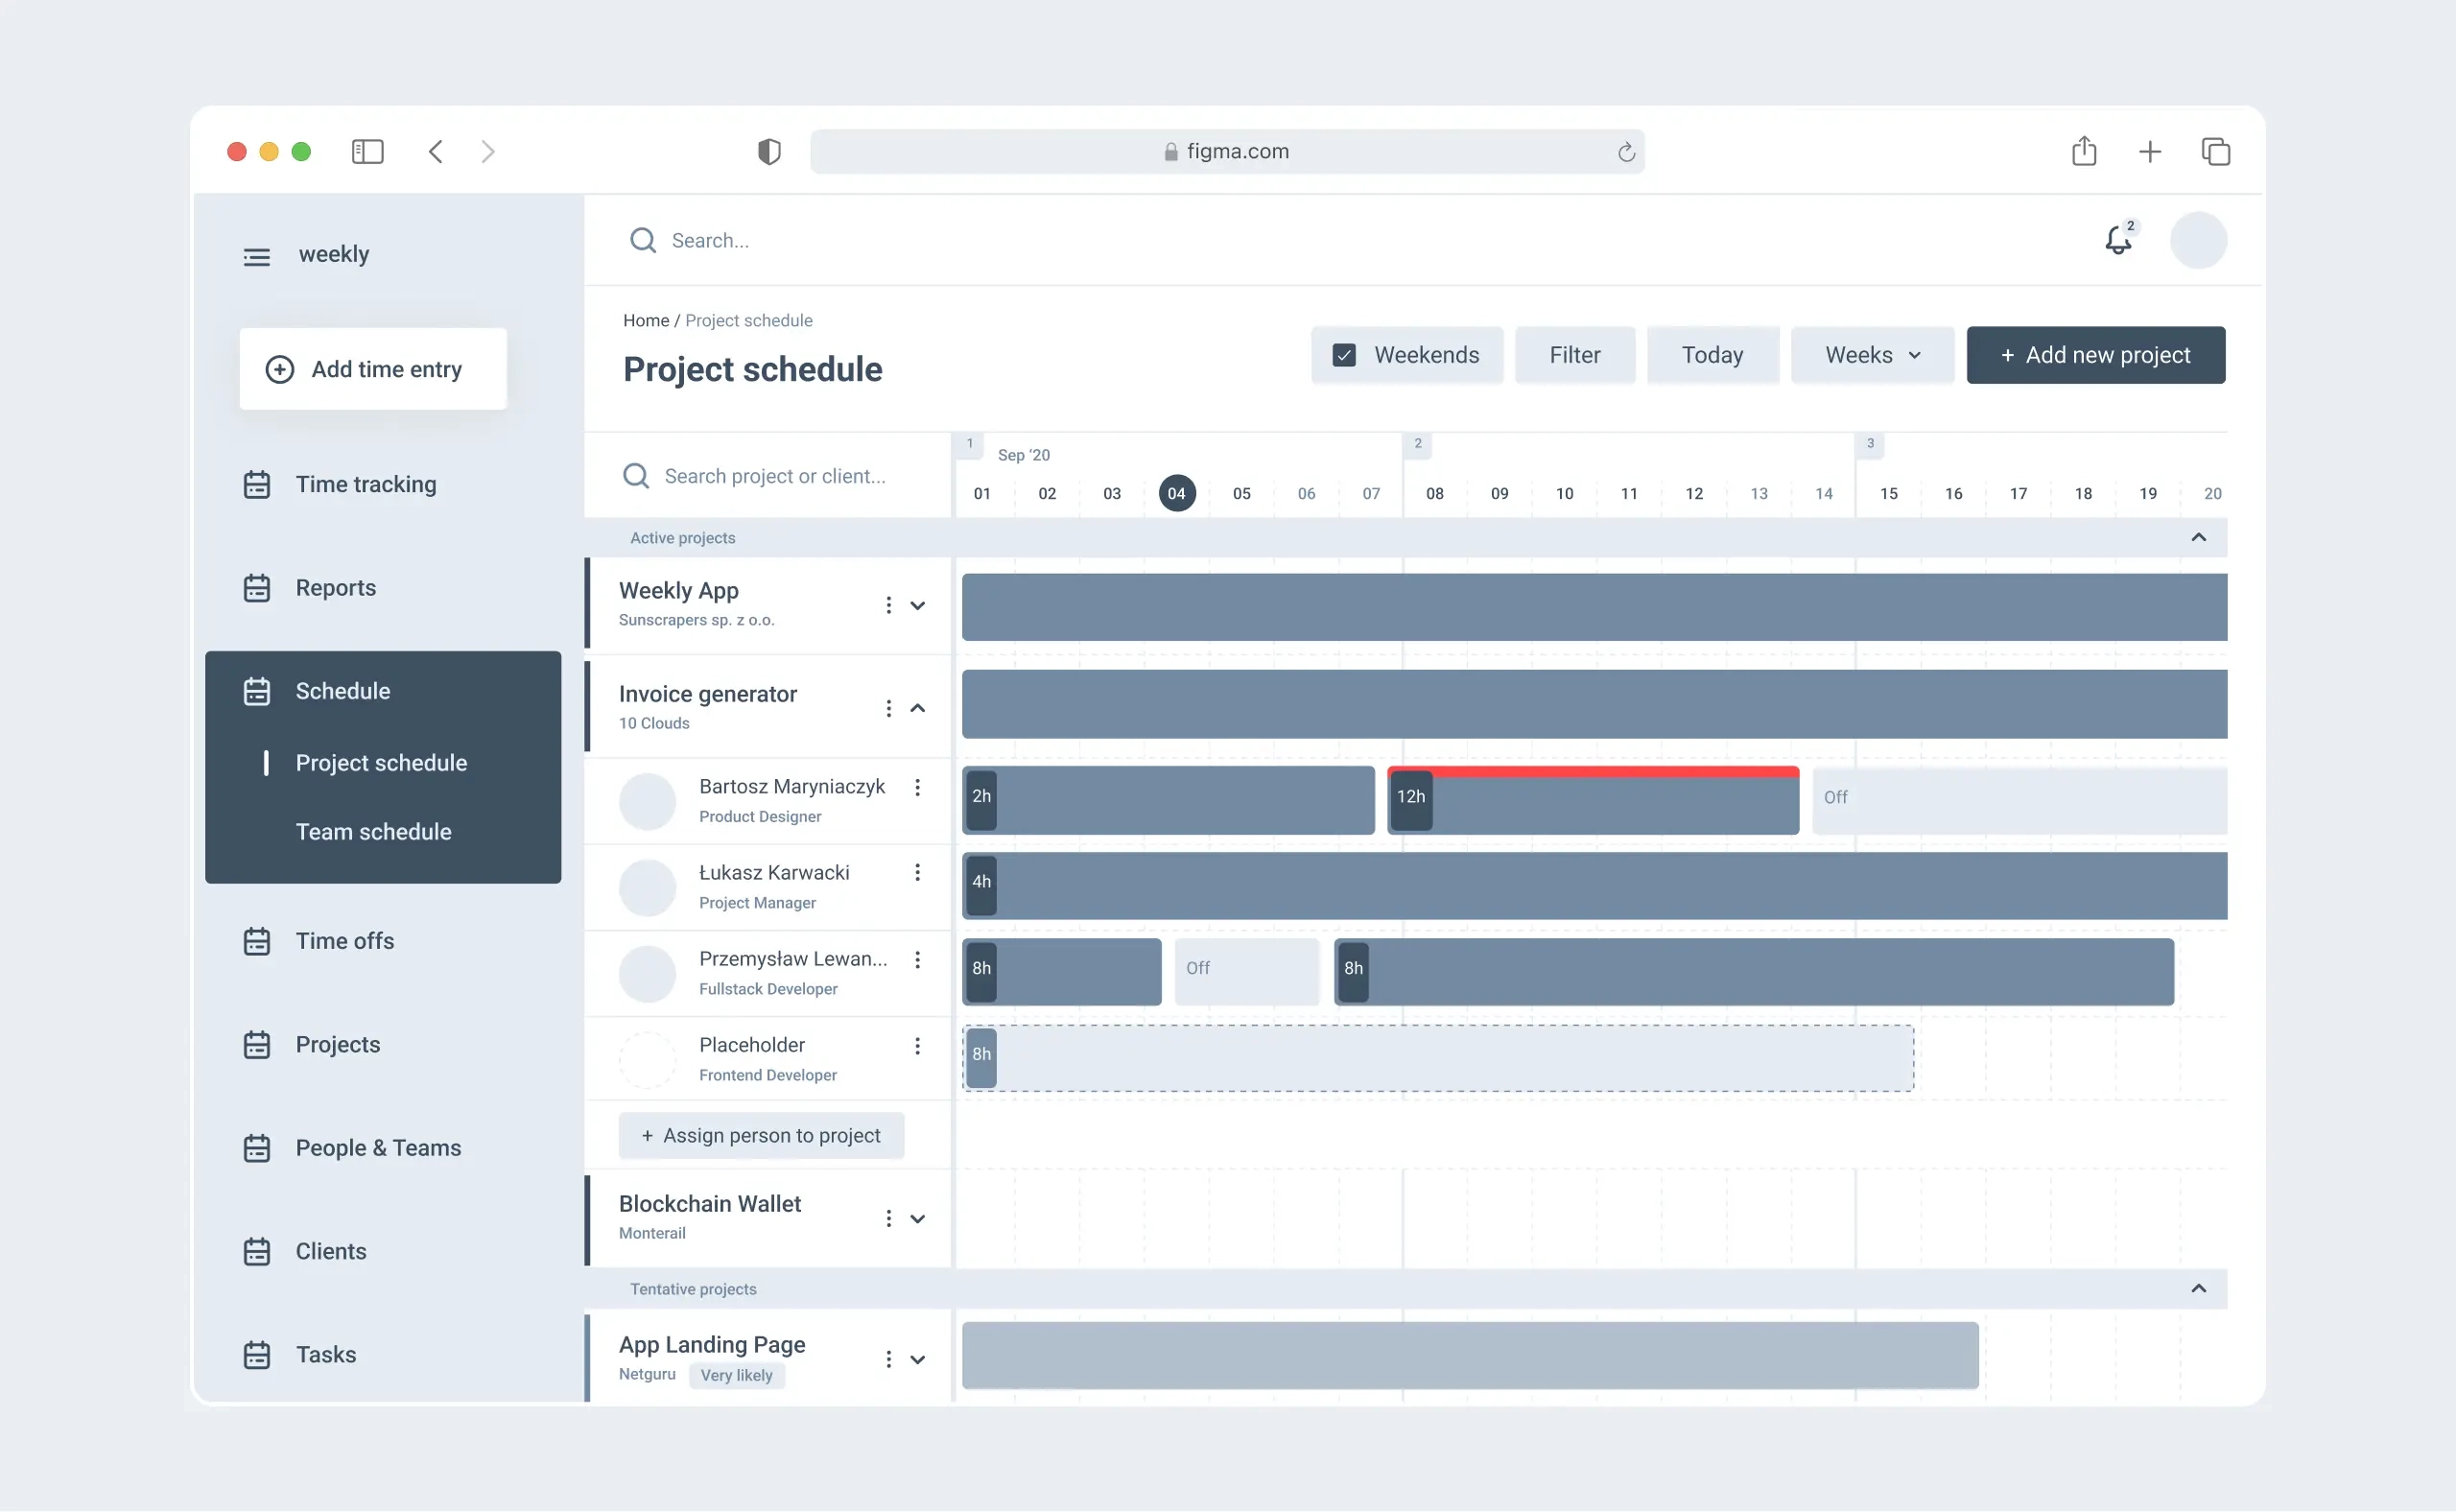
The toolset
As for the project management tool we chose Asana which is a more light-weight, better looking and more user friendly alternative to Jira. With a small team, and many non-technical contributors we thought it would better suit our needs.
We’ve migrated the backlog from Google Sheets to Asana and used it as the source of truth from now on.

Phase III
The process
Together with the team, we’ve agreed on having Scrum, with 2-week long sprints, as our work process.
Scrum is an agile project management framework that emphasizes teamwork, adaptability, and iterative progress towards a well-defined goal. It employs time-boxed sprints, typically lasting 2-4 weeks, where cross-functional teams complete prioritized tasks. To read more about Scrum, have a look at: Project management methodologies: Agile vs. Waterfall vs. Scrum vs. Kanban
We followed a traditional routine of meetings in which each sprint would have:
Sprint planning
A time-boxed meeting where the Scrum team selects prioritized tasks from the product backlog to complete during the upcoming sprint, breaking them into smaller, manageable tasks, discussing the scope in detail, writing down the acceptance criteria and revising the original estimates.
Sprint review
A meeting held at the end of each sprint, where the team demonstrates completed work to stakeholders, gathers feedback, and assesses progress towards the overall goal.
Retrospection
A team meeting after the sprint review, where the team reflects on the sprint, identifies improvements, and plans action items to enhance future performance.
At the end of each sprint an updated version of the product would be deployed to the staging environment where the application could be tested by first users.
A staging environment is an intermediate setup that mirrors the production environment, used for testing and validating changes, including new features, bug fixes, and updates, before deployment to ensure stability and functionality.
The production environment is the live system where the final, tested version of an application or website is deployed, serving real users and handling live data. It's crucial to maintain its stability and performance, as issues directly impact end-users.
Phase III
Tracking progress
Development was scheduled to last around 1.5 years thus monitoring the progress was quite important as any major deviation from our estimates early on could lead to significant budget exceeding.
We kept track of the work progress by relaying on two crucial data sets:
- Timesheets - the team has recorded all time spent working on the project
- Points delivered in a given sprint - as you may recall, in the beginning we’ve estimated all functionalities using points and revised those estimates once again during sprint planning. After each sprint we’ve calculated the total number of points delivered.
Knowing the data above we were able to calculate the team's velocity and assess the progress against the planned project timeline.
Velocity is a metric used in agile project management, representing the amount of work a team can complete within a given time frame, usually measured in story points or tasks completed per sprint. It helps predict the team's capacity for future sprints, enabling more accurate planning, resource allocation, and progress tracking. By monitoring velocity, teams can identify bottlenecks, adjust workloads, and continuously improve their productivity.
Phase III
Sprint!
Having everything set up we’ve started the development process and ran sprint after sprint, incrementally building the product.
Phase IV: Launch
As of writing this case study we were a few weeks away from launching the MVP, therefore this story will follow.
Let's talk
Discover how software, data, and AI can accelerate your growth. Let's discuss your goals and find the best solutions to help you achieve them.
Selected work
Weekly
An in-depth case study of Weekly App, a PSA SaaS
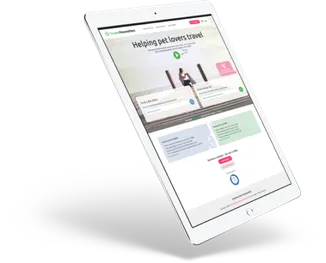
COTA
Building and improving ETL pipelines to enable enhanced cancer treatment
15Five
Helping 15Five dominate the HR Tech space
Codility
Feature and integration development for a tech assessment leader
Financial enterprise
Improving data analytics to drive smarter decisions for a financial services provider